Scully is a static site generator build for the web framework Angular. You learn how to build a Jamstack project with Angular and Scully. Let's add Tailwind CSS for easy styling, the cherry 🍒 on the cake 🍰.
TL;DR
Create a new Angular project, add Scully and Tailwind CSS using schematics. Angular provides schematics for generating and performing installation steps automatically for you - used by Scully and ngx-tailwind. 💯
ng new app-name --style=scss --routing true
cd app-name

# add scully
ng add @scullyio/init

# add scully blog
ng generate @scullyio/init:blog

# add tailwind
ng add ngx-tailwind
Or follow along with the source code. For more information about Angular and Tailwind read the in-depth guide Angular 10 with Tailwind CSS.
Remove unused CSS for production build 🧹
Tailwind generates a lot of CSS styles which are very helpful during development. Before deploying the Scully app remove all unused CSS using the purge option in tailwind.config.js. Provide paths of your template and TypeScript files:
module.exports = {
  future: {
    // removeDeprecatedGapUtilities: true,
    // purgeLayersByDefault: true,
  },
+ purge: ["./src/ **/*.html", "./src/** /*.ts"],
  theme: {
    extend: {},
  },
  variants: {},
  plugins: [],
};
Tailwind automatically purges unused styles when NODE_ENV is set to production. Use the script added by ngx-tailwind
npm run build:prod
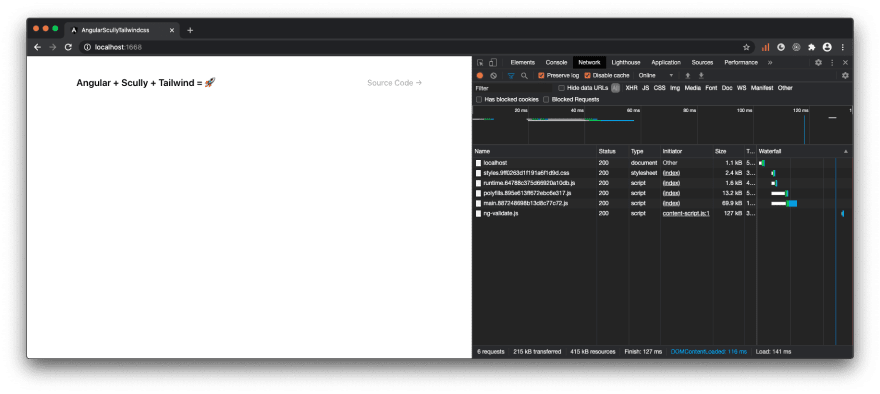
Open app.component.html and add a header template using Tailwind utility styles.
<div class="max-w-3xl mx-auto px-4 sm:px-6 xl:max-w-5xl xl:px-0">
<header class="flex justify-between items-center py-10">
<div>
<a href="/" class="text-xl font-semibold"> Angular + Scully + Tailwind = 🚀 </a>
</div>
<div>
<a href="https://github.com/notiz-dev/angular-scully-tailwindcss" class="font-medium text-gray-500 hover:text-gray-700"> Source Code → </a>
</div>
</header>
<main>
<!-- Displaying Angular routes -->
<router-outlet></router-outlet>
</main>
</div>
Customize your own header on play.tailwindcss.com.
Start Scully
Getting started to serve Angular as a Jamstack app for the first time. Follow the steps in this order.
First build Angular app
npm run build:prod
Build Scully app
npm run scully
All pre-rendered static site files are generated in ./dist/static. For each page you will see an index.html file.
Scully app
npm run scully:serve
Open your favorite browser and go to http://localhost:1668/ for the Scully static server and http://localhost:1864/ for the Angular server.
You should see on both links - Angular top 👆, Scully bottom 👇.
What's added by Scully? 🔍
Scully creates a config file scully.<projectname>.config.ts at the root folder. You will look at this in a moment.
Additionally, after your first Scully build new few new files are generated by Scully. Let's add those to the .gitignore file
# Scully
.scully
scully.log
src/assets/scully-routes.json
scully/plugins/*.js
scully/plugins/*.js.map
scully-routes.json contains all information about your available routes including the front matter data which you will access later in your blog post page.
Markdown blog
One 💍 command to rule your blog
ng generate @scullyio/init:blog
Do you need more flexibility? Try running the following and answer a few questions:
ng generate @scullyio/init:markdown
Now your blog is setup. A new route like /blog/<slug> has been added, re-build your Angular app and discover the new route with Scully
npm run scully -- --scanRoutes
Serve your Scully app and navigate to the first generated post in your browser localhost:1668/blog/<slug>.

Scully creates for each blog post an index.html inside your dist/static/blog directory.

Style blog post page
Alright, you got your first blog post page rendered, but let's be honest 🧐 it needs a few adjustment. The current blog post page is missing the blog post title , publishing date and has unstyled content.
Scully has a build in service ScullyRoutesService to access the front matter of your blog posts. It exposes all published posts under ScullyRoutesService.available$ and the current page with ScullyRoutesService.getCurrent().
Open your generated blog.component.ts and use ScullyRoutesService.getCurrent()
import { Component, OnInit, ViewEncapsulation } from '@angular/core';
import { ActivatedRoute, Router } from '@angular/router';
import { ScullyRoute, ScullyRoutesService } from '@scullyio/ng-lib';
import { Observable } from 'rxjs';

@Component({
  selector: 'app-blog',
  templateUrl: './blog.component.html',
  styleUrls: ['./blog.component.scss'],
  preserveWhitespaces: true,
  encapsulation: ViewEncapsulation.Emulated,
})
export class BlogComponent implements OnInit {
  currentPost$: Observable<ScullyRoute> = this.scully.getCurrent();

  constructor(
    private router: Router,
    private route: ActivatedRoute,
    private scully: ScullyRoutesService
  ) {}

  ngOnInit() {}
}
In your template use async pipe to unwrap the Observable to access the title and publishedAt (custom property).
<article>
  <header *ngIf="currentPost$ | async as currentPost" class="pt-6 xl:pb-10">
    <div class="space-y-1 text-center">
      <dl class="space-y-10" *ngIf="currentPost.publishedAt">
        <div>
          <dt class="sr-only">Published on</dt>
          <dd class="text-base leading-6 font-medium text-gray-500">
            <time [dateTime]="currentPost.publishedAt"> {{ currentPost.publishedAt | date: "dd MMMM yyyy" }} </time>
          </dd>
        </div>
      </dl>
      <div>
        <h1 class="text-3xl leading-9 font-extrabold text-gray-900 tracking-tight sm:text-4xl sm:leading-10 md:text-5xl md:leading-14">{{ currentPost.title }}</h1>
      </div>
    </div>
  </header>

  <!-- This is where Scully will inject the static HTML -->
  <scully-content></scully-content>
</article>
Check out Tailwind Blog which is used here as reference for styling a simple and clean blog.
Update your blog front matter to set published to true, add publishedAt with a datetime string and remove any unpublished slug, also add some placeholder content:
--------
title: 2020-10-23-blog
description: 10 Top tips about your next Pizza Hawaii
published: true
publishedAt: 2020-10-31T13:37:00.000Z
--------

# Pizza 🍕

Eat **pizza** hawaii *everyday*. ~~Don't forget~~ the 🧀 on your `pizza`.


```
var pizza = "Eat 🍕";
alert(pizza);
```


## Hawaii

Ordered List

1. 🍍
2. 🥓
3. 🧀

Unordered List

* 🧀
* 🍍
* 🥓

### Diavolo

> Pizza might be very 🌶️
Last but not least, remove all styles from blog.component.scss. Now re-build Angular, Scully and serve Scully to see the new blog post header

Awesome 🤩 looks much better. What about the unstyled content? 🤨 Go and install Tailwind Typography plugin applying styles to your markdown content.
npm install -D @tailwindcss/typography
Add the plugin to your tailwind.config.js
module.exports = {
  future: {
    // removeDeprecatedGapUtilities: true,
    // purgeLayersByDefault: true,
  },
  purge: ["./src/ **/*.html", "./src/** /*.ts"],
  theme: {
    extend: {},
  },
  variants: {},
  plugins: [require('@tailwindcss/typography')],
};
Now wrap <scully-content></scully-content> with the prose class provided by the Tailwind Typography plugin:
<article>
  <header>
    ...
  </header>

  <div class="prose max-w-none pt-10 pb-8">
    <!-- This is where Scully will inject the static HTML -->
    <scully-content></scully-content>
  </div>
</article>
Blog post content is now styled 😎. How easy was that? Feel free to further customize the styles to your brand or personal style.

One more thing is left, listing all available posts and navigating to the post slug.
Blog Overview Page
Generate a new component for your route /blog displaying all available posts using ScullyRoutesService.available$.
ng g module blogs --route blogs --module blog/blog.module
Change the path of your new route in blog-routing.module.ts from blogs to empty to match the /blog route.
const routes: Routes = [
  {
+ path: '',
- path: 'blogs',
    loadChildren: () =>
      import('../blogs/blogs.module').then((m) => m.BlogsModule),
  },
  {
    path: ':slug',
    component: BlogComponent,
  },
  {
    path: '**',
    component: BlogComponent,
  },
];
If you like to automatically redirect to /blog open app-routing.module.ts
const routes: Routes = [
+ { path: '', redirectTo: 'blog', pathMatch: 'full' },
  {
    path: 'blog',
    loadChildren: () => import('./blog/blog.module').then((m) => m.BlogModule),
  },
];
Now create a reference for all available blog posts in blogs.component.ts filtering out pages with routes starting only with /blog/. Additionally, sort your posts in descending order by the publishedAt date.
import { Observable } from 'rxjs';
import { filter, map } from 'rxjs/operators';
import { Component, OnInit } from '@angular/core';
import { ScullyRoute, ScullyRoutesService } from '@scullyio/ng-lib';

@Component({
  selector: 'app-blogs',
  templateUrl: './blogs.component.html',
  styleUrls: ['./blogs.component.scss'],
})
export class BlogsComponent implements OnInit {
  available$: Observable<ScullyRoute[]>;

  constructor(private scully: ScullyRoutesService) {}

  ngOnInit(): void {
    this.available$ = this.scully.available$.pipe(
      map((r) => r.filter((page) => page.route.startsWith('/blog/'))),
      map((r) => r.sort((page1, page2) => new Date(page2.publishedAt).getTime() - new Date(page1.publishedAt).getTime()))
    );
  }
}
Important to note you have to import ScullyLibModule in your blogs.module.ts to access ScullyRoutesService.
Add your blog name and loop over all posts in your template
<div class="pt-6 pb-8 space-y-2 md:space-y-5">
<h1 class="text-3xl font-extrabold bg-clip-text text-transparent bg-gradient-to-r from-orange-500 via-yellow-400 to-yellow-200 tracking-tight sm:text-4xl md:text-6xl">Company Blog</h1>
<p class="text-lg leading-7 text-gray-500">All the latest Company news.</p>
</div>
<ul class="divide-y divide-gray-200">
<li *ngFor="let post of available$ | async" class="py-12">
<article class="space-y-2 xl:grid xl:grid-cols-4 xl:space-y-0 xl:items-baseline">
<dl>
<dt class="sr-only">Published on</dt>
<dd class="text-base leading-6 font-medium text-gray-500">
<time [dateTime]="post.publishedAt"> {{ post.publishedAt | date: "dd MMMM yyyy" }} </time>
</dd>
</dl>
<div class="space-y-5 xl:col-span-3">
<div class="space-y-6">
<h2 class="text-2xl leading-8 font-bold tracking-tight">
<a [routerLink]="post.route" class="text-gray-900 hover:text-gray-700"> {{ post.title }} </a>
</h2>
<div class="prose max-w-none text-gray-500">{{ post.description }}</div>
</div>
<div class="text-base leading-6 font-medium">
<a [routerLink]="post.route" class="text-orange-500 hover:text-orange-600"> Read more → </a>
</div>
</div>
</article>
</li>
</ul>

Now all you need is an idea and time to write it down. Creating your next blog post is as easy as 💆
ng generate @scullyio/init:post --name="Cool post"
Made possible by Scully schematics.
What are you wait for? 😄 Now it's time for you to create your own blog 🚀. Need more inspiration? notiz.dev is build using Scully and Tailwind CSS. 😉

Latest comments (2)
Fantastic article, well detailed, do you mind if I record a live coding in my youtube channel?
Thank you, I don't mind. Feel free to create a live coding video for your Youtube channel. Drop the link here!