
In my last post, I listed out the new features of LoadRunner Professional 2022. One of the tech preview features in LoadRunner 2022 is Chaos Testing with Gremlin. This blog post will detail the steps to running chaos experiments in LoadRunner Professional using Gremlin integration.
What is Chaos Engineering?
Simply put, you break things on purpose and learn how you can make your systems reliable. I urge you to check this excellent page from Gremlin, https://www.gremlin.com/chaos-engineering/?ref=qainsights
Chaos testing is a subset of chaos engineering. Think of performance testing as a subset of performance engineering.
Gremlin Integration with LoadRunner Professional 2022
To integrate Gremlin with LoadRunner Professional 2022, following are the prerequisites required:
- LoadRunner Professional 2022
- Gremlin account (which is free)
- Sample application
- Server with Gremlin installed
To demonstrate the integration, let us use an EC2 instance on AWS with nginx installed on your favorite Linux distro.
nginx on EC2
Login to your AWS console and spin up an instance. In this example, let us use Ubuntu. Once the instance is spanned up, SSH into it to install nginx and Gremlin.
$ sudo apt update -y
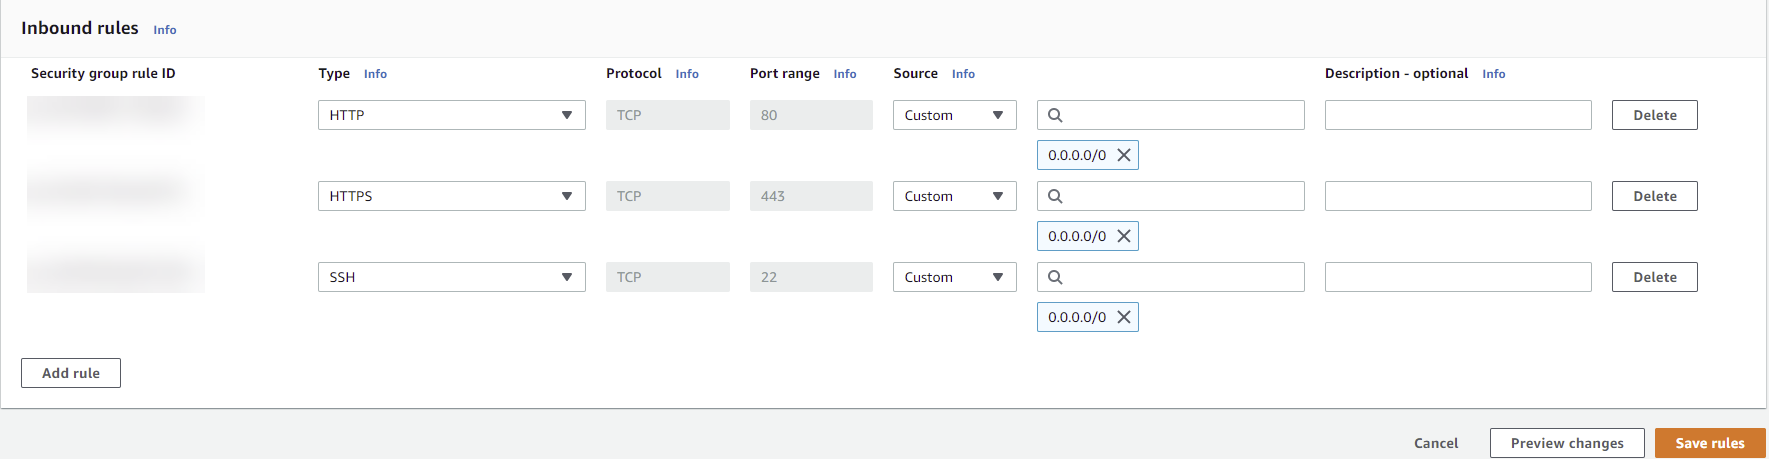
$ sudo apt install nginx -yLaunch http://<ec2_ip_address> to view the nginx home page. If you do not see the nginx home page as below, please validate the security groups.

Gremlin Installation Steps
The next step is to download and install Gremlin on the Linux box. Login to your Gremlin account. On the home page, you can find the steps to follow.
After successful installation, let us configure the Gremlin Control Plan using the Team ID and Secret Key.
Enter the below command and hit enter to copy the Team ID and Secret Key.
$ gremlin initTo grab the Team ID, go to your Company > Team > Configuration.
To grab a Secret Key, check your registered email ID or you can reset it.

Once the configuration is successful, you should get the below success message.

Creating a Scenario in Gremlin
Before we create a script in VuGen, let us create a scenario in Gremlin. Go to your Dashboard, click the Create Scenario button as shown below.

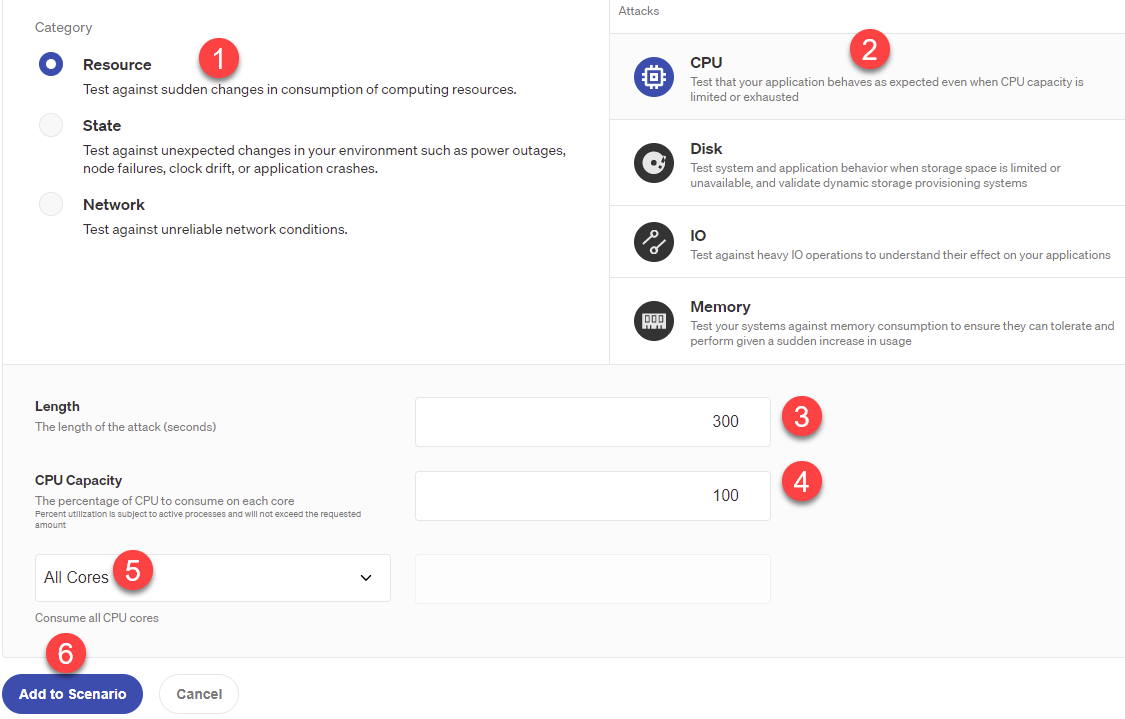
Let us attack the CPU of a Linux box where nginx is running. Name your scenario, select the target hosts, select the Category as Resource, and Attack as CPU.
The length of the attack is 300 seconds, CPU capacity as 100%. and target all the cores.
Click Add to Scenario, then Save Scenario.

Creating LoadRunner Script
Launch VuGen to create a Web HTTP/HTML protocol script and add the below code in Action.
   lr_start_transaction("T00_HomePage");


        // Replace the EC2 IP address

    web_custom_request("web_custom_request",
        "URL=http://EC2_IP_ADDRESS",
        "Method=GET",
        "TargetFrame=",
        "Resource=0",
        "Referer=",
        "Body=",
        LAST);

    lr_end_transaction("T00_HomePage", LR_AUTO);
Compile and run the script to validate the request. Let us configure the pacing as shown below in Runtime Settings.

Close VuGen and launch Controller.
Designing a scenario in Controller 2022
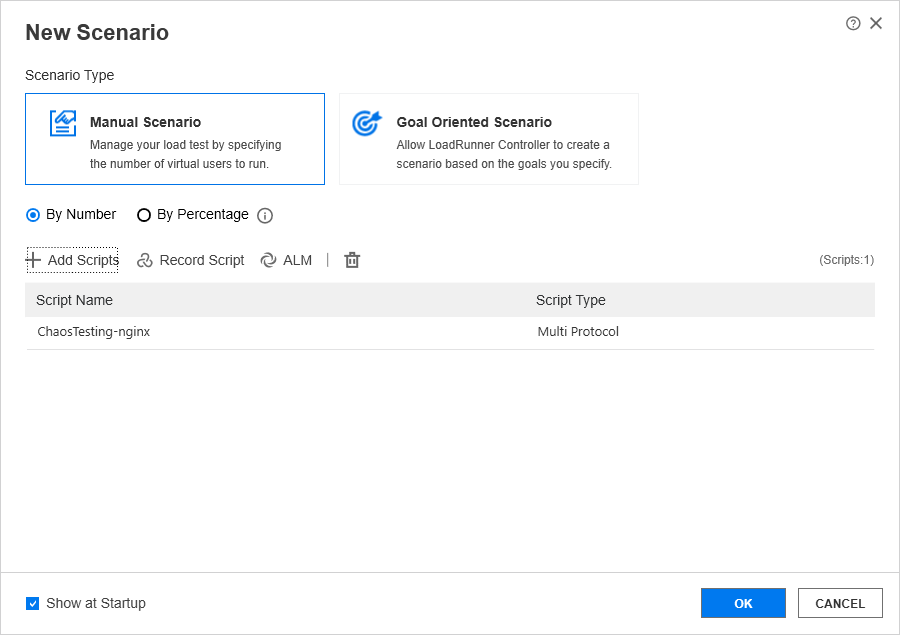
Upon launching the Controller, add the above created script as shown below.
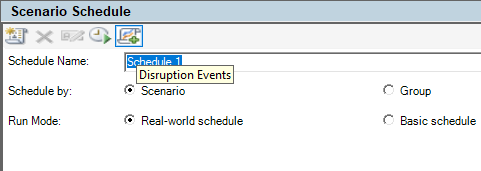
To add a disruption event, click on Disruption Events as shown below under Scenario Schedule in the Design tab.
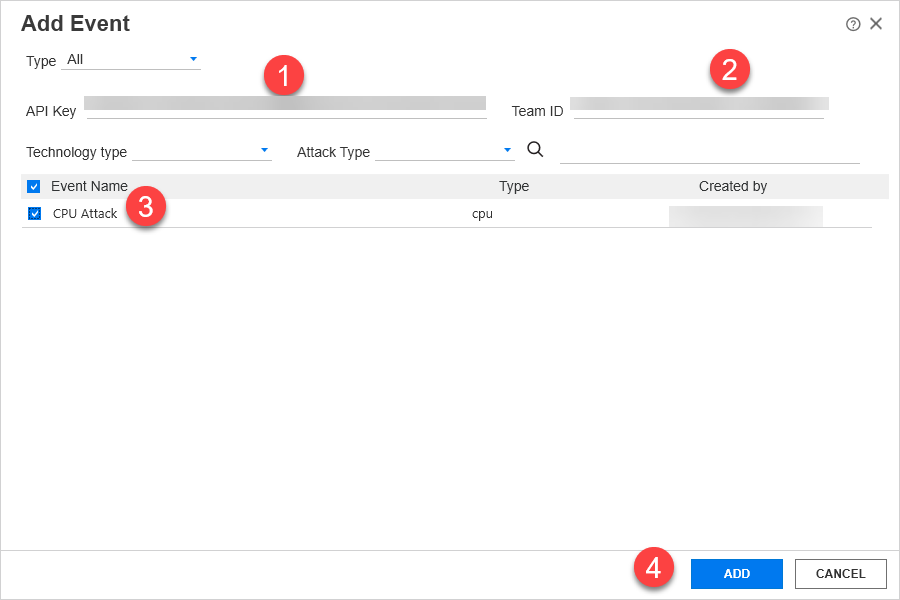
Click on the Add Event button to configure the API Key, Team ID, and other details.
To generate an API Key from Gremlin, go to your Account Settings > API Keys > New API Key. Enter a valid name and click Save.
Paste your API Key and Team ID as shown below and click Add. After adding the API key and team ID, the created scenario in Gremlin should be displayed as shown below.
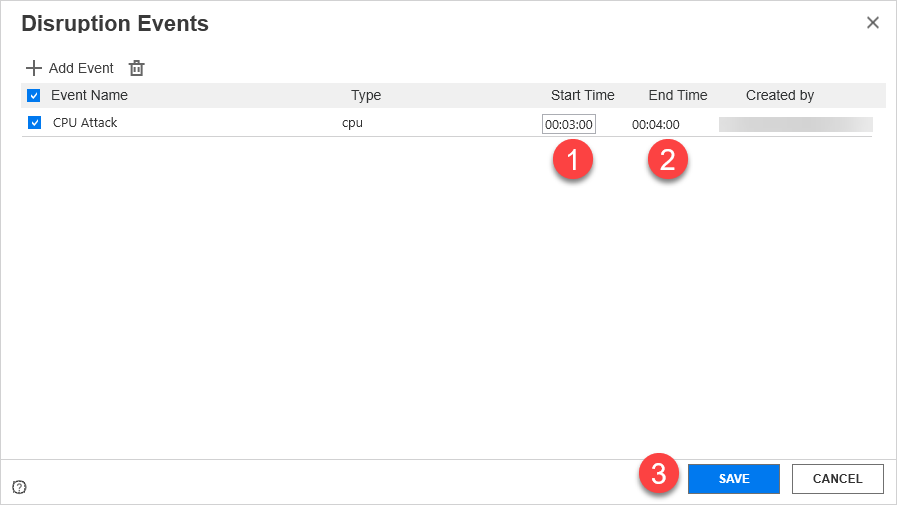
Before you click Save, configure the start time as shown below. The end time will be automatically configured. The CPU attack will get started in the third minute and will last for a minute.
Below is the Global Schedule which we are going to run.
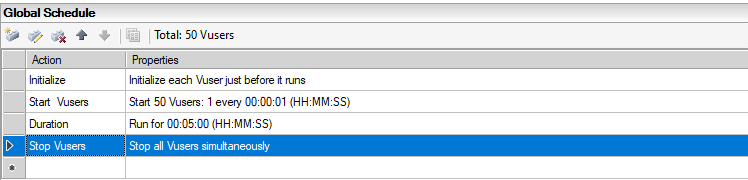
Save the Controller scenario before you hit Run.
Running Chaos Experiment
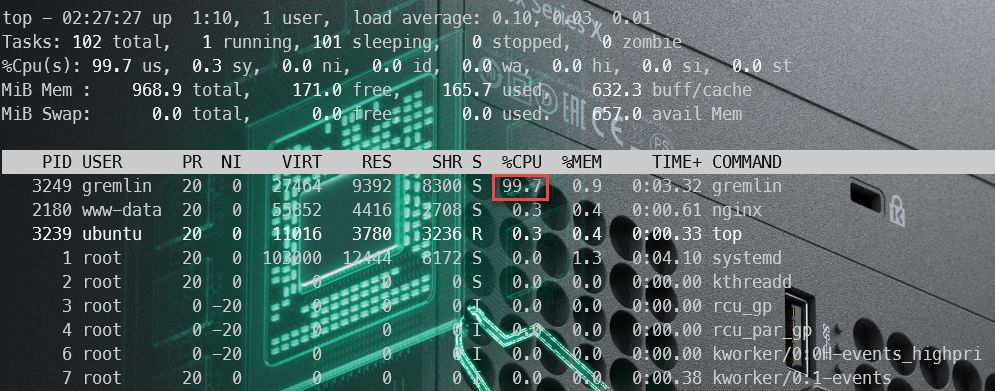
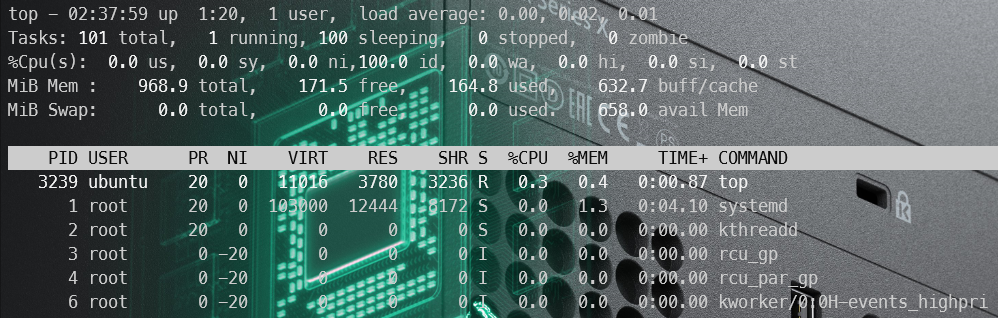
Before you start running the scenario in the Controller, go to your EC2 instance, enter top command to monitor the CPU utilization.
Creating chaos experiments is a blend of art and science.
- myself :)
Experiment Objective
The above experiment will validate the response time of nginx server for 50 vusers under the high CPU utilization.
Click on the Run button to get started and monitor the graphs in the Controller.
Before the CPU Attack
During the CPU Attack
After the CPU Attack
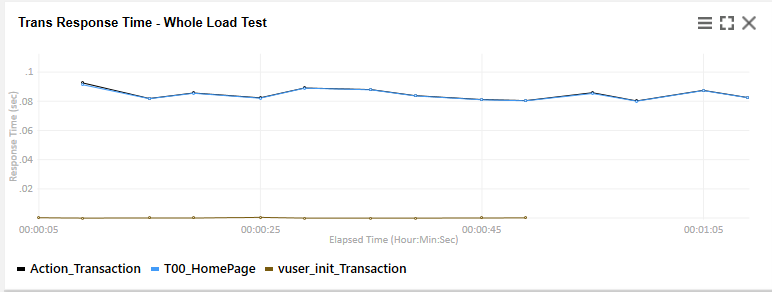
Here is the complete graph of our test where I highlighted the response time during the CPU attack. There is a slight elevation in the response time graph during high CPU utilization. After the attack, the response time trend reverted.

Congratulations! You have successfully executed a chaos experiment using Gremlin in LoadRunner Professional 2022.
After the experiment, make sure you terminate the instance on AWS, otherwise it will accrue charges.
Conclusion
Though it is a tech preview, the positive scenarios are working fine without any issues. Using the free tier in Gremlin, you can perform various experiments. Based on your requirement, you can define the blast radius and break things on purpose in a controlled manner on production. Integration with LoadRunner makes performance testers effort easy and effective.

Top comments (0)