
Recently I stumbled upon Mockintosh repo in GitHub from my LinkedIn feed. Then I started exploring on my own, for couple days by going through the documentation and the code. This blog article will deep-dive into Mockintosh, how you can get started, how it will be useful from performance testing perspective and more.
What is Mock Service?
From my experience, couple of times I used mock services during the performance testing the web applications. Assume that you are performance testing real estate listing website. In each listing, there will be contact details of the agent with their name, office address, contact number, email ID etc. Agent's office address will be displayed using the commercial map APIs (it could be Google or Bing).
When you run a load test against the agent's page, you are consuming the map credits. If you are running high volume load test, you will consume more billing from the map API provider.
Instead of making real map API calls, your development team can mock the map API. Whenever you load the page, it will display the dummy coordinates.
By mocking the map API, you can do performance testing by saving the budget.
Another use case of mocking the service is, when you shift-left the testing, instead of waiting for the complete implementation, for the time being, you can mock the relevant services.
In microservice world, mocking the service there are gaps which are mentioned in this blog article. This artcile will focus on the implementation part. Let's get started.
What is Mockintosh?
From the GitHub repo
Mockintosh aims to provide usual HTTP mock service functionality with small resource footprint, making it friendly for microservice applications. You can have tens of mocks at once, inside moderate laptop or single Docker container. Also, we have some additional ideas on how to make mocks simple and useful.
The selling points of Mockintosh are small memory footprint, based on Python, YAML (or JSON) configuration and easy to get started. Also, you can mock a service within 30 seconds (including installation time).
Prerequisites
This demo uses Windows 10 Pro operating system. But the instructions are similar to other OS.
- Python (latest version)
- PIP (latest version)
I am using Python 3.9.2 and PIP 21.0.1 in my Windows. For the editor, I am using Pycharm Community Edition 2020.3.3. You can use your own favorite editor. I am not imposing.
Installation
Installing Mockintosh is pretty straight forward. Create a new project n Pycharm or virtual environment, and issue the below command in the terminal.
pip3 install mockintoshTo validate the installation of Mockintosh, issue the below command.
mockintosh --helpAbove command will list out all the help commands.
If you want to leverage Docker, you can install the below command (assuming Docker is installed).
docker run -it -p 8000-8005:8000-8005 -v `pwd`:/tmp testrio/mockintosh /tmp/config.jsonThis will run Mockintosh in the inside the docker container using the default config.json file.
Hello World
To run the Hello World mock, just issue the below command.
mockintoshThis will launch the mock server at the default port 8001. Here is the output.
(venv) C:\Users\..\PycharmProjects\MockintoshTest>mockintosh
[2021-03-12 20:07:38,886 root INFO] Mockintosh v0.7 is starting...
[2021-03-12 20:07:38,890 root INFO] Configuration file is valid according to the JSON schema.
[2021-03-12 20:07:38,899 root INFO] Serving at http://localhost:8001 the mock for 'Default Mock Service Config'
[2021-03-12 20:07:38,899 root INFO] Mock server is ready!
Congratulations! You just mocked it :)
Launch the localhost:8001 in your favorite browser, you could see the response 'hello world'.
After you hit the URL, if you go back to the terminal, you can see the log info.
[2021-03-12 20:07:44,357 tornado.access INFO] 200 GET / (127.0.0.1) 7.00ms
[2021-03-12 20:07:44,589 tornado.access WARNING] 404 GET /favicon.ico (127.0.0.1) 1.00ms
Yes, Mockintosh uses Tornado - a Python web framework.
If you would like to log detailed info, use the flag --verbose.
To terminate the mock server, press Ctrl + C in the terminal. Now let us create our own mock service.
Creating your first mock service
Mock service can be created using YAML or JSON notation. I am going to use YAML notation in Pycharm. Create a new YAML file in PyCharm by right clicking on the project folder > New > File. Enter the name as app.yaml and hit enter.
Copy and paste the below YAML into your app.yaml.
services:
- name: First Mock Service
  hostname: localhost
  port: 8001
  endpoints:
  - path: "/"
    method: GET
In the above YAML, we create a mock service named 'First Mock Service' in localhost at port 8001 where the endpoint is / for the HTTP method GET.
If you hit the localhost:8001 from the browser or some tool, you will get success HTTP status code.
Start the mockintosh in the terminal by issuing the below command.
mockintosh app.yamlHere is the result of http://localhost:8001 in JMeter.
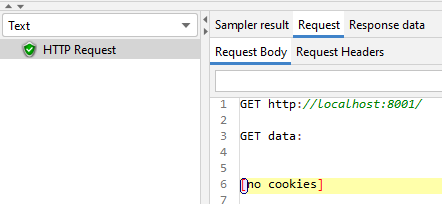
Response header
HTTP/1.1 200 OK
Server: Mockintosh/0.7
Content-Type: text/html; charset=UTF-8
Date: Sat, 13 Mar 2021 01:22:02 GMT
Etag: "da39a3ee5e6b4b0d3255bfef95601890afd80709"
Content-Length: 0
Multiple Endpoints
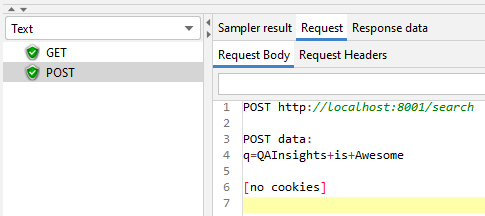
To create multiple endpoints, you just add it under the endpoints array as shown below. Below Search Service has two methods: GET and POST.
GET will mock the home page and POST will pass the search string and return the mock response.
<pre class="wp-block-code"><code>services:
- name: Search Service
  hostname: localhost
  port: 8001
  endpoints:
  - path: "/"
    method: GET
  - path: "/search?q={{keyword}}"
    method: POST
    body:
      urlencoded:
        q: '{{keyword}}'
    response: 'You queried about {{keyword}}. Here are the results:'
Here is the JMeter request/response snapshot.
Multiple Services
Let us create multiple services in the same YAML. Just add the service under services array by creating new entry as shown below.
Below auth service will generate a random token for auth service. Dynamic string can be generated using Handlebars which is a templated language.
<pre class="wp-block-code"><code>services:
- name: Search Service
  hostname: localhost
  port: 8001
  endpoints:
  - path: "/"
    method: GET
  - path: "/search?q={{keyword}}"
    method: POST
    body:
      urlencoded:
        q: '{{keyword}}'
    response: 'You queried about {{keyword}}. Here are the results:'

- name: Auth Service
  hostname: localhost
  port: 8002
  endpoints:
  - path: "/generateToken"
    method: GET
    response: 'Generated Token: {{random.uuid4}}'</code></pre>
What's in it for performance testers?
Above examples are more into functional mock services. Would Mockintosh help from performance engineers perspective? Yes. Mockintosh has a feature called Performance/Chaos Profile where you can set a rule(s) to simulate the delay (think time), fault injection, performance profile injection etc.
To set a performance profile for a service, just add the below YAML which splits the response code 200 and 500 with 50% probability along with the delay of 0.1 seconds.
Performance profile declared at the top and referenced into each service. You can also set the profile globally using globals key.
performanceProfiles:
  loadprofile:
    ratio: 0.5
    delay: 0.1
    faults:
      '200': 0.5
      '500': 0.5

services:
- name: Search Service
  performanceProfile: loadprofile
  hostname: localhost
  port: 8001
  endpoints:
  - path: "/"
    method: GET
  - path: "/search?q={{keyword}}"
    method: POST
    body:
      urlencoded:
        q: '{{keyword}}'
    response: 'You queried about {{keyword}}. Here are the results:'

- name: Auth Service
  performanceProfile: loadprofile
  hostname: localhost
  port: 8002
  endpoints:
  - path: "/generateToken"
    method: GET
    response: 'Generated Token: {{random.uuid4}}'
Remote Management
Another interesting feature of Mockintosh is Remote Management which helps us to manage the mock server via REST interface (Swagger). To enable this feature, you have to add the management key in the yaml.
Below YAML opens another port 8000 for management.
management:
  port: 8000

performanceProfiles:
  loadprofile:
    ratio: 0.5
    delay: 0.1
    faults:
      '200': 0.5
      '500': 0.5

services:
- name: Search Service
  performanceProfile: loadprofile
  hostname: localhost
  port: 8001
  endpoints:
  - path: "/"
    method: GET
  - path: "/search?q={{keyword}}"
    method: POST
    body:
      urlencoded:
        q: '{{keyword}}'
    response: 'You queried about {{keyword}}. Here are the results:'

- name: Auth Service
  performanceProfile: loadprofile
  hostname: localhost
  port: 8002
  endpoints:
  - path: "/generateToken"
    method: GET
    response: 'Generated Token: {{random.uuid4}}'
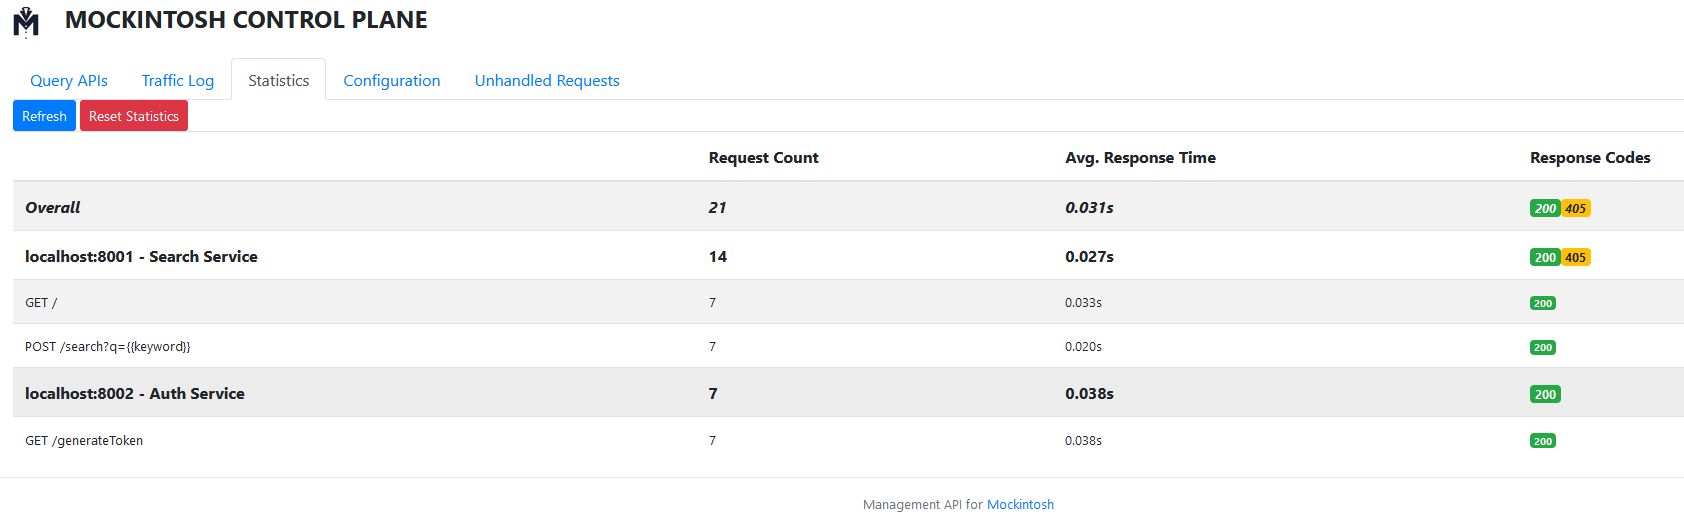
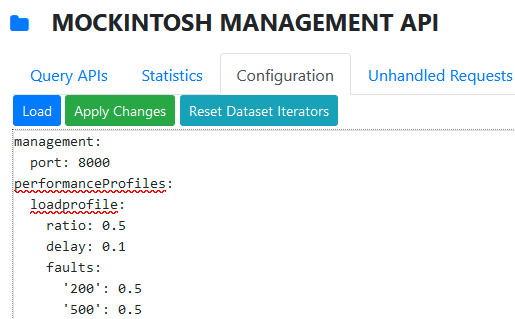
Here is the Mockintosh Management interface screenshot.

Management app has four tabs: Query APIs, Statistics, Configuration and Unhandled Requests.
Query APIs tab helps you to smoke test the mock APIs and test automation.
Statistics tab displays the stats of mock APIs e.g. response time, status code distribution, services' details etc. You can refresh the stats and reset it.
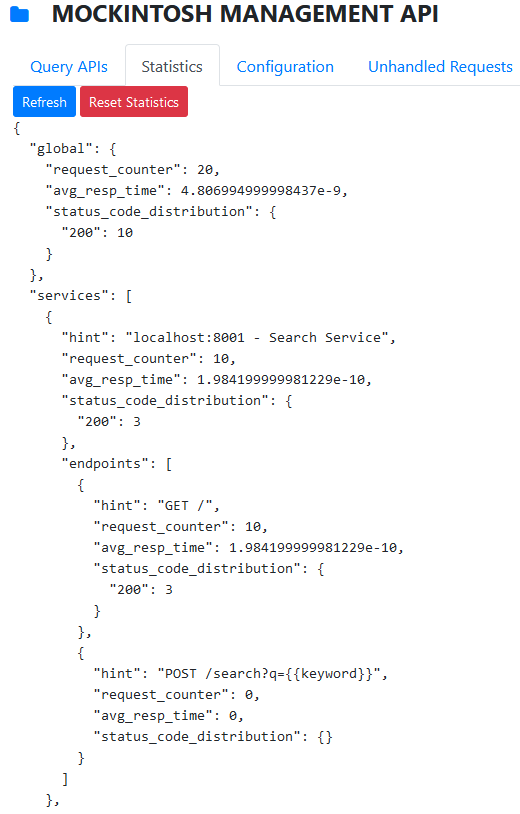
Here is the latest UI of Statistics.
Configuration tab helps to get and set the config yaml. You can modify the config and apply the changes or you can read the config by clicking on Load button.
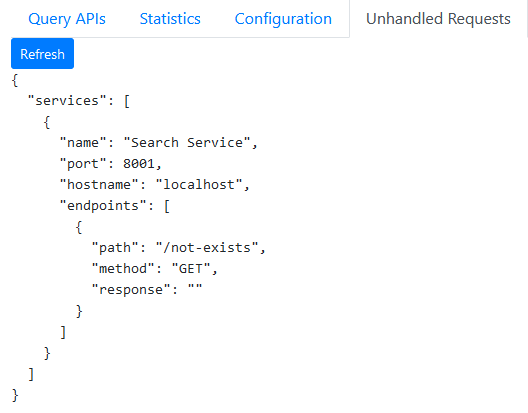
Unhandled Requests tab displays the requests which are not handled by the mock server. E.g. if you hit http://localhost:8001/not-exists, (this path doesn't exist in our yaml) it will get recorded and displayed it in Unhandled Requests.
Traffic Log
Traffic Log enables to record all the requests which hits the mock server. To enable traffic log, go to Trafic Log tab (available in the latest version) and check Enable Traffic Log.

To delete the log, uncheck Enable Traffic Log checkbox which will not record the traffic.
Request Matching
Apart from the above features, Mockintosh comes with Request Matching where you can embed the regular expressions in the requests.
Below regex will look out for 6 digits in the requests and display it in the response.
  - path: "/getorder/{{regEx '([0-9]{6})' 'ordernumber'}}"
    response: 'Here is your order details for : {{ordernumber}}'

Response Templating
You can mock the response headers, status, body etc using dynamic values using Handlerbars and Jinja2. You can leverage faker library to mock the data.
- name: Customer Service
  hostname: localhost
  port: 8003
  endpoints:
  - path: "/customer"
    response:
      headers:
        Content-Type: "application/json; charset=UTF-8"
      body: "@response/customerdetails.json.hbs"
Above yaml, will generate fake data in the response using the customerdetails.json.hbs file.
{
    "useragent": " Mozilla\/5.0 (X11; Linux i686; rv:1.9.5.20) Gecko\/2015-11-08 00:26:50 Firefox\/8.0",
    "creditcard": "Diners Club \/ Carte Blanche\nKatherine Graves\n30301229452350 06\/24\nCVC: 336\n",
    "ssn": "031-26-2812"
}
JSON Template
{
  "creditcard": "{{ fake.credit_card_full }}",
  "ssn": "{{ fake.ssn }}",
  "useragent": " {{ fake.user_agent }}"
}
Conclusion
Whatever features we have seen till now is just a little drop of Mockintosh capabilities. If you are looking for advanced usage, how it works, sample yaml config etc, I suggest you to check the GitHub repo.
All the above examples which I used is available in here.

Top comments (0)