Let's start by creating our own VPC first.
It's quite easy with the new UI.

Use the 'Name tag auto-generation' feature to generate the name tag for all resources. For example, if I enter the value 'myvpc' as a Name tag, then each of the vpc resources would contain this phrase 'myvpc' in each their respective name tags.

Let's keep the no. of AZs, public and private subnets to 2 (as defaulted), NAT gateway in 1 AZ, and leave other attributes to their default values.
Click on the 'Create VPC' button now.
With this new create VPC UI experience, you can see the progress of each steps.

Now as the VPC is created, let's move to the RDS part.
I'm selecting postgres for this example.

- Click on the 'Create database' button.
- Select 'PostgreSQL' as the DB engine. Let's use the default engine version populated (13.7-R1 for me).
- Select Dev/Test as a template.
- Select 'Single DB Instance' as deployment option which would create a single DB instance with no standby instances.
- Now select the DB instance attributes like DB instance name, master username & password, DB instance class etc.
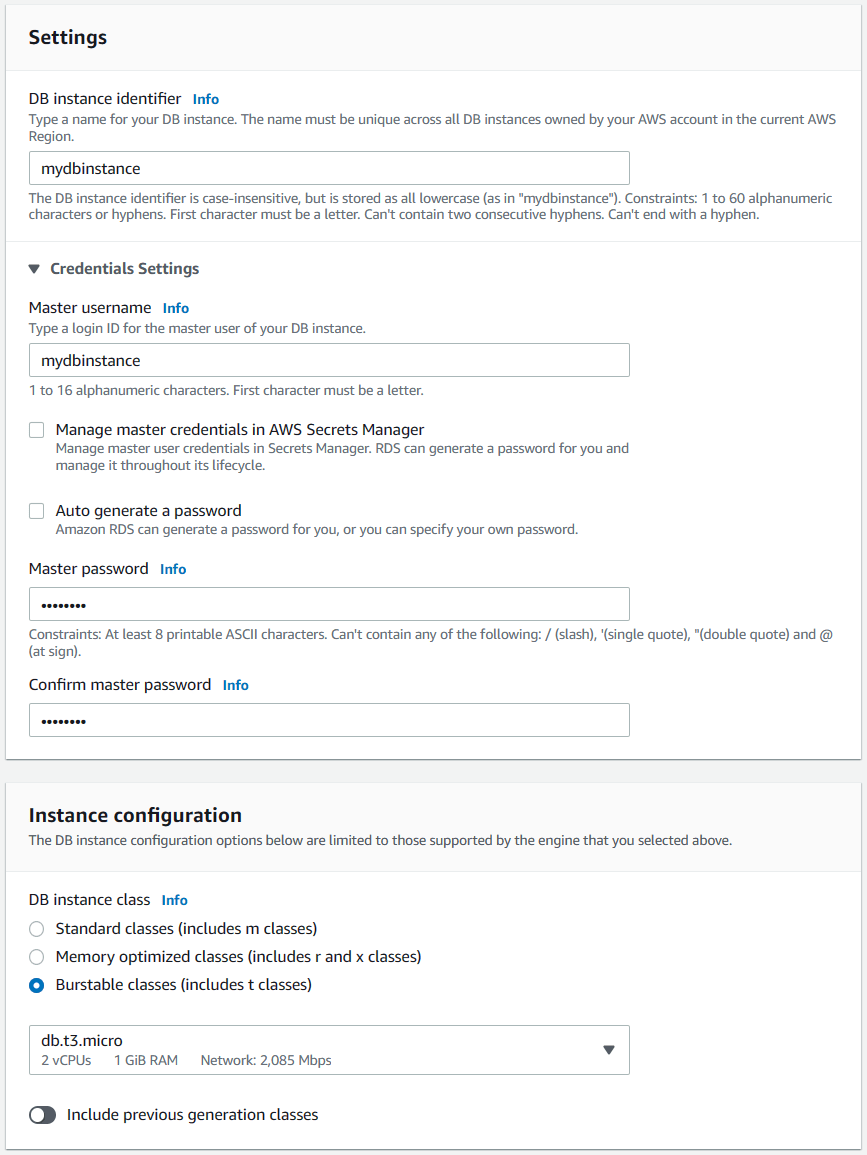
- Select general SSD (gp2) as storage class with a 25 GB storage.
- In the connectivity section, select the VPC that you created. Also, keep the 'Public access' to 'Yes' for us to connect to the DB through internet.
- Select 'Create new' for the VPC security group and provide a name for the new security group.
- Lastly, provide a name for the initial database in the 'Additional configuration' section.
- Leave other options to their default values, and click on the 'Create database' button.
Now the database is being created, it would take some time for up and running.
Meanwhile, let's download pgadmin (postgres admin tool) from https://www.pgadmin.org/download/. We would test the connectivity to our AWS RDS database using this pgadmin tool.
After the installation is completed, start the pgadmin tool. It would look something like the following.

We intend to setup the connection to our RDS database using pgadmin. For this, we first new our RDS endpoint.
Hopefully, the RDS configuration is completed by this time and it is up and running. Go to the AWS RDS console, and check the status of the RDS instance.

Click on the DB identifier.

Copy the endpoint shown under 'Connectivity & security' section.
Go to pgadmin. Right-click 'Servers'. Select Register->Server..
Provide a name to this connection.
Paste the endpoint information (copied earlier) in the 'Hostname/address' edit box and click on save.

Once the connection is established, you can find the initial database that you created your postgres DB instance.

Check the events created in RDS console

What would happen if we change the instance type for this Single AZ deployment
Changing instance type from db.t3.micro to db.t3.small.

Modification is in progress..

The corresponding events get logged and can be seen in the 'Logs & events' section. Note that DB instance was shut down and restarted after the change was applied. It generally takes 2-5 mins (based on my experience) for the DB instance to be up and running after the modification.

What would happen if we change the instance type for a multi-AZ deployment
Let's first make our DB instance multi-AZ.

Wait till the multi-AZ conversion is completed. 

Now, let's change back the instance type from db.t3.small to db.t3.micro.

Note that the moment the DB instance was shut down, Multi-AZ instance failover started. And hence the DB instance came back to a running state quite fast.


Top comments (0)