
By Kevin Kimani
Invoice management is a process that involves generating, sending, tracking, and reconciling invoices for goods or services that a customer has purchased. Invoice management is significant for e-commerce customers as it allows them to track their financial transactions and ensure that they were billed correctly. It also helps the customers to stay organized and be able to manage their finances more effectively.
Rapyd Collect is an API provided by Rapyd, a fintech company that offers a global payment processing platform. The Rapyd Collect API allows businesses from around the world to easily collect payments from their clients via several payment methods, including bank transfers, bank redirect, card, cash, and local eWallet.
With the Rapyd Collect API, you can build an e-commerce platform that allows you to create a product on Rapyd, collect payments via a Rapyd checkout page, create an invoice for the product purchased, and integrate a mailer service to automatically send the invoice to the customer once the payment is complete.
In this tutorial, you‘ll learn to create and send custom invoices using the Rapyd Collect API. To do so, you will:
- Create a Node.js web app that contains a product page
- Integrate the Rapyd checkout flow
- Use the Rapyd Collect API to create a product (service) in Rapyd, set up a plan and subscription, and create an invoice containing the items that the client subscribes to
- Integrate a mailer service (Mailgun) to automatically send the invoice to the client once the payments are complete
You can find the code for this tutorial in this GitHub repo.
Implementing Automated Invoice Emails After Payment
To follow along in implementing the system described above, you’ll need:
- Node.js, npm, a code editor, and a browser installed on your local machine.
- A Rapyd account.
- Postman set up on your local machine. You can also use the web version.
- A Mailgun account. Sign up for a free trial and be sure to verify your email.
You also need to head over to the Rapyd Docs and learn how to make your first API call.
Setting Up the Development Environment
To get started, create a folder called rapyd-invoice. Open it in your code editor and run the following command in the terminal:
npm init -y
This command will initialize a Node.js project in the rapyd-invoice directory and create a package.json file. Next, run the command below to install the dependencies that will be used in this project:
npm i express dotenv ejs node-persist nodemon body-parser mailgun-js
These dependencies include:
-
express- to set up a Node.js server. -
dotenv- to load environment variables. -
ejs- to serve as the templating engine. -
node-persist- to create local storage on the server. -
nodemon- to monitor changes in the server code and restart it automatically. -
body-parser- to parse incoming request bodies. -
mailgun-js- to mail the invoice to the customer.
Next, modify the package.json scripts key-value pair with the following to include a command to start the server:
  "scripts": {
    "start": "nodemon index.js"
  },
Then create a utils.js file in the project root folder and add the code below, which is provided by Rapyd to help in interacting with their APIs:
require('dotenv').config({path: './.env'});

const https = require('https');
const crypto = require('crypto');
const accessKey = process.env.RAPYD_ACCESS_KEY
const secretKey = process.env.RAPYD_SECRET_KEY
const log = false;

async function makeRequest(method, urlPath, body = null) {

    try {
     httpMethod = method;
     httpBaseURL = "sandboxapi.rapyd.net";
     httpURLPath = urlPath;
     salt = generateRandomString(8);
     idempotency = new Date().getTime().toString();
     timestamp = Math.round(new Date().getTime() / 1000);
     signature = sign(httpMethod, httpURLPath, salt, timestamp, body)

     const options = {
         hostname: httpBaseURL,
         port: 443,
         path: httpURLPath,
         method: httpMethod,
         headers: {
             'Content-Type': 'application/json',
             salt: salt,
             timestamp: timestamp,
             signature: signature,
             access_key: accessKey,
             idempotency: idempotency
         }
     }

     return await httpRequest(options, body, log);
    }
    catch (error) {
     console.error("Error generating request options");
     throw error;
    }
}

function sign(method, urlPath, salt, timestamp, body) {

    try {
     let bodyString = "";
     if (body) {
         bodyString = JSON.stringify(body);
         bodyString = bodyString == "{}" ? "" : bodyString;
     }

     let toSign = method.toLowerCase() + urlPath + salt + timestamp + accessKey + secretKey + bodyString;
     log && console.log(`toSign: ${toSign}`);

     let hash = crypto.createHmac('sha256', secretKey);
     hash.update(toSign);
     const signature = Buffer.from(hash.digest("hex")).toString("base64")
     log && console.log(`signature: ${signature}`);

     return signature;
    }
    catch (error) {
     console.error("Error generating signature");
     throw error;
    }
}

function generateRandomString(size) {
    try {
     return crypto.randomBytes(size).toString('hex');
    }
    catch (error) {
     console.error("Error generating salt");
     throw error;
    }
}

async function httpRequest(options, body) {

    return new Promise((resolve, reject) => {

     try {

         let bodyString = "";
         if (body) {
             bodyString = JSON.stringify(body);
             bodyString = bodyString == "{}" ? "" : bodyString;
         }

         log && console.log(`httpRequest options: ${JSON.stringify(options)}`);
         const req = https.request(options, (res) => {
             let response = {
                 statusCode: res.statusCode,
                 headers: res.headers,
                 body: ''
             };

             res.on('data', (data) => {
                 response.body += data;
             });

             res.on('end', () => {

                 response.body = response.body ? JSON.parse(response.body) : {}
                 log && console.log(`httpRequest response: ${JSON.stringify(response)}`);

                 if (response.statusCode !== 200) {
                     return reject(response);
                 }

                 return resolve(response);
             });
         })

         req.on('error', (error) => {
             return reject(error);
         })

         req.write(bodyString)
         req.end();
     }
     catch(err) {
         return reject(err);
     }
    })

}

exports.makeRequest = makeRequest;
Next, create an .env file in the project root folder and paste the following content:
RAPYD_ACCESS_KEY=
RAPYD_SECRET_KEY=
MAILGUN_API_KEY=
MAILGUN_DOMAIN=
MAILGUN_SENDER_EMAIL=
To get the values for the Rapyd access and secret keys, follow the instructions provided here under Get Your API Keys.
To get the values for the Mailgun fields, log into your Mailgun account and click on Sending on the sidebar. Select Domains, copy the domain provided, and assign it to MAILGUN_DOMAIN.

Next, click on your account name in the top right corner. In the dropdown that appears, select API keys. Copy the value of Private API key and assign it to MAILGUN_API_KEY.

For the MAILGUN_SENDER_EMAIL, use the email you used to create your Mailgun account.
Finally, create an index.js file in the project root folder and add the code below to create a basic Express server:
// import the required dependencies
require('dotenv').config({path: './.env'});

const express = require('express')
var bodyParser = require('body-parser')
const storage = require('node-persist');

var mailgun = require('mailgun-js')({apiKey: process.env.MAILGUN_API_KEY, domain: process.env.MAILGUN_DOMAIN});

storage.init()

const app = express()

// set the port
const port = 3000

// import the utility file for making requests to the Rapyd API
const makeRequest = require('./utils').makeRequest;

// variables
const planId = "<your-plan-id>"

//set the render engine
app.set("view engine", "ejs")

// parse application/json
app.use(bodyParser.json())

//Add routes here

app.listen(port, () => {
    console.log(`Example app listening on port ${port}`)
  })
You can confirm that the server is running successfully by running the following command in the terminal:
npm start
Creating the Product Page
The product page will show the details of the service, as well as a form where the customer will input their details. Before implementing this page, you’ll need to create a product and a plan in Rapyd.
With Rapyd, a product can be of type goods or service. For this tutorial, you’ll be creating a service product. To learn more about goods, you can check out the official documentation. A service product needs to be attached to a plan that describes the pricing structure of the service. The plan is then attached to a subscription.
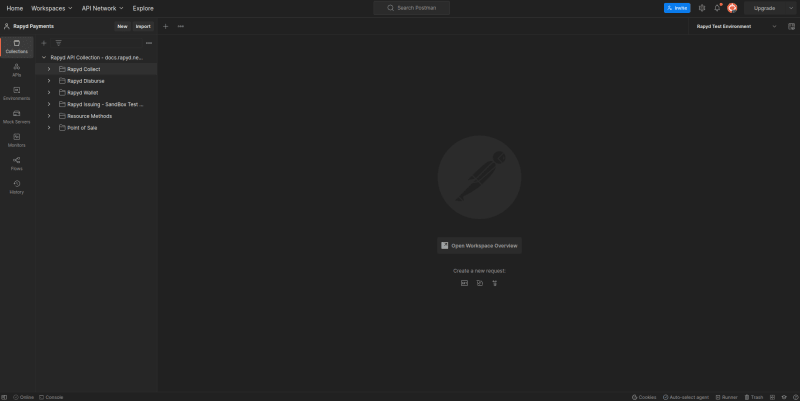
To create a product of type service, you will use the Rapyd Postman collection. Open the collection in either Postman for Web or the Postman app installed on your local machine.
Once you load the collection, you should have something similar to this:

Next, you need to create a Rapyd environment containing the Rapyd access and secret keys, as well as the base uri where you will be sending the API requests. Click on Environments in the left sidebar and create a new environment containing the required fields. You should end up with something like this:

Then head back to the Collections tab and load the newly created environment in the top right corner:
Next, from the Rapyd API Collection, search for "create services". From the results, click on Create Services, and in the tab that opens, send a POST request with the following request body:
{
    "id": "",
    "name": "Monthly Parking Service Booking",
    "type": "services",
    "active": true,
    "description": "Sign up for our monthly parking service and enjoy the convenience of having a guaranteed spot every day",
    "images": [
     "https://images.unsplash.com/photo-1506521781263-d8422e82f27a?ixlib=rb-4.0.3&ixid=MnwxMjA3fDB8MHxwaG90by1wYWdlfHx8fGVufDB8fHx8&auto=format&fit=crop&w=1170&q=80"
    ],
    "shippable": false,
    "statement_descriptor": "",
    "unit_label": ""
}
More information about each of these fields is discussed in the official documentation.
From the response received, copy data.id, which represents the product_id, as it will be used to create a plan.

To create a plan, you’ll use Postman. From the Rapyd API collection, search for "create plan". From the search results, select the Create plan with product ID option. From the tab that opens, send a POST request with the following request body:
Remember to replace
your-product-idwith the corresponding product ID that you received from the previous step.
{
    "currency": "USD",
    "interval": "month",
            “amount”: 1150,
    "product": "your-product-id",
    "aggregate_usage": "",
    "billing_scheme": "per_unit",
    "nickname": "basic",
    "transform_usage": {},
    "trial_period_days": 0,
    "usage_type": "licensed"
}
More information about each of these fields is discussed in the official documentation.

Copy the plan ID from the response, as you will use it to query the plan and the product and display the data on a web page. Open the index.js file and assign your plan ID to the const planId that has been defined already.
Now you can create a route to query for the product and plan information and return it to the frontend. Add the following code to the index.js file:
Make sure you add the code before the
app.listen()function.
// Route to query the plan and return plan+product details
app.get('/', async (req, res) => {
    try {
     const { body: { data } } = await makeRequest('GET', `/v1/plans/${planId}`);

     await storage.setItem('productPrice', data.amount)

     res.render('product', {
         title: data.product.name,
         price: data.amount,
         description: data.product.description,
         image: data.product.images[0]
     })
    } catch (error) {
     console.log(error)
    }
})
In the code above, you:
- Make a GET request to the Rapyd Collect API to retrieve the plan information.
- Save the product price to the local storage.
- Extract the required data and return it to the client along with the template that will be rendered when a request is made to this route.
To create the product template, create a folder called views in the project root folder. Inside it, create a product.ejs file and add the following code:
<!doctype html>
<html lang="en">
  <head>
    <meta charset="utf-8">
    <meta name="viewport" content="width=device-width, initial-scale=1">
    <title>Product Page</title>
    <link href="https://cdn.jsdelivr.net/npm/bootstrap@5.2.3/dist/css/bootstrap.min.css" rel="stylesheet" integrity="sha384-rbsA2VBKQhggwzxH7pPCaAqO46MgnOM80zW1RWuH61DGLwZJEdK2Kadq2F9CUG65" crossorigin="anonymous">
    <style>
     .hidden{
         display: none;
     }
    </style>
</head>
  <body class="container-sm text-center">
    <!-- Display product -->
    <div class="mt-3 d-flex flex-row">
     <img src=<%=image%> alt="Product image" style="max-width: 450px;">

     <div class="px-5 py-3 text-start d-flex flex-column justify-content-between align-items-start">
         <h2 class="title"><%=title%></h2>
         <p class="description"><%=description%></p>
         <p class="price"><strong>Price:</strong> $<%=price%> (Billed monthly)</p>
         <button class="btn btn-primary" id="purchaseBtn">Book Now</button>
     </div>
    </div>

    <!-- Customer details form -->
    <div class="mt-5 hidden" id="custContainer">
     <hr>
     <h3>Customer Details</h3>
     <form class="text-start row g-3">
         <h5>Personal Details</h5>
         <div class="col-md-4">
             <label for="custName" class="form-label">Name</label>
             <input type="text" class="form-control" id="custName" value="Jane Doe">
         </div>
         <div class="col-md-4">
             <label for="custEmail" class="form-label">Email</label>
             <input type="text" class="form-control" id="custEmail">
         </div>
         <div class="col-md-4">
             <label for="custPhone" class="form-label">Phone</label>
             <input type="text" class="form-control" id="custPhone" value="+14155559993">
         </div>

         <h5>Payment Details</h5>
         <div class="col-3">
             <label for="custCardNo" class="form-label">Card Number</label>
             <input type="text" class="form-control" id="custCardNo" placeholder="4111 1111 1111 1111" value="4111111111111111">
         </div>
         <div class="col-3">
             <label for="custCardExpMonth" class="form-label">Expiry Month</label>
             <input type="number" class="form-control" id="custCardExpMonth" placeholder="12" value="12">
         </div>
         <div class="col-3">
             <label for="custCardExpYear" class="form-label">Expiry Year</label>
             <input type="number" class="form-control" id="custCardExpYear" placeholder="34" value="34">
         </div>
         <div class="col-3">
             <label for="custCardCVV" class="form-label">CVV</label>
             <input type="number" class="form-control" id="custCardCVV" placeholder="567" value="567">
         </div>

         <div class="col-12">
             <button type="submit" id="checkoutBtn" class="btn btn-primary">Checkout</button>
         </div>
         </form>
    </div>

    <script src="https://cdn.jsdelivr.net/npm/bootstrap@5.2.3/dist/js/bootstrap.bundle.min.js" integrity="sha384-kenU1KFdBIe4zVF0s0G1M5b4hcpxyD9F7jL+jjXkk+Q2h455rYXK/7HAuoJl+0I4" crossorigin="anonymous"></script>
    <script>
     const purchaseBtn = document.getElementById('purchaseBtn')
     const custContainer = document.getElementById('custContainer')
     const checkoutBtn = document.getElementById("checkoutBtn")

     purchaseBtn.addEventListener('click', () => {
         custContainer.classList.remove('hidden')
         purchaseBtn.setAttribute('disabled', 'true')
         purchaseBtn.innerText = 'Provide your details below'
     })

     custContainer.addEventListener('submit', (e) => {
         e.preventDefault()

         const customerDetails = {
         name: document.getElementById('custName').value,
         email: document.getElementById('custEmail').value,
         phone: document.getElementById('custPhone').value,
         cardNo: document.getElementById('custCardNo').value,
         cardExpMonth: document.getElementById('custCardExpMonth').value,
         cardExpYear: document.getElementById('custCardExpYear').value,
         cardCVV: document.getElementById('custCardCVV').value
     }

         console.log(customerDetails)

         fetch('http://localhost:3000/', {
             method: 'POST',
             headers: {
                 'Content-Type': 'application/json'
             },
             body: JSON.stringify({
                 customerDetails: customerDetails
             })
         }).then(res => {
           console.log(res)
           if(res.status === 200){
               window.location.assign('http://localhost:3000/checkout')
           }
     })

     })
    </script>
  </body>
</html>
The code above renders a template that displays the product information. It also has a button called Book Now, which, when clicked, displays a form for the customer to fill in their details. The form has a Checkout button, which sends the form data to the server and redirects the customer to the /checkout route when clicked.
Next, you need to create a route that will receive these customer details and use them to create a customer on Rapyd. Open index.js and add the following route:
// Route to receive client details and create a customer on Rapyd
app.post('/', async (req, res) => {
    //create a customer using the payment details from the request body
    try {
    const body = {
      name: req.body.customerDetails.name,
      email: req.body.customerDetails.email,
      phone_number: req.body.customerDetails.phone,
      payment_method: {
     type: 'us_debit_visa_card',
     fields: {
         number: req.body.customerDetails.cardNo,
         expiration_month: req.body.customerDetails.cardExpMonth,
         expiration_year: req.body.customerDetails.cardExpYear,
         cvv: req.body.customerDetails.cardCVV
     }
      }
    }
    const { body: { data } }  = await makeRequest('POST', '/v1/customers', body)

    await storage.setItem('customerId', data.id)
    await storage.setItem('defaultPaymentMethod', data.default_payment_method)
    await storage.setItem('customerEmail', data.email)

    res.status(200).json({ success: true })

    } catch (error) {
      console.log(error)
    }
})
The code above creates a customer with a default payment method. From the API response, it extracts the customer ID, default payment method, and customer email and saves the details to local storage.
Creating the Checkout Page
Rapyd Checkout is available as a [hosted page]https://docs.rapyd.net/en/hosted-checkout-page-integration.html) and as a toolkit. This tutorial implements the checkout toolkit integration.
To create a checkout page, you first have to make a POST request to the Rapyd Collect API with the required fields. From the API response, you need to extract the checkout ID and send it to the frontend. For the expiration date, make sure you add a future date (epoch timestamp) that is not more than one year from today’s date. To do so, add the following code to your index.js file:
// Route to create a checkout page and return the checkout ID to the client
app.get('/checkout', async (req, res) => {
    let customerId = await storage.getItem('customerId')
    let productPrice = await storage.getItem('productPrice')

    try {
     const body = {
         amount: productPrice,
         country: 'US',
         currency: 'USD',
         customer: customerId,
         language: 'en',
         expiration: 1704019927,
     };

     const { body: { data }} = await makeRequest('POST', '/v1/checkout', body);

     res.render('checkout', {
         checkoutId: data.id
      })

      } catch (error) {
     console.error('Error completing request', error);
      }
})
Next, create a file called checkout.ejs in the views folder and paste in the code below:
<!doctype html>
<html lang="en">
  <head>
    <meta charset="utf-8">
    <meta name="viewport" content="width=device-width, initial-scale=1">
    <title>Checkout Page</title>
    <link href="https://cdn.jsdelivr.net/npm/bootstrap@5.2.3/dist/css/bootstrap.min.css" rel="stylesheet" integrity="sha384-rbsA2VBKQhggwzxH7pPCaAqO46MgnOM80zW1RWuH61DGLwZJEdK2Kadq2F9CUG65" crossorigin="anonymous">
</head>
  <body class="container-sm text-center">
    <div class="cont">
     <h1>Checkout page</h1>

     <!-- iframe -->
     <div id="rapyd-checkout"></div>
    </div>

    <!-- code to display the iframe -->
    <script src="https://sandboxcheckouttoolkit.rapyd.net"></script>
    <script>
     window.onload = function () {
         let checkout = new RapydCheckoutToolkit({
             pay_button_text: "Click to pay",
             pay_button_color: "blue",
             id: "<%=checkoutId%>"
         });
         checkout.displayCheckout();
     }
     window.addEventListener('onCheckoutPaymentSuccess', function (event) {
         console.log(event.detail)
         console.log(typeof(event.detail.status))
         alert('payment successful')

         window.location.assign('http://localhost:3000/verification')

     });
     window.addEventListener('onCheckoutPaymentFailure', function (event) {
         console.log(event.detail.error)
         alert('error while processing your payment')
     });
    </script>
  </body>
</html>
The code above uses the checkoutId from the server to render a checkout page containing the details of the customer and the amount to be paid.
On successful payment, the page displays an alert message: "payment successful". When the customer clicks on the OK button, they are redirected to the verification page.
Creating the Verification Page
On this page, the customer needs to perform 3DS authentication. Since this guide covers working in the sandbox, 3DS authentication will only be simulated. 3DS authentication is only relevant where the payment method is card. The Rapyd 3DS simulator helps to authenticate the card so that the payment can be completed.
To render a verification page when the customer is navigated there, add the following route to the index.js file:
app.get('/verification', async (req, res) => {
    let customerId = await storage.getItem('customerId')
    let defaultPaymentMethod = await storage.getItem('defaultPaymentMethod')

    // Create subscription
    try {
     const subscriptionBody = {
         customer: customerId,
         billing: 'pay_automatically',
         billing_cycle_anchor: '',
         cancel_at_period_end: true,
         coupon: '',
         days_until_due: null,
         payment_method: defaultPaymentMethod,
         subscription_items: [
         {
             plan: planId,
             quantity: 1
         }
         ],
         tax_percent: 10.5,
         plan_token: ''
     };

     const { body: { data }} = await makeRequest('POST', '/v1/payments/subscriptions', subscriptionBody);

     await storage.setItem('subscriptionId', data.id)

     // create invoice
     try {
         let subscriptionId = await storage.getItem('subscriptionId')
         const invoiceBody = {
             customer: customerId,
             billing: 'pay_automatically',
             days_until_due: null,
             description: '',
             due_date: 0,
             metadata: {
             merchant_defined: true
             },
             statement_descriptor: '',
             subscription: subscriptionId,
             tax_percent: '',
             currency: 'USD'
         };
         const { body: { data }} = await makeRequest('POST', '/v1/invoices', invoiceBody);

         await storage.setItem('invoiceId', data.id)

         console.log(data);

         // create invoice items
         try {
             let customerId = await storage.getItem('customerId')
             let invoiceId = await storage.getItem('invoiceId')
             let subscriptionId = await storage.getItem('subscriptionId')
        let productPrice = await storage.getItem('productPrice')

             const invoiceItemBody = {
                 currency: 'USD',
                 customer: customerId,
                 invoice: invoiceId,
                 plan: planId,
                 metadata: {
                 merchant_defined: true
                 },
                 amount: productPrice
             };
             const { body: { data }} = await makeRequest('POST', '/v1/invoice_items', invoiceItemBody);

             console.log(data);
             } catch (error) {
             console.error('Error completing request', error);
             }
         } catch (error) {
         console.error('Error completing request', error);
         }
         } catch (error) {
     console.error('Error completing request', error);
      }

    // finalize invoice
    let invoiceId = await storage.getItem('invoiceId')
    try {
     const { body: { data }} = await makeRequest(
         'POST',
         `/v1/invoices/${invoiceId}/finalize`
     );

     console.log(data);

     res.render('verification', {
         authLink: data.payment.redirect_url
     })

      } catch (error) {
     console.error('Error completing request', error);
      }
})
In the code above, you:
-
Create a subscription and save the
subscriptionIdfrom the API response in local storage. -
Create an invoice using the
subscriptionIdand save theinvoiceIdfrom the API response in local storage.- Note: An invoice has a few statuses, as discussed here under the Response Parameters. The invoice you just created is in a draft state. In this state, you edit the invoice and add invoice items. You will later finalize the invoice to mark it as "paid" and complete the payment associated with it.
-
Create invoice items using the
invoiceIDand add them to the invoice. -
Finalize the invoice by making a POST request with the
invoiceId. From the API response received, you extract theredirect_urlto simulate 3DS authentication and send it to the front end.
Next, you need to create the verification page that the customer can use to simulate 3DS authentication. Create a verification.ejs file in the views folder and add the code below:
<!doctype html>
<html lang="en">
  <head>
    <meta charset="utf-8">
    <meta name="viewport" content="width=device-width, initial-scale=1">
    <title>Verification Page</title>
    <link href="https://cdn.jsdelivr.net/npm/bootstrap@5.2.3/dist/css/bootstrap.min.css" rel="stylesheet" integrity="sha384-rbsA2VBKQhggwzxH7pPCaAqO46MgnOM80zW1RWuH61DGLwZJEdK2Kadq2F9CUG65" crossorigin="anonymous">
</head>
  <body class="container-sm text-center">
    <div class="cont">
     <h1>3DS Verification</h1>
     <!-- <p>Open the link below in a new page to simulate 3DS authentication</p> -->
     <p>
         <a href="<%=authLink%>" target="_blank" id="auth">Simulate 3DS Authentication</a>
     </p>
     <p>Once you're done, come back to this page and select "Generate Invoice".</p>
     <button class="btn btn-primary" id="generateBtn" disabled>Generate Invoice</button>
    </div>

    <script>
     const generateBtn = document.getElementById('generateBtn')

     document.getElementById('auth').addEventListener('click', () => {
         generateBtn.removeAttribute('disabled')
     })

     generateBtn.addEventListener('click', () => {
         window.location.assign('http://localhost:3000/invoice')
     })
    </script>
  </body>
</html>
The code above renders an HTML file that instructs the customer to click the link displayed, perform 3DS simulation, and then return to the page and click the Generate Invoice button. This button redirects the customer to the invoice page.
Creating the Invoice Page
This page will display the invoice data to the customer. To create it, you first need the server code to retrieve the invoice and the invoice items. Open index.js and add the following route:
// Retrieve invoice, line items => return line items to client
app.get('/invoice', async (req, res) => {
    let custEmail = await storage.getItem('customerEmail')

    let item
    let quantity
    let subTotal
    let tax
    let total
    let status

    // retrieve invoice
    try {
     let invoiceId = await storage.getItem('invoiceId')

     console.log(invoiceId)

     const { body: { data }} = await makeRequest(
         'GET',
         `/v1/invoices/${invoiceId}`
     );

     console.log(data)

     quantity = data.lines.length
     subTotal = data.subtotal
     tax = data.tax
     total = data.total
     status = data.status

     // retrieve subscription
     try {
         const subscriptionId = await storage.getItem('subscriptionId')
         const { body: { data }} = await makeRequest(
             'GET',
             `/v1/payments/subscriptions/${subscriptionId}`
         );

         item = data.subscription_items.data[0].plan.product.name;

         // console.log(data.subscription_items.data[0].plan.product)

         } catch (error) {
         console.error('Error completing request', error);
         }
      } catch (error) {
     console.error('Error completing request', error);
      }

      // send email
      let invoiceId = await storage.getItem('invoiceId')
      var data = {
      from: `Monthly Booking Services <${process.env.MAILGUN_SENDER_EMAIL}>`,
      to: custEmail,
      subject: 'Monthly Booking Services Invoice',
      html: `<h1>Monthly Booking Services</h1><h3>Your Invoice ID: ${invoiceId}</h3><p>Item: ${item}</p><p>Quantity: ${quantity}</p><p>Tax: ${tax}</p><p>Total: ${total}</p><p>Invoice status: ${status}</p>`
      };

      mailgun.messages().send(data, function (error, body) {
     if(error){
         console.log(error)
     }
      console.log(body);
      });

      res.render('invoice', {
     item,
     quantity,
     subTotal,
     tax,
     total,
     status,
     custEmail
      })
})
The code above retrieves the invoice and the subscription associated with the invoice to extract the name of the product the customer has subscribed to. All this information is then returned to the front end. The code also includes the logic to send the invoice details to the customer’s email via Mailgun.
Create a file called invoice.ejs inside the views folder and add the following code to render a page that displays the invoice data to the customer:
<!doctype html>
<html lang="en">
  <head>
    <meta charset="utf-8">
    <meta name="viewport" content="width=device-width, initial-scale=1">
    <title>Invoice Page</title>
    <link href="https://cdn.jsdelivr.net/npm/bootstrap@5.2.3/dist/css/bootstrap.min.css" rel="stylesheet" integrity="sha384-rbsA2VBKQhggwzxH7pPCaAqO46MgnOM80zW1RWuH61DGLwZJEdK2Kadq2F9CUG65" crossorigin="anonymous">
</head>
  <body class="container-sm text-center">
    <div class="cont">
     <h2>Your Invoice</h2>
     <table class="table">
         <thead>
             <tr>
             <th scope="col">#</th>
             <th scope="col">Item</th>
             <th scope="col">Quantity</th>
             <th scope="col">Rate</th>
             </tr>
         </thead>
         <tbody>
             <tr>
             <th scope="row">1</th>
             <td><%=item%></td>
             <td><%=quantity%></td>
             <td>$<%=subTotal%></td>
             </tr>

             <tr>
             <td colspan="3" class="text-end">Sub Total</td>
             <td>$<%=subTotal%></td>
             </tr>
             <tr>
             <td colspan="3" class="text-end">Tax</td>
             <td>$<%=tax%></td>
             </tr>
             <tr>
             <td colspan="3" class="text-end">Total</td>
             <td>$<%=total%></td>
             </tr>
             <tr>
             <td colspan="3" class="text-end">Invoice Status</td>
             <td class="bg-success text-white"><%=status%></td>
             </tr>
         </tbody>
         </table>

         <p class="bg-primary text-white py-4 px-2">Invoice successfully sent to: <%=custEmail%></p>
    </div>
  </body>
</html>
Testing the Application
To confirm that the application is working as expected, run npm start in the terminal and open http://localhost:3000 on your browser. You should see the product page:

When you click the Book Now button, the customer details form, which contains some placeholder values for testing purposes, is displayed:

Enter the customer email (make sure to use your own personal email that you used to register your Mailgun account) and click on the Checkout button. You will be redirected to the Checkout page. Once you’re there, select the Click to pay button and click OK on the alert upon successful payment.

This will redirect you to the verification page. Select Simulate 3DS Authentication.

This opens a new tab. Enter the code provided and click the Continue button.

Navigate back to the verification page and select Generate Invoice. This will redirect you to the invoice page and inform you that an email has been sent to the customer's email.

Open your inbox and you should see the received email.

Conclusion
In this article, you learned about Rapyd and the Rapyd Collect API. You also learned about various Rapyd Collect concepts, such as products, plans, subscriptions, invoices, and invoice items. Lastly, you learned how to combine all these concepts to create a web app that automatically sends an invoice to the customer once payments are complete via a mailer service.
Rapyd is a payment processing solution that helps you liberate global commerce with all the tools you need for payments, payouts, and business everywhere. It aims to make it easier for businesses to expand globally by simplifying the process of accepting and making payments in different countries and currencies. Rapyd’s developer-friendly API allows businesses to easily integrate their payment systems with the Rapyd network.

Top comments (1)
Interesting. Really insightful