Building a web application is (arguably!) easier than ever. Tools like create-react-app make it easy to start a production-grade web application in minutes. But the story for building native applications that can be installed on your machine is pretty different. Electron provides one way of doing this, but at the cost of packaging an entire web browser for running your HTML, CSS and Javascript. I wanted to try out an alternative called Revery, which lets you use a familiar 'React' development style, but compile your app to a native executable.
Since this was my first time using any of the technologies, I thought I'd write a walkthrough for anyone else looking to give it a try. Using this many new technologies is always going to throw up some snagging issues, so I've tried to add in some practical tips. Overall I've come away with nothing but respect for the community working on this project. ReasonML and Revery have a real focus on building fast, robust tools which blend the best of correctness (a proper typesystem!), performance (a super-fast compiler!) and ergonomics (lots of lessons learnt from the vibrant web dev community).
The background
Revery swaps out each of the tools that you'd use for web development with an equivalent:
- Language - Instead of Javascript you write ReasonML
- Components - Instead of manipulating Browser DOM elements, you manipulate Revery Components such as button and slider
- Layout - Instead of using Browser CSS, you use a ReasonML CSS layout implementation
- Framework - Instead of manipulating your components with ReactJS, you manipulate them with Brisk, a ReasonML implementation which matches the React API
The payoff for doing all this is that rather than needing to install a whole web browser, or running your app code on top of a Javascript Virtual Machine, you can compile the entire codebase to a true native application for your machine. This has a huge payoff to the user in terms of app package size and memory consumption.
Setting up
First of all I needed to install esy, the package manager for native ReasonML (think of it as the best bits of npm). I did that with:
npm install -g esy
Now I'm ready to clone and build the Revery Quickstart:
git clone https://github.com/revery-ui/revery-quick-start.git
cd revery-quick-start
esy install # install dependencies
esy build && esy run
On the first build this will do quite a lot of work, but subsequently this should be super quick. You might even be able to speed this up by pre-installing some packages If all goes we'll you should now be looking at a simple quickstart application:
Getting started
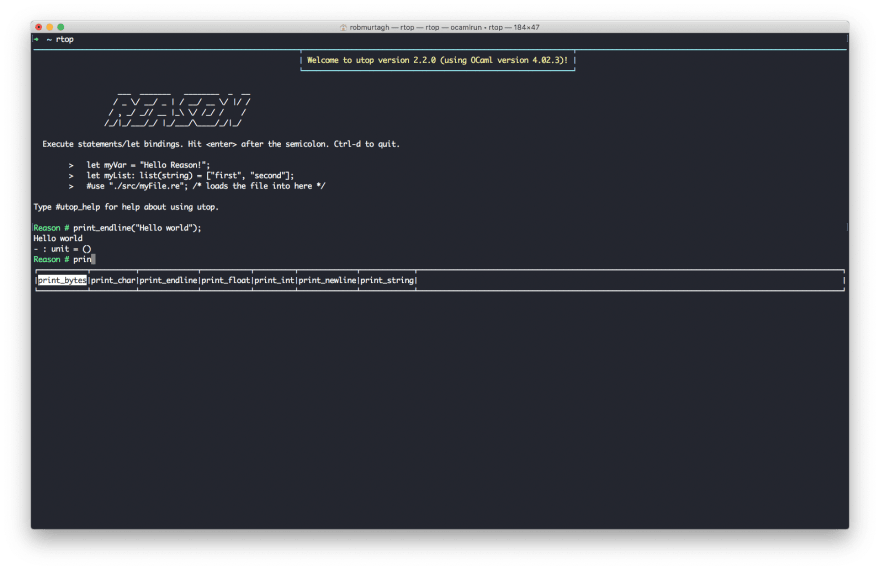
The first thing I like to do when working with a new stack is to log something. Literally anything will do. We're working in ReasonML, and rtop is a great tool for playing around locally, and finding out what functions we should be using. print_endline seems to do the job:
In our Revery project App.re is the critical file, so it's worth starting there, making some edits, and adding some logs. Digging around further in the codebase, we can see they're already using the timber logging framework, so we can get that up and running with:
/* Line ~5, under the 'open' statements */
module AppLog = (val Log.withNamespace("My.App"));
/* Inside the 'let init' function */
AppLog.info("Hello World");
A first component
I wanted to test out Revery by building a super simple Todo List application.
As a starting point, I rendered this extremely simple component which just renders Hello World to the canvas:
open Revery;
open Revery.UI;
open Revery.UI.Components;

/* setup our logger */
module AppLog = (val Log.withNamespace("My.App"));

/* a component which takes no arguments, and returns 'Hello World!' text */
module TodoList = {
  let make = () => <Text text="Hello world!" />;
};

/* the launch configuration below comes directly from 'revery-quick-start' */
let init = app => {
  Revery.App.initConsole();

  /* more logging configuration */
  Timber.App.enable();
  Timber.App.setLevel(Timber.Level.perf);

  let win = App.createWindow(app, "Welcome to Revery!");

  /* render the <TodoList/> component to the UI */
  let _: Revery.UI.renderFunction = UI.start(win, <TodoList />);
  ();
};

App.start(init);
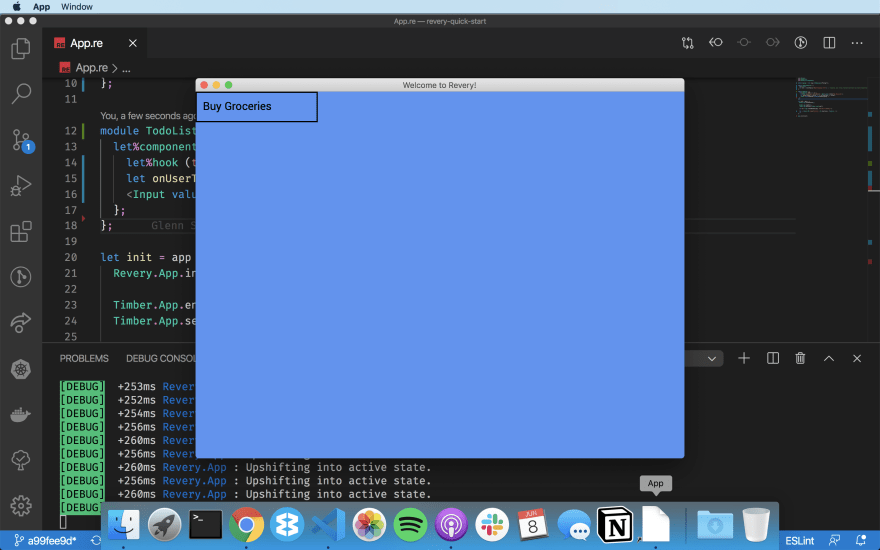
Now I've gotten things rendering, I want to try and write some actual logic. A good starting point was to use a simple 'controlled component' as user input. Every time the user types we set the value to state, and we set the input to always display the current value assigned to state. The component now looks like this:
module TodoList = {
  let%component make = () => {
    let%hook (todoItem, setTodoItem) = React.Hooks.state("Buy Groceries");
    let onUserTyping = (value, _) => setTodoItem(_ => value);
    <Input value=todoItem onChange=onUserTyping />;
  };
};
In the screenshot you can see how the app is running from the dock, and has the menu bar as you'd expect:
Next up I want to be able to store my list of todo items. Here's some code that on every button click adds an item to the list:
let%hook (todoList, setTodoList) = React.Hooks.state([]);
let onUserClick = () => setTodoList(items => [todoItem, ...items]);
Lists in ReasonML are immutable, and the code above prepends an element and returns a new list. For those who are interested, ReasonML is simply a new syntax for OCaml, whose lists are implemented as linked lists hence this can be done in constant time. My component now looks like this:
module TodoList = {
  let%component make = () => {
    let%hook (todoItem, setTodoItem) = React.Hooks.state("Buy Groceries");
    let%hook (todoList, setTodoList) = React.Hooks.state([]);
    let onUserTyping = (value, _) => setTodoItem(_ => value);
    let onUserClick = () => setTodoList(items => [todoItem, ...items]);
    <View>
      <Input value=todoItem onChange=onUserTyping />
      <Clickable onClick=onUserClick>
        <Text text="Add" />
      </Clickable>
    </View>;
  };
};
I'm building up a list of todo items, but now I need to get them rendered on the screen. This requires mapping over the list of strings to return a list of JSX elements. But then I also need to collapse the list so it can be treated as a single element. I do that with:
let todoElements =
      todoList
      |> List.map(item => <Text text=item />)
      |> Brisk_reconciler.listToElement;
The |> syntax is called pipe last, and it takes the return value from the left hand side, and passes it as the final argument to the expression on the right hand side. So now my final app code looks like this:
open Revery;
open Revery.UI;
open Revery.UI.Components;
open List;

module AppLog = (val Log.withNamespace("My.App"));

module TodoList = {
  let%component make = () => {
    let%hook (todoItem, setTodoItem) = React.Hooks.state("Buy Groceries");
    let%hook (todoList, setTodoList) = React.Hooks.state([]);
    let onUserTyping = (value, _) => setTodoItem(_ => value);
    let onUserClick = () => setTodoList(items => [todoItem, ...items]);
    let todoElements =
      todoList
      |> List.map(item => <Text text=item />)
      |> Brisk_reconciler.listToElement;
    <View>
      <Input value=todoItem onChange=onUserTyping />
      <Clickable onClick=onUserClick>
        <Text text="Add" />
      </Clickable>
      <View> todoElements </View>
    </View>;
  };
};

let init = app => {
  Revery.App.initConsole();

  Timber.App.enable();
  Timber.App.setLevel(Timber.Level.perf);

  let win = App.createWindow(app, "Welcome to Revery!");

  let _: Revery.UI.renderFunction = UI.start(win, <TodoList />);
  ();
};

App.start(init);
And there you have it! The world's simplest Todo List, as a native build Mac app.
There's quite a bit which I haven't delved into here. The biggest of which is probably styling. Right now, I've found that these files are the best place to see how things are working, but I'll leave that as an exercise for the reader.
I hope this has helped you get started with Revery, and happy hacking!


Latest comments (3)
I create one native app with styled, based in this post:
github.com/enieber/revery-todo
Ah, that's really cool, nice one!
thanks for this post, I like much and learn much too.