This article was originally posted on CircleCI's blog by Stanley Ndagi
Continuous Integration (CI) involves the test automation of feature branches before they are merged to the main Git branch in a project. This ensures that a codebase does not get updated with changes that could break something. Continuous Delivery (CD), on the other hand, builds upon CI by automating releases of these branches and/or the main branch. This allows small incremental updates to reach your users faster, in line with Agile software development philosophy.
In this article, I will take you through setting up CI with GitHub. We will use a Python application to demonstrate our CI pipeline.
Here are the steps we will take:
- Create a simple Python application (with Flask)
- Create tests for this app
- Add the
config.ymlfile - Push to GitHub
- Configure CircleCI
- Update our
READMEwith a badge - Create a PR and see CircleCI in action
Creating a simple Python app
Prerequisites
If you don’t have Python installed, follow the instructions here for your local system. The Python installation comes with pip (The PyPA recommended tool for installing Python packages).
Building the app
For simplicity, in terms of fewest lines of code, we will create a Flask application. Flask is a microframework for Python. For our exercise, little knowledge of the framework is necessary. We’ll use the example found here.
First, create a project directory (folder) and cd into it. Type this into Terminal:
mkdir python_app && cd $_/
Next, open your favorite editor and create a hello.py file. Then, copy the following lines into that file:
from flask import Flask

app = Flask(__name__)

@app.route("/")
def hello():
    return "Hello World!"
Virtual environments in Python
When working in Python, it is strongly advised that you use a virtual environment. This allows you to install Python packages in an abstracted environment that is not your entire local machine. Some common ways to do this are to use virtualenv or, even better, virtualenvwrapper. We’ll use the module venv that comes as a part of Python3. This is how it’s done:
- Create the virtual environment:
python3 -m venv venv
(Note that we can use other names for our virtual environment, like in the next example.)
python3 -m venv Env
- Activate this environment:
source venv/bin/activate
(Replace venv if you used another name for the environment)
You will notice (venv) just before the shell prompt telling you that the virtual environment is active. Any Python package that is installed will be installed within this environment. To deactivate this environment simply run:
deactivate
Running the app
Now, let’s create a requirements.txt file in our editor. Add the word Flask to the file and save it.
Flask
Then, within the virtual environment, install the package by running:
pip install -r requirements.txt
The final command to run this application is:
FLASK_APP=hello.py flask run
You can see the application running on your browser at http://localhost:5000/.
Tests
In your editor, create a tests.py file and paste these lines into it:
from hello import app
with app.test_client() as c:
    response = c.get('/')
    assert response.data == b'Hello World!'
    assert response.status_code == 200
Please see these references for more information on tests:
Now, let’s run our test. Open Terminal and run:
python3 tests.py
Nothing should be returned to our Terminal. Why? The reason is that we structured our Flask app so that it does not output to Terminal on a pass. This means that our tests are passing. The resources mentioned above give better examples of Terminal UX (user experience) on tests passing and failing, but this will suffice for our case.
CircleCI config file
Create a .circleci folder and inside of that create a config.yml file. Then, copy these lines into it:
version: 2
jobs:
  build:
    docker:
      - image: circleci/python:3.6
    steps:
      - checkout
      - restore_cache:
          key: deps1-{{ .Branch }}-{{ checksum "requirements.txt" }}
      - run:
          command: |
            python3 -m venv venv
            . venv/bin/activate
            pip install -r requirements.txt
      - save_cache:
          key: deps1-{{ .Branch }}-{{ checksum "requirements.txt" }}
          paths:
            - "venv"
      - run:
          name: Running tests
          command: |
            . venv/bin/activate
            python3 tests.py
      - store_artifacts:
          path: test-reports/
          destination: python_app
For more information regarding this config file, see: https://circleci.com/docs/2.0/language-python/.
Pushing to GitHub
We should have initialized Git earlier and had atomic commits (the philosophy of committing your code early and often). However, since this tutorial is about integration of CircleCI and GitHub, I intentionally put it on hold until now.
Our current code structure looks like this:
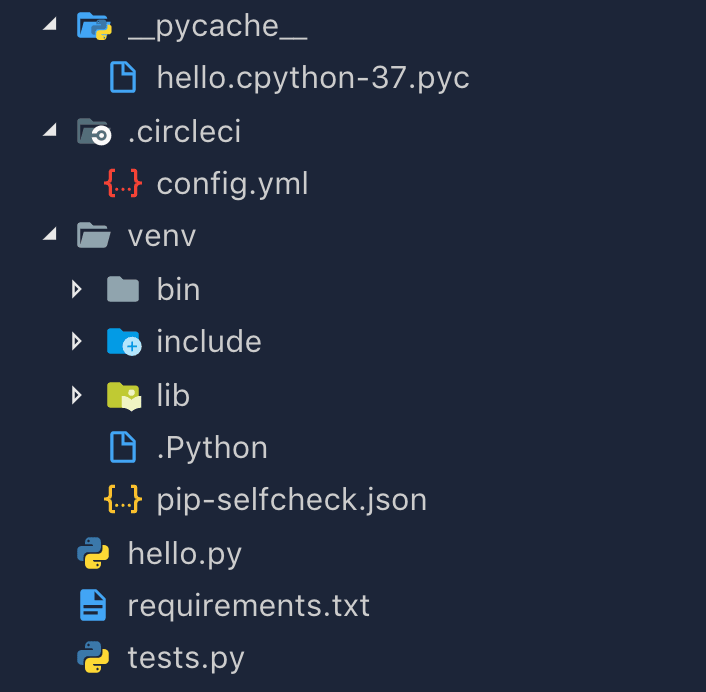
Open your editor and create a .gitignore file in the working directory to state which files and folders that we don’t want to commit to Git. Copy the following lines into that file:
# Byte-compiled / optimized / DLL files
__pycache__/
*.py[cod]

# Virtualenv
venv/*
We are now going to commit our code by running the following commands:
git add .
git commit -m "Initial commit"
Go to https://github.com and create a GitHub account, if you don’t already have one. Then, create a repository.

After creating your new repository, you will get to a page like this one:
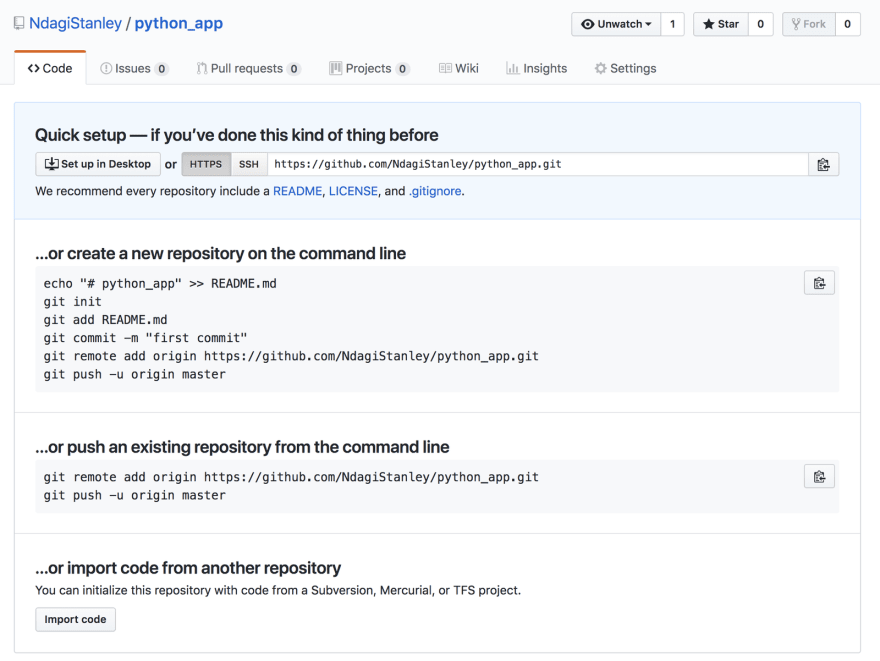
We’ll go with the second option, …push an existing repository. Run:
git remote add origin https://github.com/NdagiStanley/python_app.git
git push -u origin master
Configuring CircleCI
Now that the repo is on GitHub, we can finalize the CI by configuring CircleCI.
Head on over to https://circleci.com/. Then click Sign Up at the top right.

Sign up for CircleCI with your GitHub account.
Once you are logged in, ensure that your personal GitHub account is active. If you are in several GitHub organizations, one of them might be active. Just click the drop down menu (top left) and select your GitHub username. Then, click Add Projects. The most recent project, ‘python_app’, appears there.

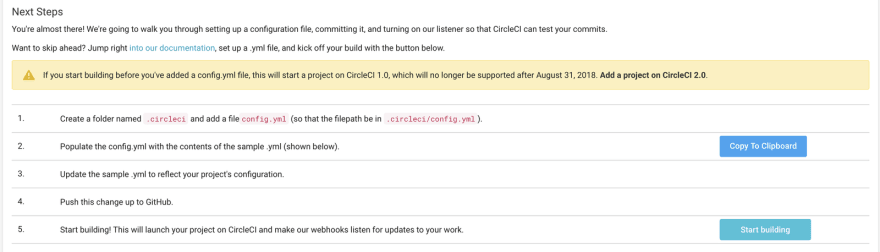
Click Set up Project at the right side of the row that includes our project. On the redirected page, you’ll notice the Next Steps section. Had we not had our own .circleci/config.yml file, we would have started at No. 1. We just need to scroll to No. 5 and click Start building.
Within no time, the build passes. It's successful!

In the top right corner, click the Settings cog. Then click Projects on the left, and finally, python_app.

You will be on a path like this one: circleci.com/gh/<username>/python_app. Mine is https://circleci.com/gh/NdagiStanley/python_app. Click the settings cog next to the repo name: python_app.

It is important that you to become familiar with the settings that you can change for this project. I will touch on what is relevant to us now.
In Advanced Settings, notice that Only build pull requests is turned off. This means that every push to GitHub will run on CircleCI, including PRs.
In Chat Notifications, notice that you can configure your Slack, HipChat, FlowDock, Campfire and IRC to be notified on every build. For Slack, this resource is handy.
In Status Badges, notice the Markdown embed code. We will copy this code to paste into our README.
ReadME - status badge
On our local machine, checkout to another Git branch by running:
git checkout -b add_readme
Open your editor and create a README.md file. Copy and paste the following lines into this file:
README.md
# PYTHON APPLICATION
This Python application repo was created to showcase the integration between GitHub and CircleCI.
[](https://circleci.com/gh/NdagiStanley/python_app)
I added a title and a brief description to mine.
Now, run the following commands:
git add .
git commit -m "Add README"
git push -u origin add_readme
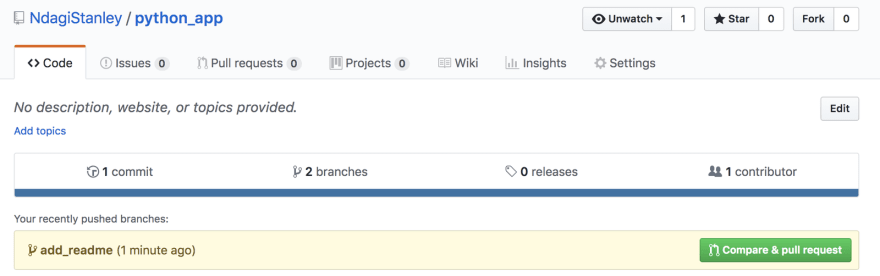
If you go to https://github.com//python_app you will notice that we have a new branch: add_readme. We can go ahead and click Compare and pull request.
Opening a pull request
This is how I set up my PR:

Click Create pull request and in no time, this is what we get:

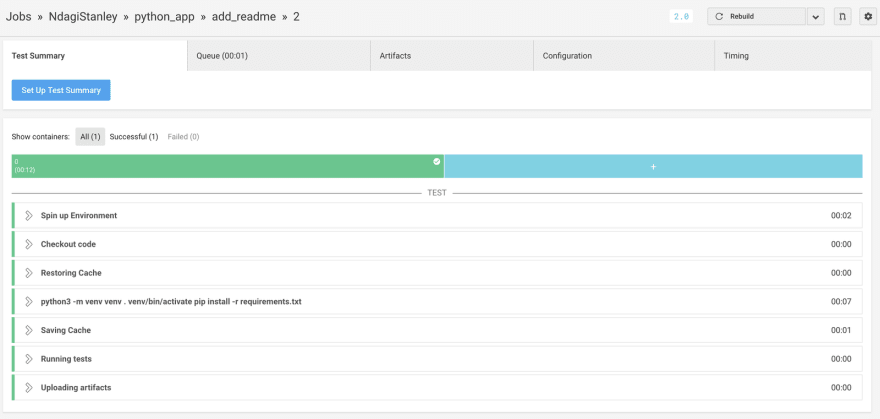
A successful build! Now, click Show all checks. You will see that the check is from CircleCI.

Even the browser’s tab favicon shows a tick for the successful run:

If you click Details, this will redirect you to the build on CircleCI:
Notice that the favicon here also shows that the build is successful:

At the top, click python_app

You are redirected to the builds for this project:

Conclusion
And there you have it! We have integrated GitHub with CircleCI. In summary, we set up a Python application and created tests for it. We then created a CircleCI config file and pushed the codebase to GitHub. Finally, we connected the GitHub repository we created to CircleCI.
If you followed through successfully, you can now set up your own project in GitHub and configure CI builds on CircleCI. The following links point to my references while writing this article.
https://circleci.com/docs/2.0/configuration-reference/#full-example
http://flask.pocoo.org/
https://circleci.com/docs/2.0/configuration-reference/
About Stanley: From a young age, Stanley tinkered with electronics and building things with tech. Now, he’s an engineer at Andela and his work involves data, the web, and IoT. Stemming from his lifelong love of DIY, he’s on a personal journey of invoking the builder within and teaching others along the way. He cares about how technology affects society and seeks collaborations with others who are working to create positive impact.

Top comments (0)