In this post, we will add CodePush to a new React Native Project.
The first thing we will do is create a new React Native project using
react-native init RNCodePush
Now that the new project is created, we can cd into the project:
cd RNCodePush
Now we have our project, we can go ahead and install the CodePush cli:
npm install -g code-push-cli
CodePush
Installing CodePush
Click here to view the CodePush documentation.
Now that we have our project, we can go ahead and install the CodePush cli:
npm install -g appcenter-cli
Creating a Mobile Center account
After successfully installing the App Center CLI, execute the command to configure the CLI for your App Center account details, command is
appcenter login
We should be able to now sign up / authenticate using either a GitHub or Microsoft account.
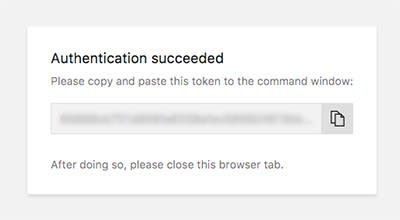
Once we are registered / logged in, we should receive a token that we can use to paste into our command line to authenticate:
Creating the CodePush App
you can run the following command to display the e-mail address associated with your current authentication session, your username, and your display name:
appcenter profile list
Now that we are logged in, we need to create the CodePush app that we will be associating with our React Native Project.
We will be creating two apps, one for iOS and one for Android
appcenter apps create -d <appDisplayName> -o <operatingSystem> -p <platform>
In my example, I will be calling my iOS app name RRNCodePush-IOS and my android app name RNCodePush-Android, so my command will look be:
appcenter apps create -d RNCodePush-Android -o Android -p React-Native
appcenter apps create -d RNCodePush-IOS -o iOS -p React-Native
Codepush Apps automatically had two deployments (Staging and Production). In App Center, you'll have to create them yourself using the following commands
appcenter codepush deployment add -a <ownerName>/<appName> Staging
appcenter codepush deployment add -a <ownerName>/<appName> Production
In my case totally 2 Android apps with environment Staging and Production and 2 IOS apps with with environment Staging and Production ,totally four keys i will have here is the example
Android
1.appcenter codepush deployment add -a salman18/RNCodePush-Android Staging
2 .appcenter codepush deployment add -a salman18/RNCodePush-Android Production
iOS
appcenter codepush deployment add -a salman18/RNCodePush-IOS Staging
appcenter codepush deployment add -a salman18/RNCodePush-IOS Production
Finally, if you want to list all apps that you've registered with the App Center server, run the following command:
appcenter apps list
After you create the deployments, you can access the deployment keys for both deployments using
appcenter codepush deployment list -a <ownerName>/<appName> --displayKeys -k
Example:-
For Android
appcenter codepush deployment list -a salman18/RNCodePush-Android --displayKeys -k
For iOS
appcenter codepush deployment list -asalman18/RNCodePush-IOS --displayKeys -k
react-native-code-push plugin installation and setup
Configure install and configure react-native-code-push on your project based on your react-native version by clicking provided link below
JS bundle and assets (react-native bundle for React-native apps)
We need to do this each time when we are deploying changes via codepush.
react-native bundle --platform android --dev false --entry-file
index.js --bundle-output  android/app/src/main/assets/index.android.bundle
 --dev false
More information about bundling is with and without assets [https://docs.microsoft.com/en-gb/appcenter/distribution/codepush/cli]
Releasing Updates (General)
appcenter codepush release -a <ownerName>/<appName> -c <updateContentsPath> -t <targetBinaryVersion> -d
 <deploymentName>

[-t|--target-binary-version <version>]
[-с|--update-contents-path <updateContentsPath>]
[-r|--rollout <rolloutPercentage>]
[--disable-duplicate-release-error]
[-k|--private-key-path <privateKeyPath>]
[-m|--mandatory]
[-x|--disabled]
[--description <description>]
[-d|--deployment-name <deploymentName>]
[-a|--app <ownerName>/<appName>]
[--disable-telemetry]
[-v|--version]


Top comments (0)