
Let’s Build: Workout tracker with React and Firebase part 4: database and deployment
In this part we will connect the Firebase realtime database to our application so users can add, update and delete workouts.

Signing up
When a new user signs up we also need to list this user in our database so we can attach activities to this specific user.
Inside the firebase console, go to the database page and create a new realtime database using the TEST mode for now.
Inside our firebase.js file we will import the database and add it to our constructor:
import 'firebase/database';

...

this.db = app.database();
And inside the class we will add the methods to insert a new user:
user = uid => this.db.ref(users/${uid}):
users = () => this.db.ref('users');
When the user method is called, a new user is created inside users, using the user ID retrieved from the authUser object.
In SignUp.jsx we’ll add this method in the handleSubmit:
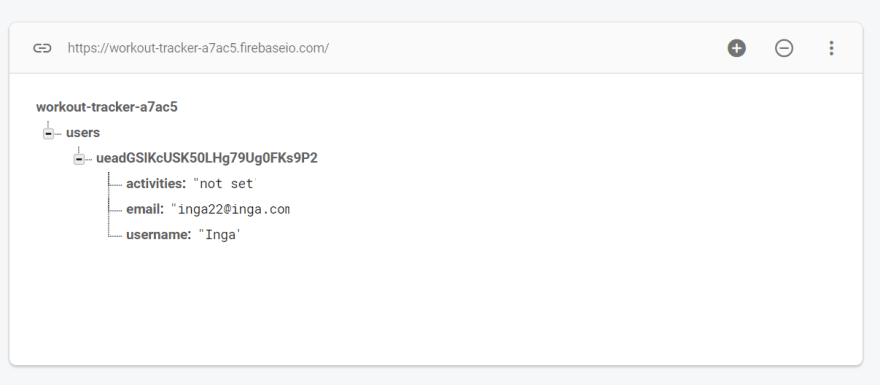
The username and email gets stores, as well as activities which we’ll set to “not set” for now. Notice that the password does not get stored in the database, for security reasons. One of the benefits of Firebase is seperating a secure authentication.
Now try to sign up a new user and check if it is added into your realtime database in Firebase.
Adding an activity
To avoid making our Calendar component too big, we will create a new component called AddActivity inside our /components folder.
Let’s think about what this component needs to receive.
The day on which the activity will be added
Firebase class to add the activity to the database
A notification when the activity has been added
Create an empty functional component in the AddActivity.jsx file for now.
Inside our Calendar.jsx file we will add the AddActivity component with all the props it needs to receive.
The state of the alert (called the snackbar component in Material UI) we will manage with a hook, as well as the alert text.
Inside AddActivity.jsx we will add several Material UI components:
Textfield for the activity name
Dropdown for the activity type
Slider for the activity duration
Now let’s add the functionalities inside our AddActivity function.
First off we will destructure off all our props again. Then we will grab the user id from authUser.uid
We will setup the queryData for our activity by converting our selectedDay object to a date string.
The activity will be managed by a state hook which has the defaultActivity as follows:
const defaultActivity = {

 name: '',

 type: 1,

 duration: 60,

 date: queryDate

};

const [activity, setActivity] = useState(defaultActivity);
When the textfield or selectbox changes we want to update our activity:
`const handleChange = e => {
const {name, value} = e.target;
setActivity({
...activity,
date: queryDate,
});
}; `
We keep the existing activity and dynamically update the e.target fields by using the name and value.
To update our slider, we will grab the aria-valuenow attribute from the element and update it with setActivity.
Our isValid function only checks if an activity type has been entered.
On pressing submit, we’ll check if the authUser actually exist before sending it to the database. We will add the addActivity method inside our Firebase class in the next section.
With setTimeout() we can hide the alert after a couple seconds.
AddActivity.jsx now contains the following code:
Add the following function inside firebase.js:
addActivity = (uid, activity) => {users/${uid}/activities
const ref = this.db.ref().child():
ref.push(activity);
}
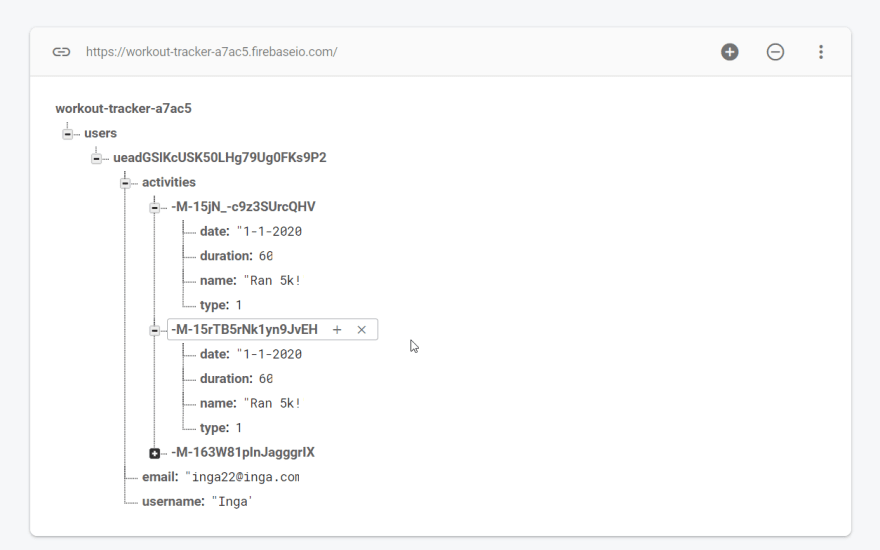
This creates a new /activities branch inside our user branch with a new activity.
Now try to add an activity, it should show in inside the realtime database under the correct user. Check if the date is correct.
Now we will add the alert message so our user knows what happend. The only thing we have to do is add a Snackbar component within our main Grid.
Make sure you have Grid, Paper and Snackbar imported from material UI.
<Snackbar

 anchorOrigin={{ vertical: 'bottom', horizontal: 'right' }}

 open={openSnackbar}

 message={snackbarMsg}

/>
Now our alert should show up when we add a new activity and automatically disappear after 3 seconds.
Next up we will set up the activity list.
List of activities
Create a new folder called ActivityList inside our /components folder with a file index.jsx and import it into our Calendar component. Like we did before, let’s think of all the properties we need our ActivityList component to have.
List of activites
The authUser
Alert open/closed
Alert message
Loading true/false
For the activities and loading we will use a state by using hooks.
Then we will create a function retrieveData() that fetches the activities of the user and stores them inside our activities state hook.
Now we will fire this function as soon as our component mounts, because we are using a functional component we have to use the useEffect lifecycle hooks to achieve this.
useEffect(() => retrieveData());
Make sure to import it also in Calendar.jsx. You can read more about the useEffect hook here: https://reactjs.org/docs/hooks-effect.html
Now console.log some text and load your application, you will see that the component re renders infinitely. We need to connect the useEffect hook to the selectedDay variable so that it run the retrieveData() function everytime the selectedDay state changes.
useEffect(() => retrieveData(), [selectedDay]);
Run your app again and check in the console that the component only re renders whenever you select another day.
Now if you console.log the activities state you will see that the activities are coming in as one big object containing activity objects.

The keys are auto generated by Firebase. So inside our ActivityList we will map over the activities using the values of the object.
We will add a loader icon inside our /ActivityList folder. I’m using loading.io to generate a loader icon, you can make your own icon here.

Inside our ActivityList, we will again import the Table components from Material UI and destructure off the properties that this component receives.
If loading is true, we will show the image with the loader icon.
If the activities are not set (new user) or if there are no activities found, we will notify the user.
We are also importing a delete and edit icon that fire off functions.
Deleting an activity
For deleting an activity in our Firebase realtime database, we will just update the activity with empty values and Firebase will automatically delete this activity from our user. This way we can also use the updateActivity function for editing an activity.
Inside our firebase.js class:
updateActivity = (uid, activity, activityKey) => {users/${uid}/activities/${activityKey)
const ref = this.db.ref().child();
ref.update(activity);
};
The activity key we will retrieve by getting the object key from our activity:
const activityKey = Object.keys(activities)[i];
Our ActivityList.jsx then finally looks like:
In the next section we will add the editing functionality.
Editing an activity
Like we do everytime, let’s add a new folder inside components called EditActivity with a file index.jsx (empty functional component for now). Then import it into our Calendar.jsx component.

Then we think about the properties this component needs to receive.
If the user is currently editing
The to be edited activity
The activity key inside the database
Alert message
const [editing, setEditing] = useState(false);

const [activity, setActivity] = useState(null);

const [activityKey, setActivityKey] = useState(null);
Based on the state of editing we’ll show the AddActivity or EditActivity component:
Let’s copy all our code from AddActivity to EditActivity as they are quite similar.
On our handleSubmit function we will use the updateActivity method. Besides that, this component is almost exactly the same:
Try to edit an activity, it should update immediately.
We are almost finished with building our workout tracker application, great job!
Showing active days
It would be nice for the user to see which days contain activities by highlighting them right? Let’s build that.
Let’s create a hook with an empty array for our active days inside our Calendar component.
const [activeDays, setActiveDays] = useState([]);
And send the activeDays state to the CalendarBody component as props.
We will add another function inside Calendar to retrieve all the active days from the user. We will map over every activity and store the month/day combination by slicing the result. This result gets stored inside a new array which we will update activeDays with.
Everytime retrieveDate() function is called (so when another day is clicked) we also have to check again if the activeDays are changed.
Then inside calendar-body.jsx we’ll check if the selected day is found inside the array of activeDays. If so, we’ll add an extra class to the table cell which makes the day have a little green circle behind it.
Add some activities and now they should show up with a little green circle.
Well, that is it for now. Great job! Using these techniques you can expand this app with functionalities like:
Admin page
User settings
Advanced activities
Custom activities
Activity chart
Workout programs
And store it into Firebase.
As a last step, I want to quickly show you how to deploy our application in minutes using a free AWS service called Amplify.
This only works if you are storing your application on Github.
Create a free account on aws.amazon.com
Browse to the Amplify service inside the console
Click connect app, Github and continue
Select your Github repository of the workout tracker and choose the master branch
Press next, save and deploy and … you’re app will be live in minutes!
Amplify is a smart service that decides which files and configs are needed to setup your application.
Thanks for checking out one of my first tutorials!
Checkout the final result: https://master.d2e0orovu8bxyk.amplifyapp.com/**
**Source code: https://github.com/sanderdebr/workout-tracker

Top comments (0)