Reposted From https://www.sqlmessenger.com/faqview.html?id=576
Q: Some colleagues send me Excel files daily. My task is to save them to a designated folder (for archiving and future reference) while also copying their data into a master spreadsheet (one file per month). Initially, I only received a few files each day, but now the increased volume is very time-consuming. Could SQLMessenger help automate this process?
A: Yes, SQLMessenger can automate this for you. Its MailAttachmentBot plugin identifies email types based on subject lines and attachment filenames, then processes the files automatically.
The plugin handles everything: fetching emails, storing files, and loading data into your SQLMessenger-integrated PostgreSQL database (running locally on your machine).
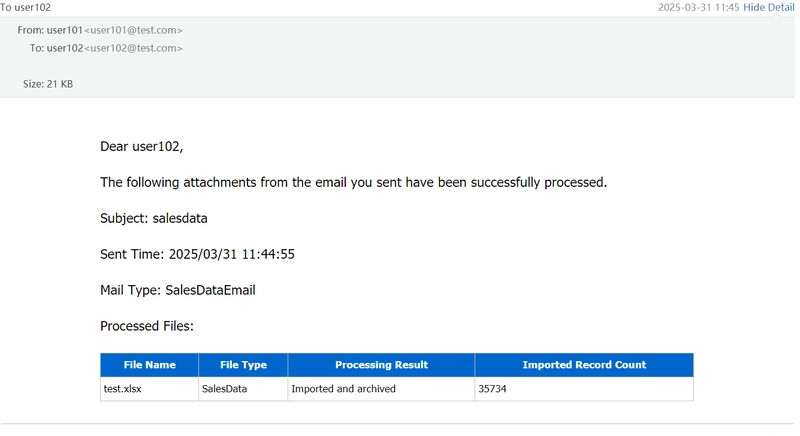
Once installed, the system checks your inbox every 30 seconds. If a new email is detected, it processes the attachments and sends a confirmation email to the sender.
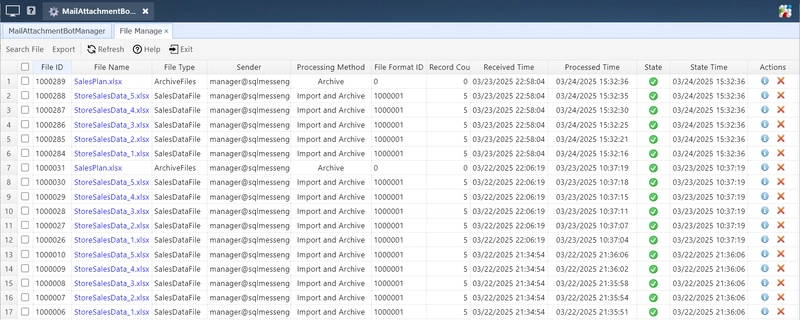
You can manage received files in the File Manager, where you can:
- View the list of processed files
- View file details or open original attachments
- Check data content
- Merge multiple files into a single Excel sheet for batch processing
You can also set up automated tasks to process the data, generate reports, and even email them to colleagues.
If you're unsure how to configure reports in SQLMessenger, please share your report templates and statistical conditions with us, and our team will design the reporting tasks for you. Our email address is support@sqlmessenger.com.
Step 1: Install the MailAttachmentBot Plugin
If you are using SQLMessenger version 2.2.0004 or later, skip this step—the MailAttachmentBot plugin is already installed with the setup program.
If you are using version 2.2.0003 or earlier, first upgrade to version 2.2.0004, then install the MailAttachmentBot plugin. Click here to view the MailAttachmentBot installation guide.
If you are unsure how to upgrade SQLMessenger, Click here to learn about the upgrade process.
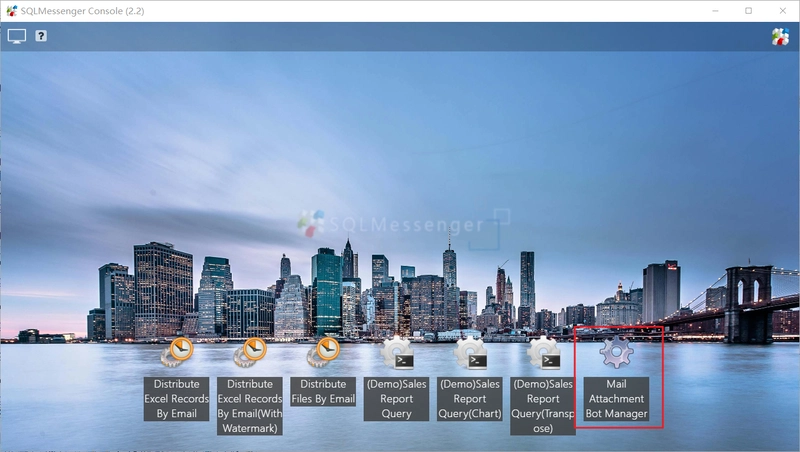
Once the plugin is installed, click the "Mail Attachment Bot Manager" icon to open the configuration and management interface for the MailAttachmentBot plugin.
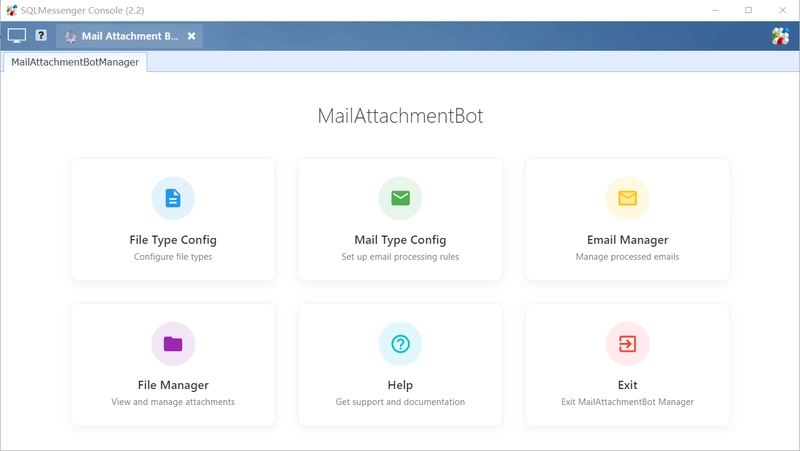
(The Mail Attachment Bot Manager)
Step 2: Configure Email Types and File Types
After installing the plugin, configure the email types and attachment file types you want to process in the plugin manager. The system will process emails based on your configured keywords and file formats.
For example, if you want the system to:
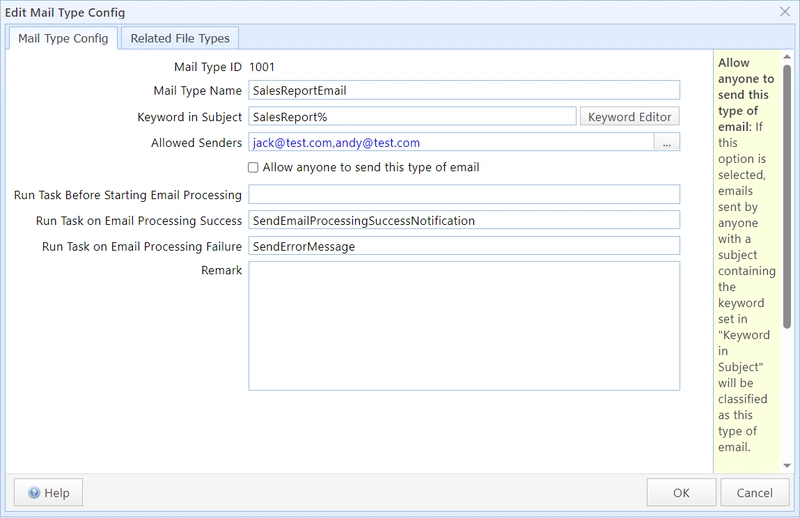
Process emails sent from jack@test.com or andy@test.com
Filter emails with the subject containing the keyword "SalesReport"
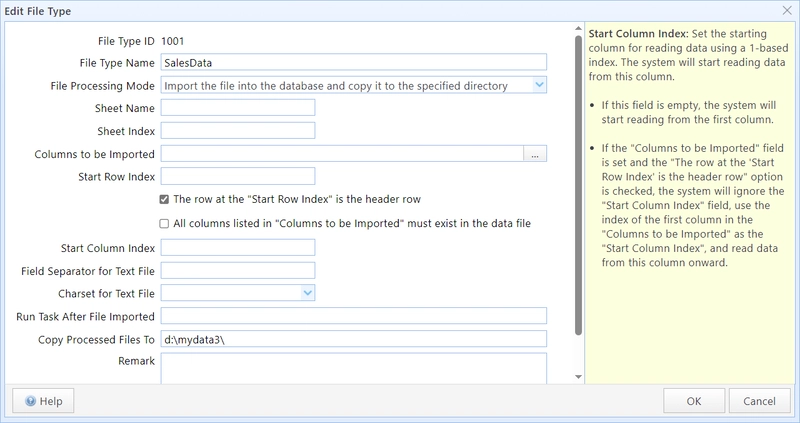
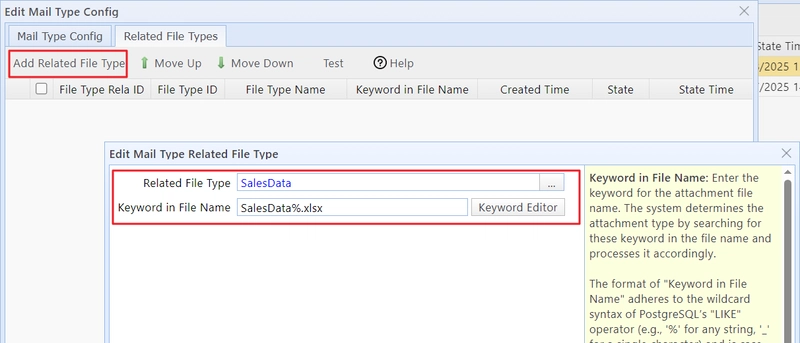
Import Excel attachments with filenames starting with "SalesData" into the database
Save the files to D:\mydata for centralized storage
You can configure it as follows:
(1) Configure file type
(2) Configure email type
(3) Define the relationship between email type and file type
Step 3: Enable MailAttachmentBot to Process Emails Automatically
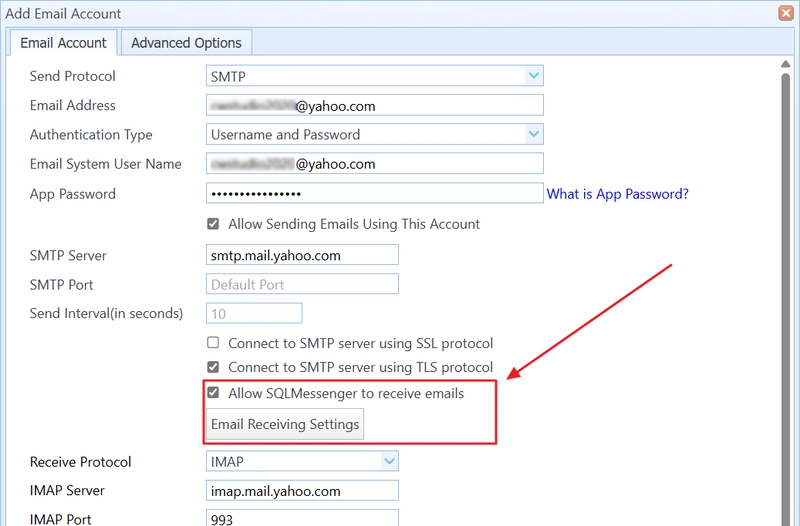
After setting up the email types, add the email account for receiving messages in the "Email Accounts Manager".
Click here for detailed email account configuration instructions.
When configuring the email account:
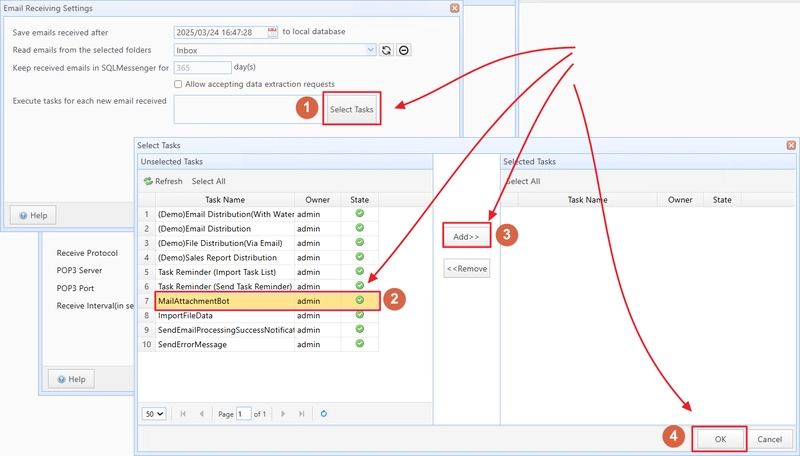
- Check the "Allow SQLMessenger to receive emails" option and Click "Email Receiving Settings" to open the settings dialog;
- Click "Select Tasks", choose the "MailAttachmentBot" task from the left list, add it to the right list, and click "OK".
Once the email account is set up, the system will check the inbox every 30 seconds. If a new email is detected, it will trigger MailAttachmentBot to process the email.
For a detailed guide on MailAttachmentBot, visit the MailAttachmentBot User Manual.





Top comments (0)