
Continuing from my previous post where I explained about how to host static website from S3.
Link to my previous post: https://dev.to/sudhachandranbc/host-static-website-in-s3-with-namecheap-dns-2ioc
Now, let's learn how to make S3 website URL to use HTTPS for security.

1. AWS Services used
- S3
- Certificate Manager
- CloudFront
2. Certificate Manager
- Request a public certificate from AWS Certificate Manager.
- Provide your website's domain name and subdomain name as well.
- Example:
example.comandwww.example.com - Before the certificate can be issued, Amazon needs to be able to verify that you own the specified domains.
- You can choose from two verification methods: Email or DNS.
- I have used mail validation, so it looks like below before validation.

- Mail configured in DNS server will receive email for validation. Upon approval, you'll get following message.

- Finally your certification is ready to used in CloudFront distribution.

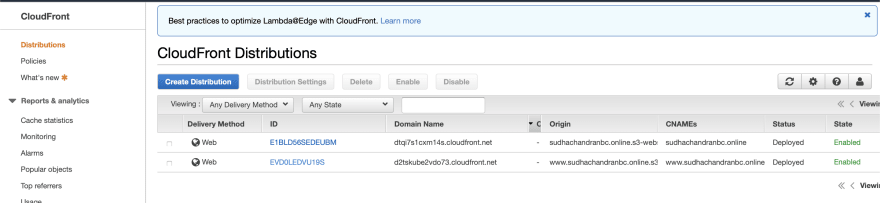
3. CloudFront Distribution.
For the final step we are going to use CloudFront which allows us to use the new SSL certificate to serve the website with HTTPS. CloudFront also speeds up the distribution of web content by storing it at multiple edge locations and delivering from the closest edge location to a user.
We need two new web distributions, one for each S3 bucket.
- Open the CloudFront console.
- Choose Create Distribution.
- Under Web, choose Get Started.
- Origin Domain Name: Set this to the S3 website endpoint for one of the buckets. Important: This field will give you some auto-complete options with your S3 bucket names. However, using these can cause issues with redirecting to the bucket endpoint. So instead use the bucket endpoint without http:// directly.
- Origin Id: This populated for you when you enter Origin Domain Name.
- Viewer Protocol Policy: Set to “Redirect HTTP to HTTPS”.
- Alternate Domain Names (CNAMEs): This should match the name of the S3 bucket you’re pointing to. For example “example.com”.
SSL Certificate: Select “Custom SSL Certificate” and select your new certificate from the dropdown.
Repeat this step again for the second S3 bucket.
- The distributions can take a while to spin up, so while we wait, let’s do the finishing steps.
3. Final Steps.
Back in S3, go to your secondary bucket (www.example.com), in the Properties tab and under Static Website Hosting set the redirect protocol to HTTPS.
In your DNS service you’ll need to go update the CNAME record from there to point to the CloudFront domain name.

Finally, you website is now available at the custom domain and served with HTTPS!
Thank you for reading! 😊

Top comments (0)