Serverless computing is a cloud computing model in which a cloud provider automatically manages the provisioning and allocation of compute resources. I am creating a dashboard to demonstrate how to build an Angular 9 app and deploy it to AWS Lambda and then expose these for public consumption using API Gateway.
**Prerequisites
**Node 12
Angular CLI
AWS CLI
Part 1. Build an angular app
Create a new app
Start with creating the angular project by using angular cli named ‘angular-app’. Let’s add scss for styles and angular routers.
ng new angular-app --style=scss --routing=true --inlineStyle=false
You can start the application by ng serve and test it in browser http://localhost:4200/.
Now let’s add some packages that we are going to use for the COVID-19 dashboard.
# add sass
npm i --save node-sass

# add bootstrap
ng add @ng-bootstrap/ng-bootstrap

# install chartjs
npm i --save chart.js
I am going to create a dashboard with some statistics and graphs, such as daily world-wide statistics, daily increase graph, total cases world-wide, and timeline graph. The data source I have obtained from GitHub as a demonstration purpose.
Create components
I use the ng command to create the following components.
# generate components
ng g c components/daily-increase

ng g c components/countries-summary

ng g c components/overall-timeline

ng g c components/overall-summary

ng g c components/mailing-list
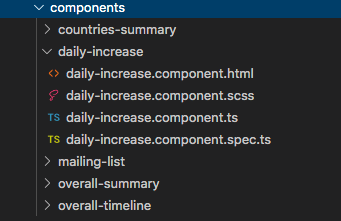
It should generated the components in this structure, with each component folder contains the following files.
 angular component folder structure
And reference these components into our app.component
Don’t forget add these components into our app.module as well.
Create Services
I also need to create a service that would make api calls from a backend service and return some data for our graphs.
ng g service services/covid
It should generate a covid.service.ts under the services folder and I am using the http client to make http calls to retrieve some json data.
Because I created these components as sub components inside app component and some of them are sharing the same data. So I am using Observable.subscribe() and Subject.next() to communicate between them.
With the covid.service you can subscribe to new overall data in any component with getOverall() method,
send overall data from any component (in this case I am calling it from app component) with the callOverall() method.
by the way, I defined the api Url in our environment.ts that can be accessed globally across the whole application.
Create a graph for daily-increase.component
I can modify each component and create whatever graphs and content we needed. I am taking the daily-increase component as an example. (for the rest you can get the source code from GitHub)
I modify the daily-increase.component.html with a canvas that I am going to use to display the chartjs graph.
And daily-increase.component.ts to call service, populate data and generate graph.
Repeat the similar processes for other graph components. For reference you can clone the full source code from GitHub.
Part 2 — Configure serverless and deploy to AWS
First we need to setup an AWS account and obtain the programmatic access. After you have obtained the Access_Key & Access_Secret, keep them somewhere safe and you will need them for lambda deployment. You can find it in IAM -> Users -> Security Credentials -> Create access key.
Then go back to your app and install the serverless package and configure it with your AWS access_key and access_secret.
# install serverless
npm install -g serverless

# configure serverless with aws credentials
serverless config credentials --provider aws --key <ACCESS_KEY> --secret <ACCESS_SECRET>
Add @ng-toolkit/universal that allow our app to support server-side rendering,
ng add @ng-toolkit/universal
And add aws as provider,
ng add @ng-toolkit/serverless --provider aws
A few other packages may required,
#package and create your lambda application using Express framework
npm i --save express

npm i --save aws-serverless-express

#Serverless plugin that enables/disables content compression setting in API Gateway
npm i --save-dev serverless-api-compression
Finally, deploy with this command.
npm run build:serverless:deploy
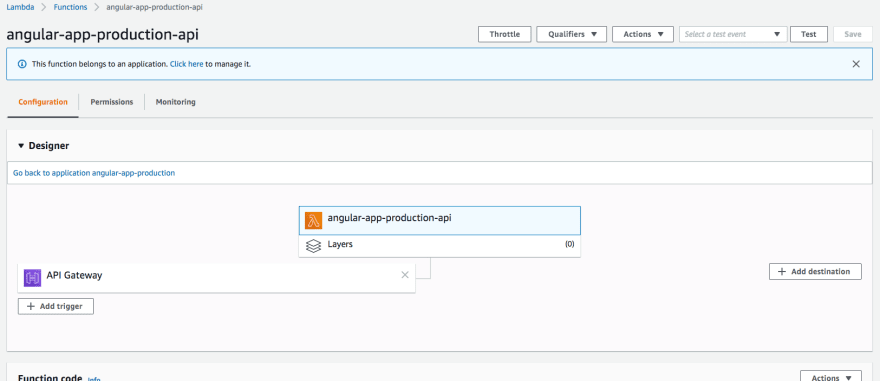
After the deployment completed, you should see an endpoint and function name, and try to open the url from your browser, you should be able to see your web app.
See it from the AWS Lambda interface
Part 3. Configure dns and domain
You should also see production-angular-app from API Gateway as well.
Register a domain
I am using CloudNS to register my domain and configure my dns records there. They provide free dns hosting for one dns zone. Set your NS records to:
ns1.cloudns.net
ns2.cloudns.net
ns3.cloudns.net
ns4.cloudns.net
Create SSL certificate
Because AWS API Gateway only services content from https, so we need to create a ssl certificate for our web app to be served. And you can request a public ssl certificate from AWS Certificate manager for free.
Either you can go to certificate manager web page and request a certificate
Or using AWS cli to request, it will generate a CName validation pair that you need to put into your domain register.
To validate you own this domain, you need to obtain the validation CNAME and Value from above, and create a CNAME record in your domain register, this case CloudNS.
Once you have done that, you could see the certificate status from Certificate Manager web page, or use this command by AWS cli
aws acm certificate-validated --certificate-arn <Certificate-CRN>
Create custom domain in API Gateway
You can go to API Gateway -> Custom Domain Names -> Create,
in my example I am using US-West-2 as my region, and created my ssl certificate in the same region. So I have to select Regional endpoint for my custom domain name. (For Edge-optimized you will need to have ssl created in us-east-1)
After created the domain name, you need to select the API mapping, to choose the target API and Stage (we only have production, if you have a staging environment, you can also bind a sub-domain to the staging site)
Or you can use the following AWS cli commands to achieve the same goal, is your domain name, $CERTIFICATE_ARN is a variable from above. (you can obtain it from certificate manager as well)
To know your API Gateway ID, you can see it from API list page,
Finally, you are all done with your covid-19 dashboard deployed to AWS Lambda and you can access it via API Gateway through your browser.
Here is the link to GitHub to grab the complete source code for the app.
superwalnut/covid19-dashboard
*I have created a COVID-19 dashboard using Angular 9 and demostrate how to deploy it to AWS Lambda using serverless…*github.com


Top comments (0)