
The File Manager is a component similar to Windows File Explorer that allows users to efficiently manage, browse, download, and upload files.
This blog explains the easy steps to synchronize your Google Drive with Essential JS 2 File Manager and download, upload, and preview images in it.
Getting started
In order to access the files from the Google Drive, we need the Google Drive file provider, which is an interface between the Google Drive and our File Manager. This helps in managing the files in the Google Drive Storage.
Clone the ej2-google-drive-aspcore-file-provider using the following command.
| git clone https://github.com/SyncfusionExamples/ej2-google-drive-aspcore-file-provider ej2-google-drive-aspcore-file-provider
cd ej2-google-drive-aspcore-file-provider
|
To run the google drive service we need client_secrect.json file. This file should be generated from the google drive API that helps to access the files from the storage. Please follow the below steps to generate this json file.
Generate client_secrect.json
- Log into https://console.cloud.google.com/.
- Tap on the drop-down button and select NEW PROJECT.


- Provide a name for the project and tap C** REATE**.

- The created project will show in the notifications. Select VIEW to open it.

- On the left page, select APIs & Services -> Library ,
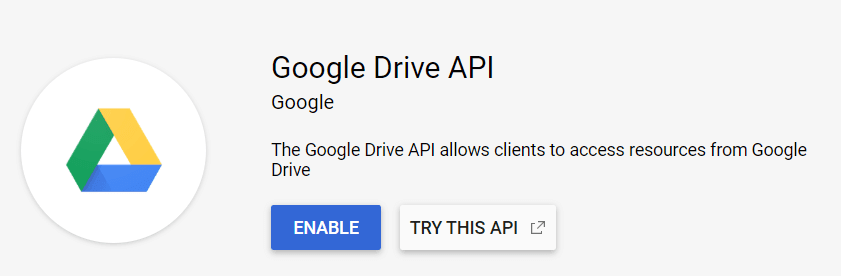
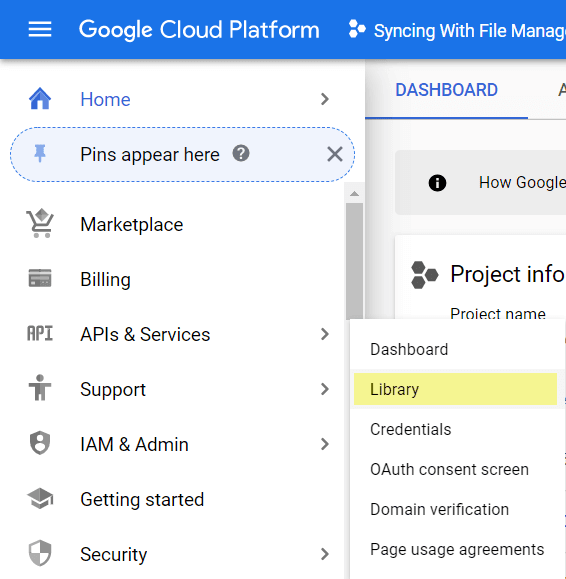 Look for the Google Drive API and select it. Then, select Enable.
- Select API & Services-> OAuth consent screen , provide the application name, and click Save.


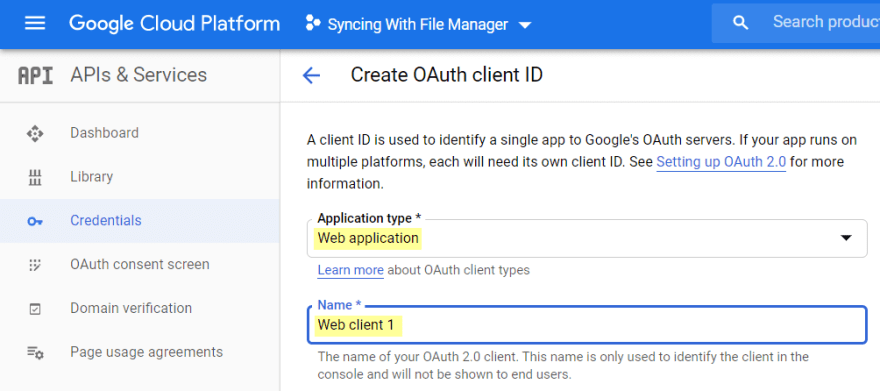
- Now, in the left pane, select Credentials , click CREATE CREDENTIALS , and select OAuth client ID.
 Choose Web application as the application type, give it a name, and click CREATE.
 OAuth Client will be created and the Client ID and client secret will be displayed. Click OK.
 - Now the OAuth Client IDs will be listed. Select D** ownload** and save it.

After generating the client secret data, copy the JSON data to the following specified JSON files in the cloned project location.
EJ2FileManagerService > credentials > client_secret.json
GoogleOAuth2.0Base > credentials > client_secret.json
Running the application
Once cloned, open the solution file in Visual Studio. Build the project and run it after restoring the NuGet packages.
Now the service project is ready to use. Next, create a basic JavaScript File Manager example by referring to the getting started documentation. You can also get a runnable and preconfigured example from this GitHub repository.
File Manager AjaxSettings
To perform the basic file actions of read, delete, copy, move, rename, and search, and to retrieve the details of files from the Google Drive service, start mapping the following service URLs to the ajaxSettings property of File Manager.
Here, the hostUrl will be your locally hosted port number.
var hostUrl = http://localhost:62870/;
ajaxSettings: {
      url: hostUrl + 'api/GoogleDriveProvider/GoogleDriveFileOperations'
}
File download
To perform a download operation, initialize the downloadUrl property in the ajaxSettings of the File Manager component.
var hostUrl = http://localhost:62870/;
ajaxSettings: {
      url: hostUrl + 'api/GoogleDriveProvider/GoogleDriveFileOperations',
      downloadUrl: hostUrl +'api/GoogleDriveProvider/GoogleDriveDownload'
}
File upload
To perform upload operation, initialize the uploadUrl property in the ajaxSettings of the File Manager component.
var hostUrl = http://localhost:62870/;
  ajaxSettings: {
        url: hostUrl + 'api/GoogleDriveProvider/GoogleDriveFileOperations',
        uploadUrl: hostUrl +'api/GoogleDriveProvider/GoogleDriveUpload'
  }
File image preview
To perform image preview, initialize the getImageUrl property in the ajaxSettings of the File Manager component.
var hostUrl = http://localhost:62870/;
  ajaxSettings: {
        url: hostUrl + 'api/GoogleDriveProvider/GoogleDriveFileOperations',
         getImageUrl: hostUrl +'api/GoogleDriveProvider/GoogleDriveGetImage'
  }
Conclusion
In this blog, we learned the steps to configure Google Drive with the File Manager component. Try it yourself and manage your files and images in Google Drive using a UI of your choice by customizing the File Manager.
If you’re already a Syncfusion user, you can download the product setup from our website. Otherwise, you can download a free, 30-day trial here.
If you wish to send us feedback, please use the comments section below. If you would like to submit any questions, please feel free to contact us through our support forum, Direct-Trac, or feedback portal. We are always happy to assist you!
The post Easy Steps to Synchronize Google Drive with JS 2 File Manager appeared first on Syncfusion Blogs.

Top comments (0)