Plants are a fresh and wholesome addition to any home, but can quickly become tiresome …watering plants takes a surprisingly large amount of time, energy and (for me at least) is shockingly hit and miss.
With the T3chFlicks smart hanging basket, you can be lazy and still have beautiful blooms! With just the touch of a button on your Arduino Dashboard, you can water your plants from wherever you are. What’s more, the hanging basket is packed with other cool sensors — view things like weather and light intensity on your dashboard so you can check up on your plant’s environment and get local measurements to help you plan your day (or outfit).

Supplies
Arduino Maker IoT Bundle: https://www.distrelec.nl/en/mkr-iot-prime-bundle-...
3D Printed parts: https://gitlab.com/t3chflicks/smart-hanging-basket
12V white led strip: https://www.distrelec.nl/en/led-strip-12-vdc-bart...
5V regulator: https://www.distrelec.nl/en/ldo-voltage-regulator...
Power supply: https://www.distrelec.nl/en/plug-in-power-supply-...
Connecting clips: https://amzn.to/2l0gs7X
Solenoid valve: https://amzn.to/2n767YG
Bolts: https://amzn.to/2l1hErI
UV transparent plastic: https://rover.ebay.com/rover/1/710-53481-19255-0/...
Wire — https://amzn.to/2n5lxMR
3D printer — https://amzn.to/2mHGfCf
Heat gun — https://amzn.to/2mAHFP4
-
Soldering iron — https://amzn.to/2mGZQT3
🔗 Get The Smart Hanging Basket Files On Github 📔
Tutorial
Build 🛠️
Before we get onto the make, we wanted to take you through some of our thinking behind the project.
Background — Design
When we embarked on this planty project, we knew we wanted to make a smart hanging basket but we weren’t entirely sure where to begin. We had a couple of ‘must-haves’ for our smart hanging basket, namely:
It has to be able to hold the weight of a damp soil/flower-filled basket
It must house the electronics for the LEDs, sensors and water valve
It needs to have wired power because a solar solution can’t provide enough energy during the winter months (thanks, England)
It must have an easy-to-access connection with a hose pipe.
Despite best intentions, our first attempt at a design was a pretty hideous block, but after going back to the drawing board, we produced a refined version which (we think) looks quite good!
For the electronics, the Arduino MKR IoT bundle saved the day — the kit contains lots of sensors which were ideally suited to our purpose.

The Arduino environment shield
The environment shield on the Arduino kit has sensors for: luminescence, temperature air pressure, humidity and UV (broken down into UVA, UVB and UV index).
These sensors can act like a mini weather station for our hanging basket, giving the user access to accurate, live, local information about weather conditions.

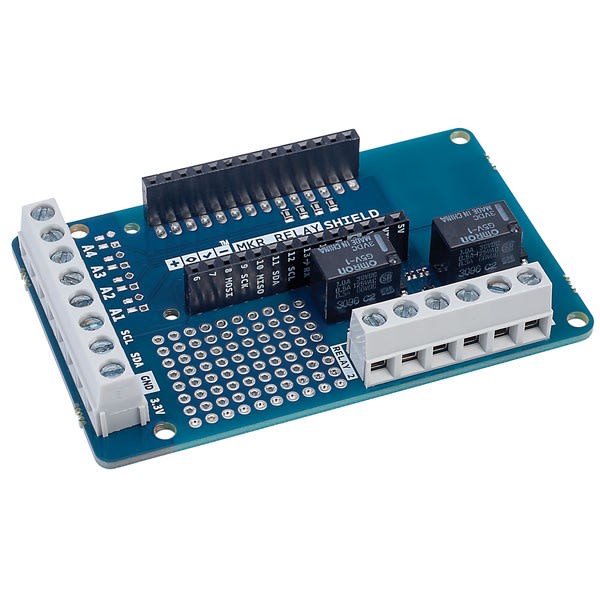
The Arduino relay board
The relay board contained within the kit means we can easily control higher power devices. We decided we could use this to control water flow to the hanging basket using a 12V solenoid valve and also decided a powerful light — we made one using some 12V LED strips — would be a helpful addition.
We also decided to try out the Arduino cloud platform for this project. In a previous project, we made an app for displaying real time data, but honestly, the cloud platform was a much more straightforward way to control our Arduino project and was super user-friendly.
3D Printed Parts
There are seven main parts:
Main Bracket
Body
Top (lid)
Bracket for valve
Connectors for the hose nozzle
Light support
Light cover

We designed these parts ourselves — you can find the files for them here. We decided to print in PETG filament for improved strength, durability and longevity.
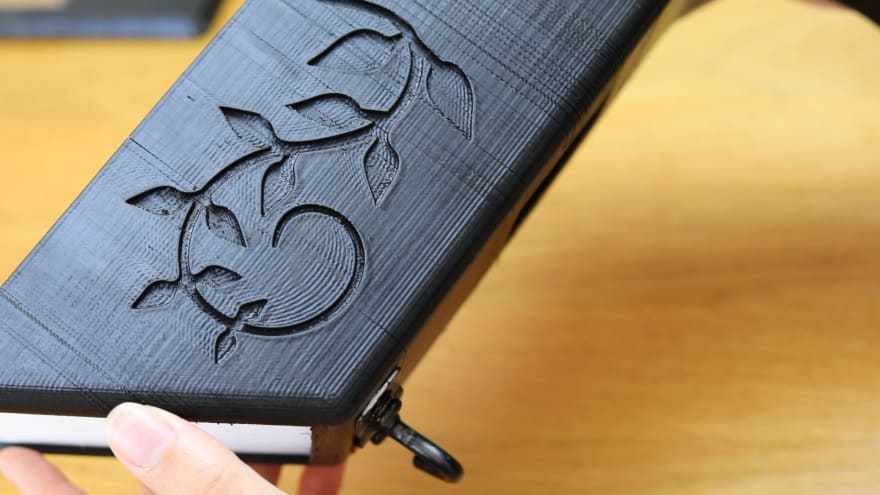
Sadly, the print wasn’t perfect so we used a heat gun to try and heal some of the layer gaps (does anyone know how we can get it to print nicely rather than attack the finished print with pyrotechnics?). We left a slot in the top for a window so the sensors can still see and added some embossed effects on the side to try and make it look a bit prettier.


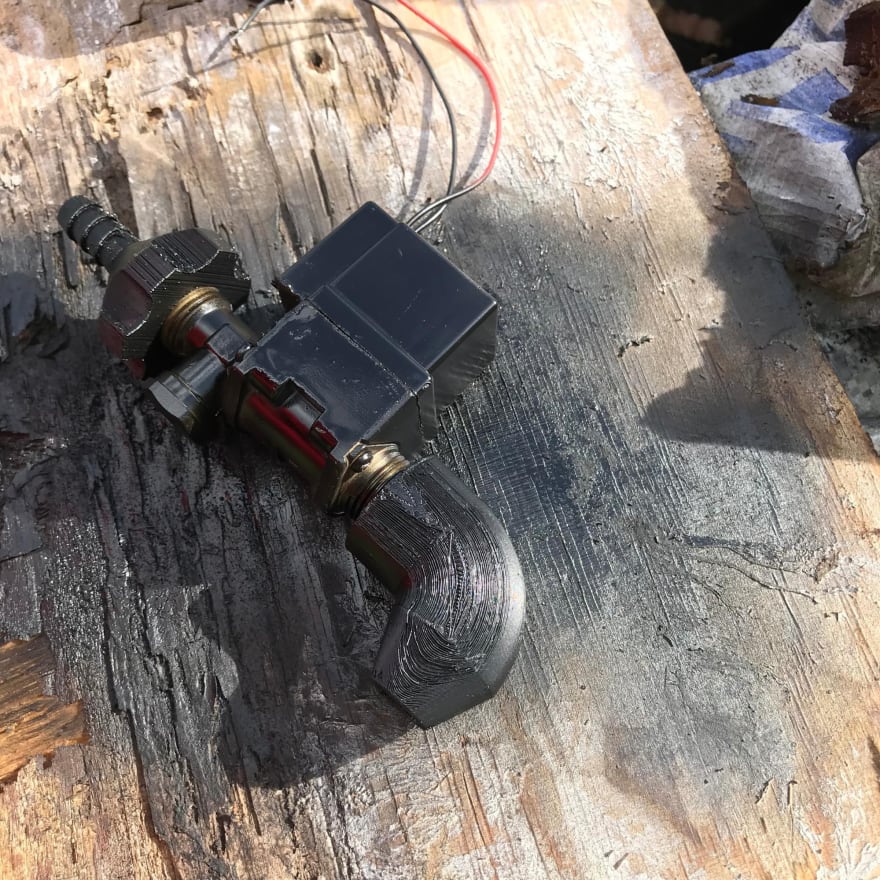
Prepping the Water Valve
Take the solenoid valve and screw the wires into terminal on top — one for positive and one for ground. It doesn’t matter which way round they go.

Make a hole in the plastic lid which covers the wiring for the solenoid valve. Pass the positive and ground wires through this hole.

The solenoid valve case has a hole where wires would ordinarily come out. As we’ve made the hole in the lid and put the wires through this, we no longer need this. Fill this hole with hot glue (an elegant solution, right?!) so water can’t get in.
OPTIONAL: spray paint everything black for a smooth-looking finish.

Screw the hook for the hanging basket into place at the end of the bracket.
Arduino Stack
Put the 5V power regulator in the perfboard section of the bottom board (i.e. the relay board). Either side on the relevant pins, put headers that will turn 12V-> 5V for the Arduino.

Make a stack of Arduinos, putting the sensor board into the mkr1010 (Arduino), and the mkr1010 into the relay board.

Plug the wires from the solenoid wires into the relay board: Red to 12V, Black to Common © on Relay normally closed (NC) relay to GND of 12V.
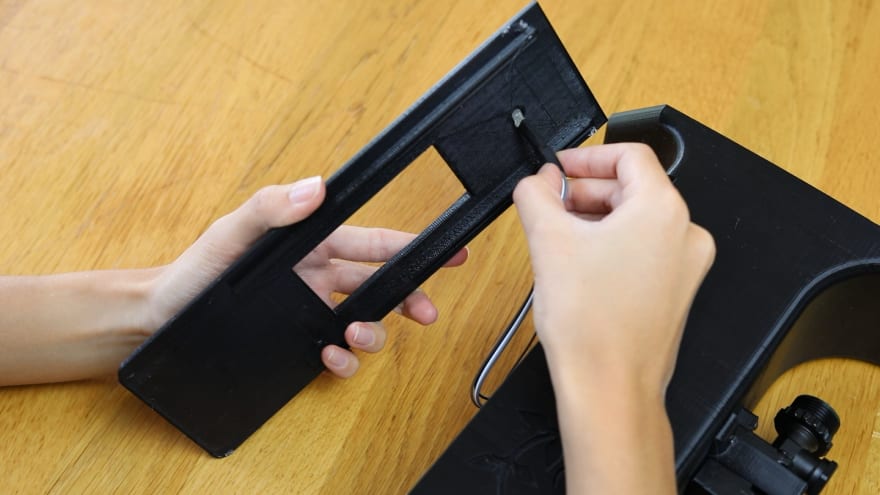
Flood LEDs
Cut five strips of six LEDs from a strip. Wire the positives and negatives together as shown and glue them onto the thicker of the 3D printed light covers.


Next, wire up the light by connecting the positive wire from the LED grid to the 12V power supply multiconnector. Connect the negative wire from the LED grid to NC (normally closed) of the relay board. Finally, connect a ground wire from Common on the relay board to the Ground of the 12V power supply multiconnector.
Cover the light with the thinner rectangular 3D printed part.


Signal LED
Connect a 220 Ohm resistor to the ground pin of the RGB LED and then plug it into the GND pin on the top of the stack.

Connect the R, G, and B positives to pins 3, 4, 5. Heat shrink and cover and push the LED through its hole in the lid.

Connect Power
Connect the 12V and Ground multiconnectors to a euro barrel plug male head.

Plug in the female euro barrel plug head from the 12V supply.

Arduino Cloud
As we mentioned earlier, creating dashboards for your Arduino-based IoT project is made simple by their cloud platform.

Go to the Arduino Cloud and create an account.
Create a new ‘thing’ (an Arduino Cloud connected device).

Add properties — these will be the variables you are measuring or monitoring. We added temperature as an example.

Open your online sketch editor. You can see that some default connections for updating the variables has been added. These should work fine, but to use the temperature measurement on the ENV shield, you will need to add a bit of code which can be found in the examples on the left hand side of the editor.

Enter your WiFi credentials.

Upload your code and return to the dashboard where, if you have done everything correctly, you should see a live updating value of the new variable.

We then went on to add all the other sensors on the device to the Arduino Cloud: temperature, humidity, illuminance, pressure, UVB, UVA. We also added controls for RGB colour of the LED and floodlight and water control. Check out our code to see how we did it.

Put Together
Glue the Arduino in place inside the case and tidy up the wires.

Put the lid on the case and glue on the 10 X 5 cm UV transparent cover.


Screw the hose-to-solenoid valve connector onto the solenoid valve at the end nearest the wall. Connect the hose to the valve connector.

Screw the nozzle onto the other side of the solenoid valve (i.e. the side nearest the hanging basket hook).
Screw the whole bracket into a wall or fence of your choice (do ask the owner of the vertical surface before you do this…).

Connect the hose to the tap and turn it on.
Plug in the power supply and sit back as your smart hanging basket means you have green fingers without getting your hands dirty!

Use and Admire and Improve
You can now use Arduino creator dashboard to control your Smart Hanging Basket. The app lets you control the floodlight and watering as well as monitor all the sensor readings.


There’s a web hooks tap on Arduino Dashboard page that says
‘Webhooks allow you to send and receive automated messages to other services. For example you could use a webhook to receive a notification when a property of your Thing changes. If you’re new to webhooks, check this sample project.’
They don’t seem to have the functionality for ‘receiving automated messages from other services’ from what we can tell, however this would be awesome because you can link your google calendar to IFTTT and automate your watering! If you’re feeling up to challenge of adding it yourself, it is done here.
You may have noticed that the lid doesn’t sit flush. We fixed this by using some hot glue to fill in the gap (post video) and it works quite well!
🔗 Get The Smart Hanging Basket Files On Github 📔
Thanks for reading
I hope you have enjoyed this article. If you like the style, check out T3chFlicks.org for more tech focused educational content (YouTube, Instagram, Facebook, Twitter).

Top comments (0)