In this post we are going to take a look at the different ways we can style a picker view in our SwiftUI project. Let's first setup a simple picker view like in the example below.
    var arrayOfNames = ["Tom", "Nick", "Tony", "Dylan"]
    @State private var selectedIndex = 0

    var body: some View {
        Picker("Names", selection: $selectedIndex) {
            ForEach(0 ..< arrayOfNames.count) {
                Text(self.arrayOfNames[$0])
            }
        }
    }
}
Above we created a basic picker view with four names to choose from. Now let us change the style of our picker to be included in a Form.
    var arrayOfNames = ["Tom", "Nick", "Tony", "Dylan"]
    @State private var selectedIndex = 0

    var body: some View {
        NavigationView {
            Form {
                Picker("Names", selection: $selectedIndex) {
                    ForEach(0 ..< arrayOfNames.count) {
                        Text(self.arrayOfNames[$0])
                    }
                }
            }
        }
    }
}

In the example above is wrapped our code in a NavigationView and a Form. This changes our picker view style so that it segues us to another view to make our selection. This is great for a picker that has many options to choose from. But let's say we didn't want to segue to another view to see our options.
Let's see how we can implement a segmented picker view style.
    var arrayOfNames = ["Tom", "Nick", "Tony", "Dylan"]
    @State private var selectedIndex = 0

    var body: some View {
        NavigationView {
            Form {
                Picker("Names", selection: $selectedIndex) {
                    ForEach(0 ..< arrayOfNames.count) {
                        Text(self.arrayOfNames[$0])
                    }
                }.pickerStyle(SegmentedPickerStyle())
            }
        }
    }
By just adding .pickerStyle(SegmentedPickerStyle()) to our picker view, SwiftUI gives us a segmented style picker view with minimal change to our code.
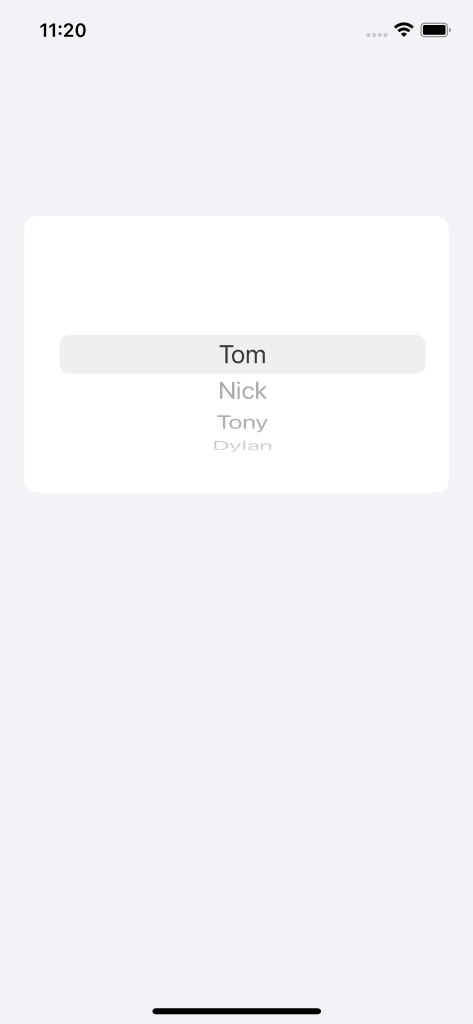
Let's say we don't want either of these styles. What if we wanted a picker view like we originally had in our first example. We can easily do this by switching our picker style to .pickerStyle(WheelPickerStyle()).
I hope this helps you in your next SwiftUI Project.
Thanks for reading and happy coding! ⛏⛏⛏


Top comments (0)