Task 1: Creating IoT Hub
Sign in to the Azure portal.
search for and select IoT Hub
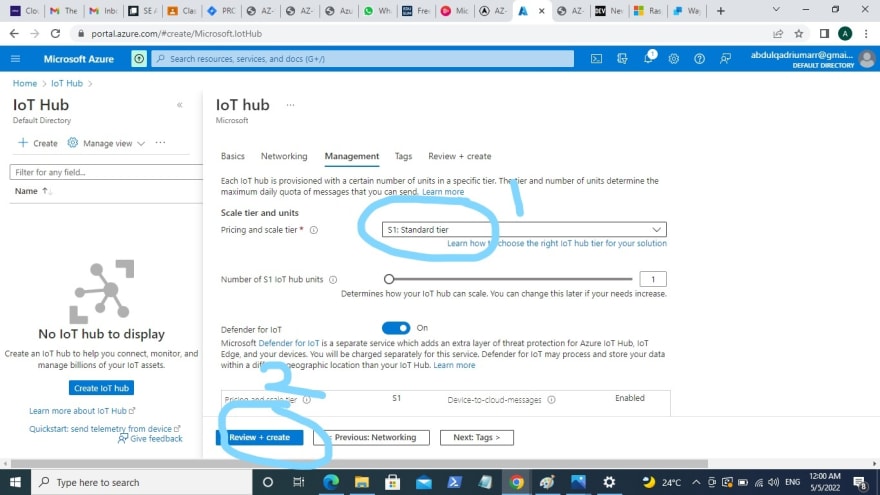
click Create and fill in the fields as shown in the image below

Go to the Management tab, and use the dropdown to set the Pricing and scale tier to S1: Standard tier.
Click the Review + create button.
Click the Create button to begin creating your new Azure IoT Hub instance.
- Wait until the Azure IoT Hub instance is deployed.
Task 2: Adding an IoT Device
When the deployment has completed, click Go to resource from the deployment blade. Alternatively, search for and select IoT Hub and locate your new IoT Hub instance
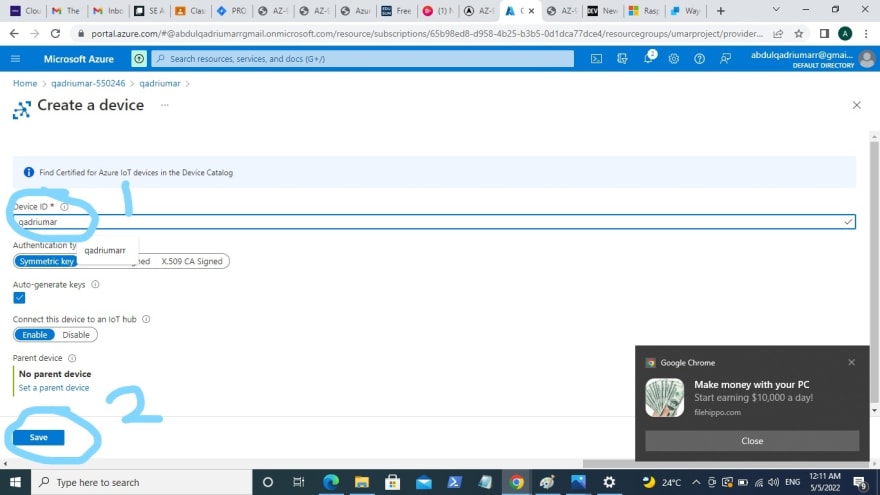
Go to resource scroll down to the Device management section and click Devices. Then, click + Add Device.

Provide a name for your new IoT device, qadriumar, and click the Save button. This will create a new IoT device identity in your Azure IoT Hub.
If you do not see your new device, Refresh the IoT Devices page.
Select qadriumar and copy the Primary Connection String value. You will use this key in the next task to authenticate a connection to the Raspberry Pi simulator.

Task 3: Testing the device using a Raspberry Pi Simulator
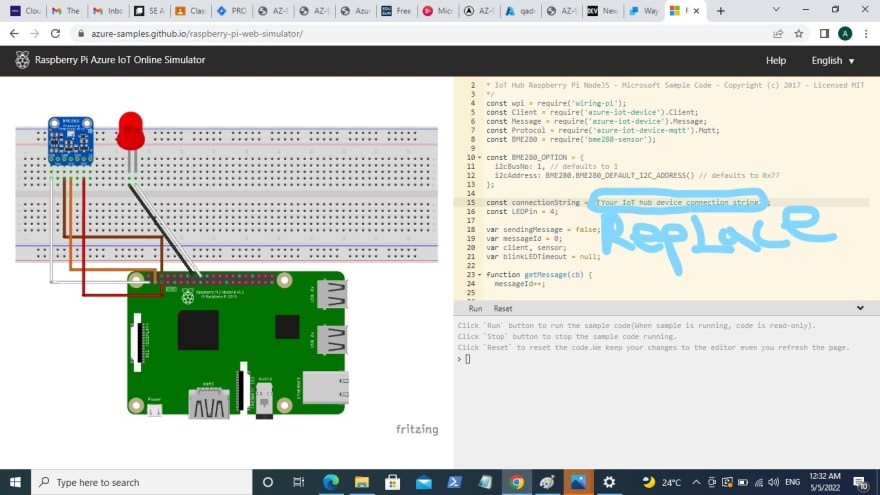
Open a new tab in the web browser and type this shortcut link (https://aka.ms/RaspPi) It will take you to a Raspberry Pi Simulator site. When done select “X” to close the pop-up window.
In the code area on the right side, locate the line with ‘const connectionString =’. (line 15)Replace it with the connection string you copied from the Azure portal. Note that the connection sting includes the DeviceId (qadriumar) and SharedAccessKey entries.
Click Run (below the code area) to run the application. The console output should show the sensor data and messages that are sent from the Raspberry Pi simulator to your Azure IoT Hub. Data and messages are sent each time the Raspberry Pi simulator LED flashes.
Click Stop to stop sending data.

Return to Azure Portal
Switch the IoT Hub Overview blade and scroll down to the IoT Hub Usage information to view usage. Change your timeframe in the show data for last to see data in the last hour.

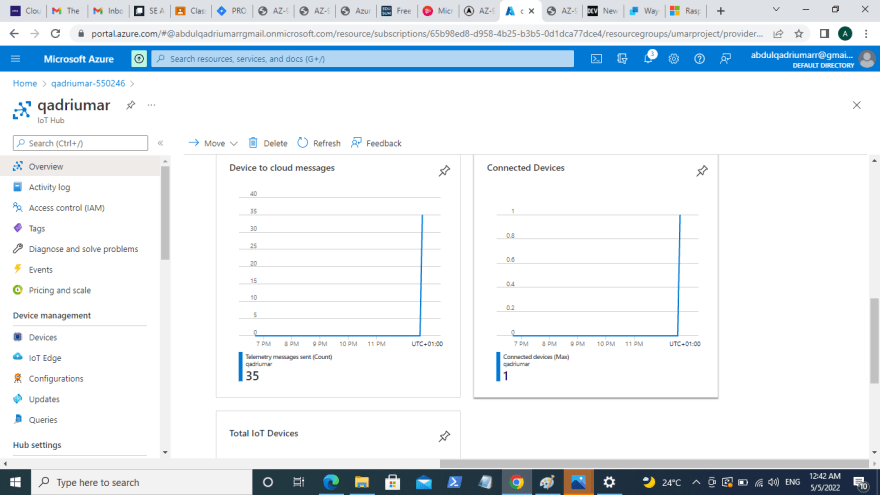
Congratulations! You have set up Azure IoT Hub to collect sensor data from an IoT device.
Note: To avoid additional costs, you can optionally remove this resource group. Search for resource groups, click your resource group, and then click Delete resource group. Verify the name of the resource group and then click Delete. Monitor the Notifications to see how the delete is proceeding.
Thank you all

Top comments (0)