
Introduction
This is the second part of the series for Docker meets NodeJS where we are going to introduce a database service, MongoDB, which we will connect to it with our Node app through a network.
Note: Since we are introducing a new database service, by doing so this also makes our Node app also a service
Note: Ensure you go through the first part of this series since it contains a huge part of how we created our Node app within a Docker container.
Note: Remember to clone the
docker_nodejs_apprepo here
Getting Started
Recap
On the first part of the series we were able to:
- Setup the project
- Create a Node container
Goals
We should be able to:
- Add a MongoDB service in which we will be able to access through a network.
About Services
Services basically are a group of containers, they make it easier to scale your application.
Lets Code
In order to connect to our Mongo database with Node, we need to install a new dependency called Mongoose.
$ npm install mongoose --save
Let's connect our Node App to a database that does not exist by adding a couple of lines in our app.js file.
// Connect to database
mongoose.connect("mongodb://mongo:27017/docker_nodejs_app", {
  useNewUrlParser: true,
  useCreateIndex: true
});

mongoose.connection.on("open", err => {
  if (err) console.log(chalk.red("Error connecting to our mongo database"));
  console.log(chalk.green("Connected to mongo database successfully"));
});
Note: If you have used mongoose and mongo before, your local or mlab connection URL might look like this
mongodb://localhost:27017/<your_db>ormongodb://<dbuser>:<dbpassword>@ds115595.mlab.com:15595/<your_db>respectively and notmongodb://mongo:27017. This is because our mongo database service will be calledmongoand since it exists in a docker container and not locally on your drive we will expose the port 27017 in its container.
Your app.js file should look like this
"use strict"; // Ensures our code is compiled in strict mode

// Lets import our web framework
var express = require("express");
var mongoose = require("mongoose");

// Initialise our app
const app = express();

// Lets set our port
/**
 * The default port number is `3000`
 * Take note on that as we will come to that.
 */
app.set("port", 3000);


// Connect to database
mongoose.connect("mongodb://mongo:27017/docker_nodejs_app", {
  useNewUrlParser: true,
  useCreateIndex: true
});

mongoose.connection.on("open", err => {
  if (err) console.log("Error connecting to our mongo database");
  console.log("Connected to mongo database successfully");
});

/**
 * To ensure works as it should we will create a
 * simple endpoint to return a json response
 */

// Define our json response
const data = {
  blog_name: "docker_nodejs_app",
  blog_author: "wachira (tesh254)",
  blog_author_twitter: "@wachira_dev"
};

// Define out GET request endpoint
app.get("/", (req, res) => {
  res.status(200).json(data);
});

// Initialize our server
app.listen(app.get("port"), () => {
  console.log(`Server listening on port ${app.get("port")}`);
});
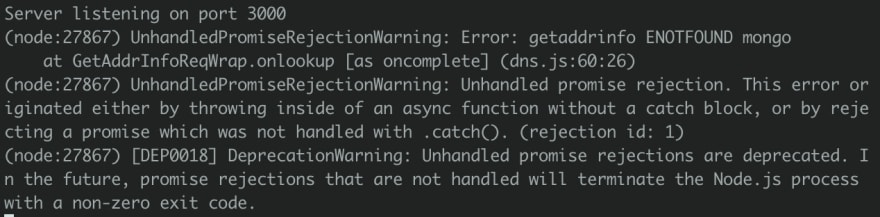
If we run our Node app we should get an error
Create our MongoDB service
In order to build and run a couple of services, we need to introduce a docker-compose.yml file that contains certain configurations that will allow that.
$ touch docker-compose.yml
Type this in the YAML file
# Defines our composer file version
version: "2.2"
# Define our services
services:
  # This is our nodejs app built using the Dockerfile
  app:
    # The name of our node app container
    container_name: docker_nodejs_app
    # Restarts our node app whenever it fails
    restart: always
    # Builds the node app docker container from the local -
    # Docker file we created
    build: .
    # Exposes the necessary ports that our node app uses
    ports:
      - "3000:3000"
    # All the services our node app will link to -
    # which in our case is only mongo
    # You can other services such as a Redis
    links:
      # The name should be similar to the service you will build
      - mongo
  # Our database service called mongo
  mongo:
    # The name of the database container, NOTE: it is similar to the name provided
    container_name: mongo
    # Builds a mongo image from the docker repository
    image: mongo
    # Exposes the ports that Mongo uses
    ports:
      - "27017:27017"
To run our configurations we will use a
docker-composecommand...wait where did this come from? 😳
The command docker-compose comes with the Docker software, it executes the configurations in the docker-compose.yml file.
To build and run our app and mongo services, type this in your terminal
$ docker-compose up
What happens next will take a bit longer...😇...Free time...maybe make yourself a cup of coffee ☕️ or check out Twitter
What happens next, Docker:
- Pulls the Mongo image from the remote Docker repository
Downloads Mongo into Dockers cache
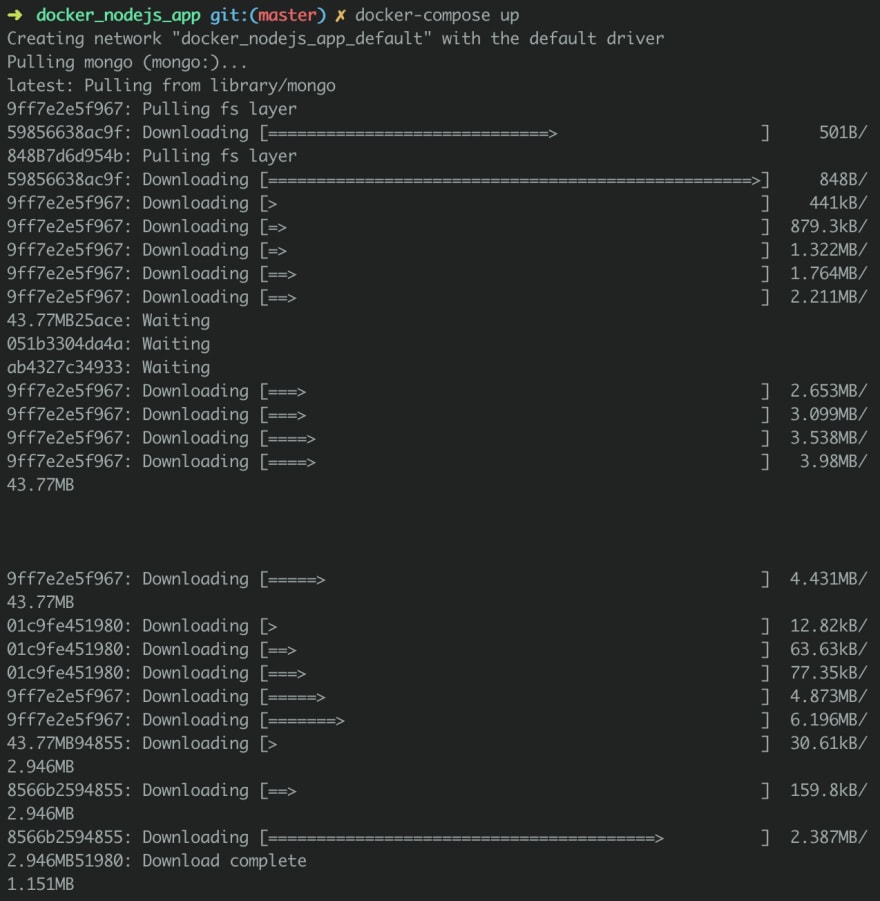
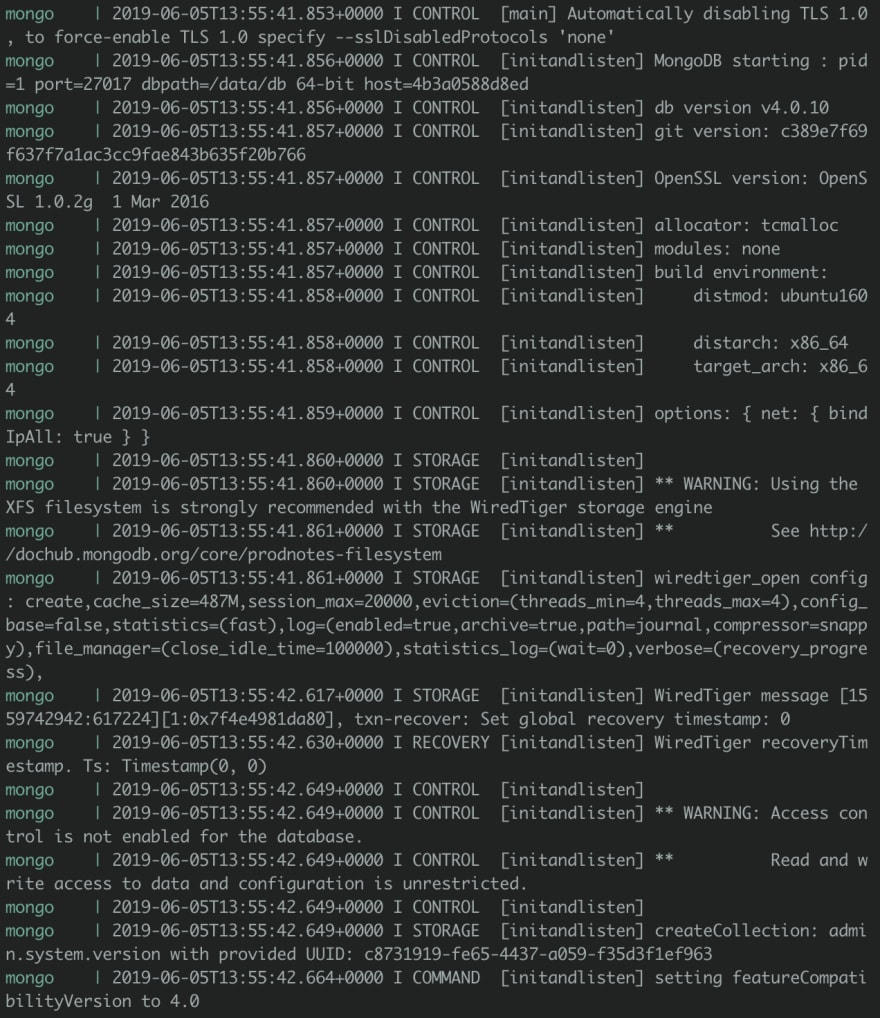
Run instances of mongo

- Builds our Node app
- Runs our server and connects to the Mongo database successfully.

What next after a successful build?
You can test out the database by creating a couple of
- POST requests to save data in the MongoDB database collection
- GET requests to retrieve data from the database collection
- PUT requests to update data in the database collection
- DELETE requests to delete data in the database collection
Summary
To summarise, in this post we have:
- Connected to MongoDB database service successful
- Introduction to the
docker-composecommand
Next
In the next part:
- We will host our application on Heroku
- Push our repo to the Docker repository.
- Other commands in Docker that will make your experience worthwhile such as:
- Clearing container cache
- Deleting, Stopping Docker containers
Extras
Link to repo https://github.com/werickblog/docker_nodejs_app
Link to download NodeJS https://nodejs.org/en/download/
Link to download Docker https://www.docker.com/get-started
Understanding what docker is https://docs.docker.com/engine/docker-overview/

Top comments (0)