
Are you a frontend developer,Without any backend programming knowledge which is responsible for authenticating your Users into your app.Maybe,you are a backend developer who is tired of debugging your Authentication MVC model.Here is a step to step tutorial with a few clicks to set you on the go.
What is OAuth
Auth0 is a cloud-based identity and access management (IAM) platform that offers authentication and authorization as a service. It provides developers with a set of tools and APIs to easily add secure authentication and authorization functionalities to their web and mobile applications.
The key features of Auth0 include:
-Authentication: Auth0 supports various authentication methods, such as social login (e.g., Google, Facebook, Twitter), username/password authentication, multi-factor authentication (MFA), and more. This allows developers to offer users multiple ways to log in to their applications securely.
-Authorization: Auth0 provides a flexible and customizable authorization system that allows developers to define fine-grained access control policies for their resources. This helps ensure that users only have access to the resources they are authorized to use.
-Single Sign-On (SSO): Auth0 enables single sign-on, allowing users to log in once and access multiple applications without the need to re-enter their credentials for each one.
- Developer-Friendly: Auth0 provides SDKs and libraries for various programming languages and platforms, making it developer-friendly and straightforward to integrate authentication and authorization functionalities into applications.
Steps to follow
1.Create a new Account
-Navigate to
-Sign up if You do not have an already signed in account

-On success upon sign up or login You will be navigated to the user dashboard where you are responsible of managing your apps.
2.Create an Application
-In the user dashboard click on the create application in the get started section
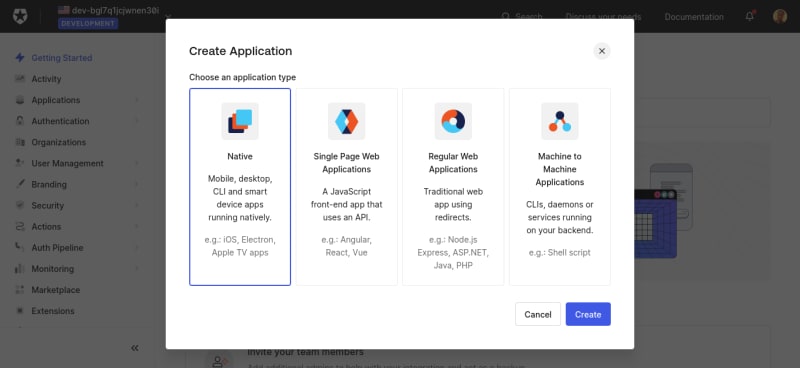
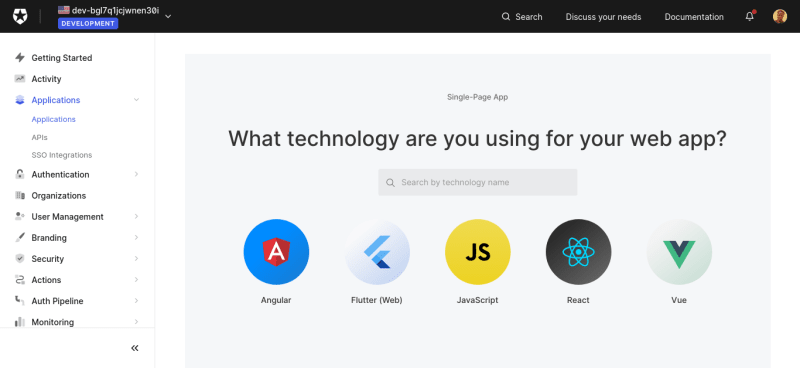
- A pop-up will appear,enter the name of your app,beneath th name there are various options of application to create for the authentication. -Since we are dealing with a frontend framework (React) choose SPWA(Single Page Web Page Application) option. -On success You will be redirected to choose Your SPWA framework option,choose react
3.Auth settings & configuration
-Confirm that your panel has been set up and navigate to settings
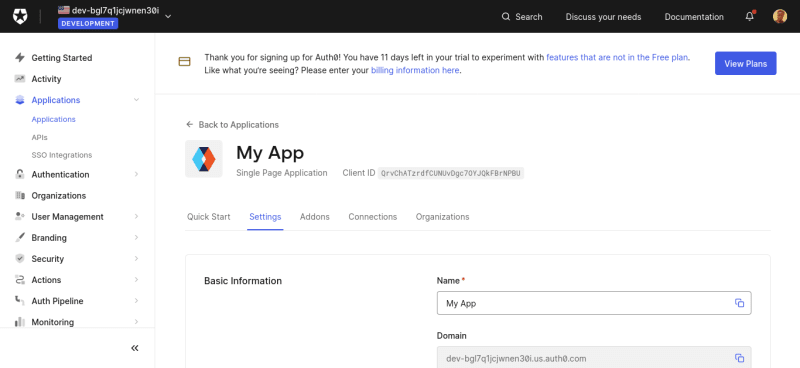
-In the settings section includes personal information about your API.
4.App code configuration
-Copy the clientId and Domain name mentioned in the settings panel safely since they are the essential information to gain access to our API.
-In your React application run
npm i @auth0/auth0-react
responsible for installing package for authO provider
-Back in your React code,make sure your app is wrapped with the authOprovider.
-copy and paste your domain and clientId as shown below
import React from 'react';
import ReactDOM from 'react-dom/client';
import './index.css';
import App from './App';
import { Auth0Provider } from '@auth0/auth0-react';

const root = ReactDOM.createRoot(document.getElementById('root'));
// dev-bgl7q1jcjwnen30i.us.auth0.com
// BB6LuOvArlkD9hjzUdOcGJhhwKtlIkWv
root.render(
    <Auth0Provider
        domain="dev-bgl7q1jcjwnen30i.us.auth0.com"
        clientId="BB6LuOvArlkD9hjzUdOcGJhhwKtlIkWv"
        authorizationParams={{
            redirect_uri: window.location.origin,
        }}
    >

         <App />

    </Auth0Provider>
);
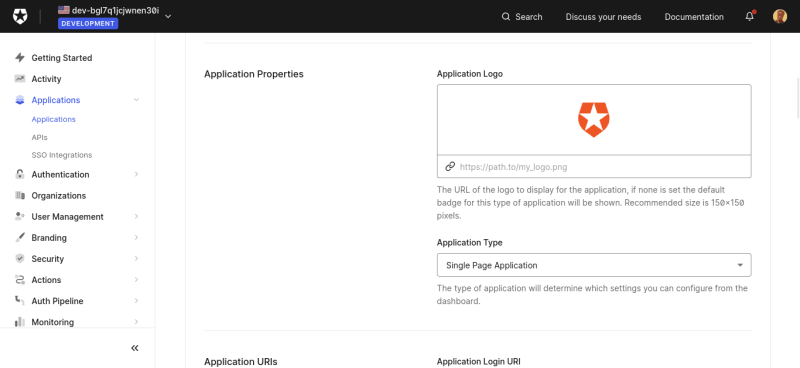
5.Application properties
-If you have a logo deployed you may switch the logo URL
-Change the application type to Single Page Application
6.Setting up Your App URI's
-Once you're done navigate to back to AuthO scroll down to Application URI.
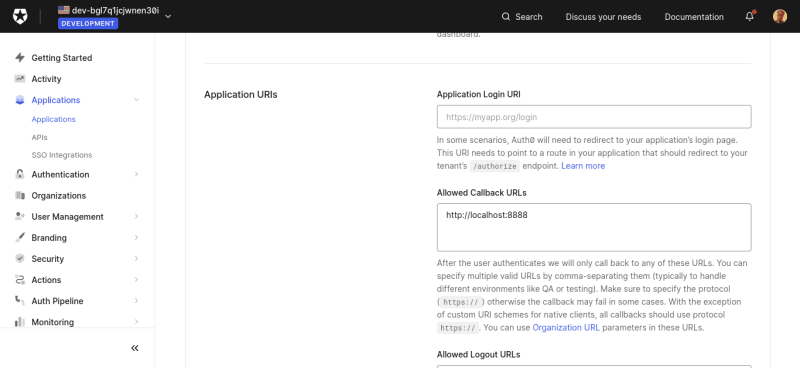
-Copy and paste your deployed react web app,if deployed else
copy and paste your localhost URL in each of the entries within the application URI.
7.Confirmation
-Once you are done scroll to the bottom of the page and click on save changes
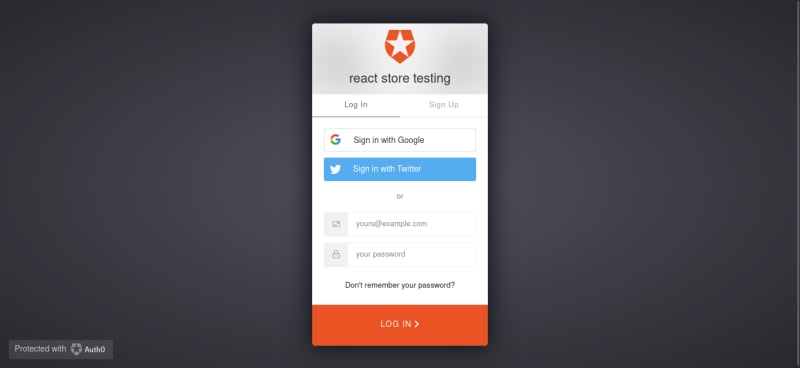
-Launch you your app with
npm run start
command and hopefully on Launch when you click on the login.You'll see a page similar to this one:
Hope it was insightful don't forget to leave a thumb's Up

Top comments (0)