Previous: 1. Get your XUMM API credentials 🔑
For this example we will use a Javascript (node) environment. More experienced developers will probably use Typescript or Deno, but to keep this tutorial simple we will use plain Javascript.
- Open Visual Studio Code, or your prefrred code editor, and create a new file - File » New file
- Save your newly created file - File » Save. Create a new folder in a suitable project location e.g.,
xumm-sdk-tutorialand save your new file asindex.js -
Install the XUMM SDK in your project using the 'node package manager'. Open the terminal - Terminal » New terminal and at the prompt enter
npm install xumm-sdk -
Copy then paste the following boilerplate code into your
index.jsfile:
const {XummSdk} = require('xumm-sdk')
const Sdk = new XummSdk('Your-API-Id', 'Your-API-Secret')

const main = async () => {
  console.log(`Hi! This is where we'll be writing some code`)
}

main()
Please replace Your-API-Id and Your-API-Secret in the code with the credentials obtained from the XUMM Developer Console when you registered your app.
What does this code actually do?
- First, we 'import' the XUMM SDK that we installed using
npminto our code - step 3 above. We are using thexumm-sdkpackage, and we are calling itXummSdkin our code. - we then initialize a new instance of the SDK, which we call
Sdk. We will use this one later in the project as we don't interact with the XUMM SDK just yet. While not needed yet in the project the dummy API Key and API Secret need to be inserted here. - We then define a function called
mainand we 'tell' node that this function is asynchronous (async); meaning we can run code, wait for a response, then continue running more code. - In the function we have just created, we then tell the code to output a message to the terminal, using the
console.logmethod. - Lastly, we call our
mainfunction so the code will actually run.
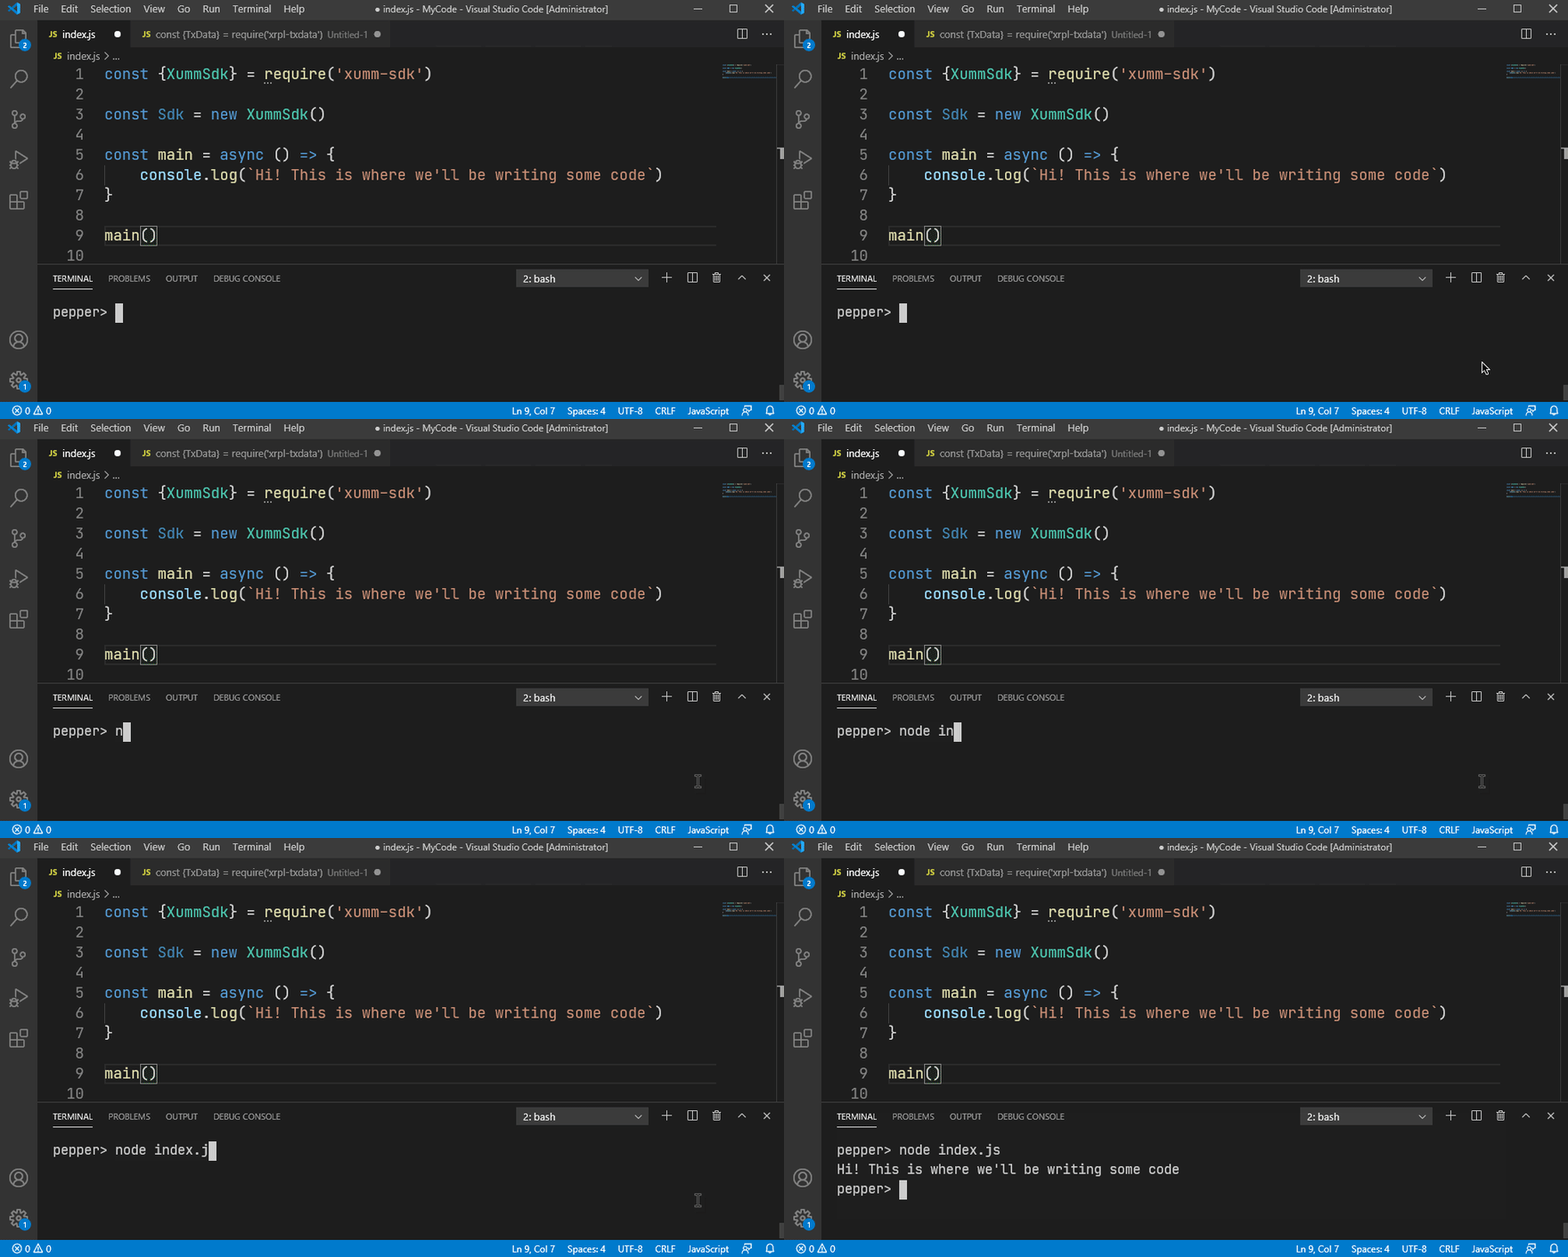
Now let's run this code. In the terminal panel, type:
node index.js
This will tell node to run all code in your index.js file. You should receive the message Hi! This is where we'll be writing some code in your terminal and be back at the prompt awaiting furher instruction.
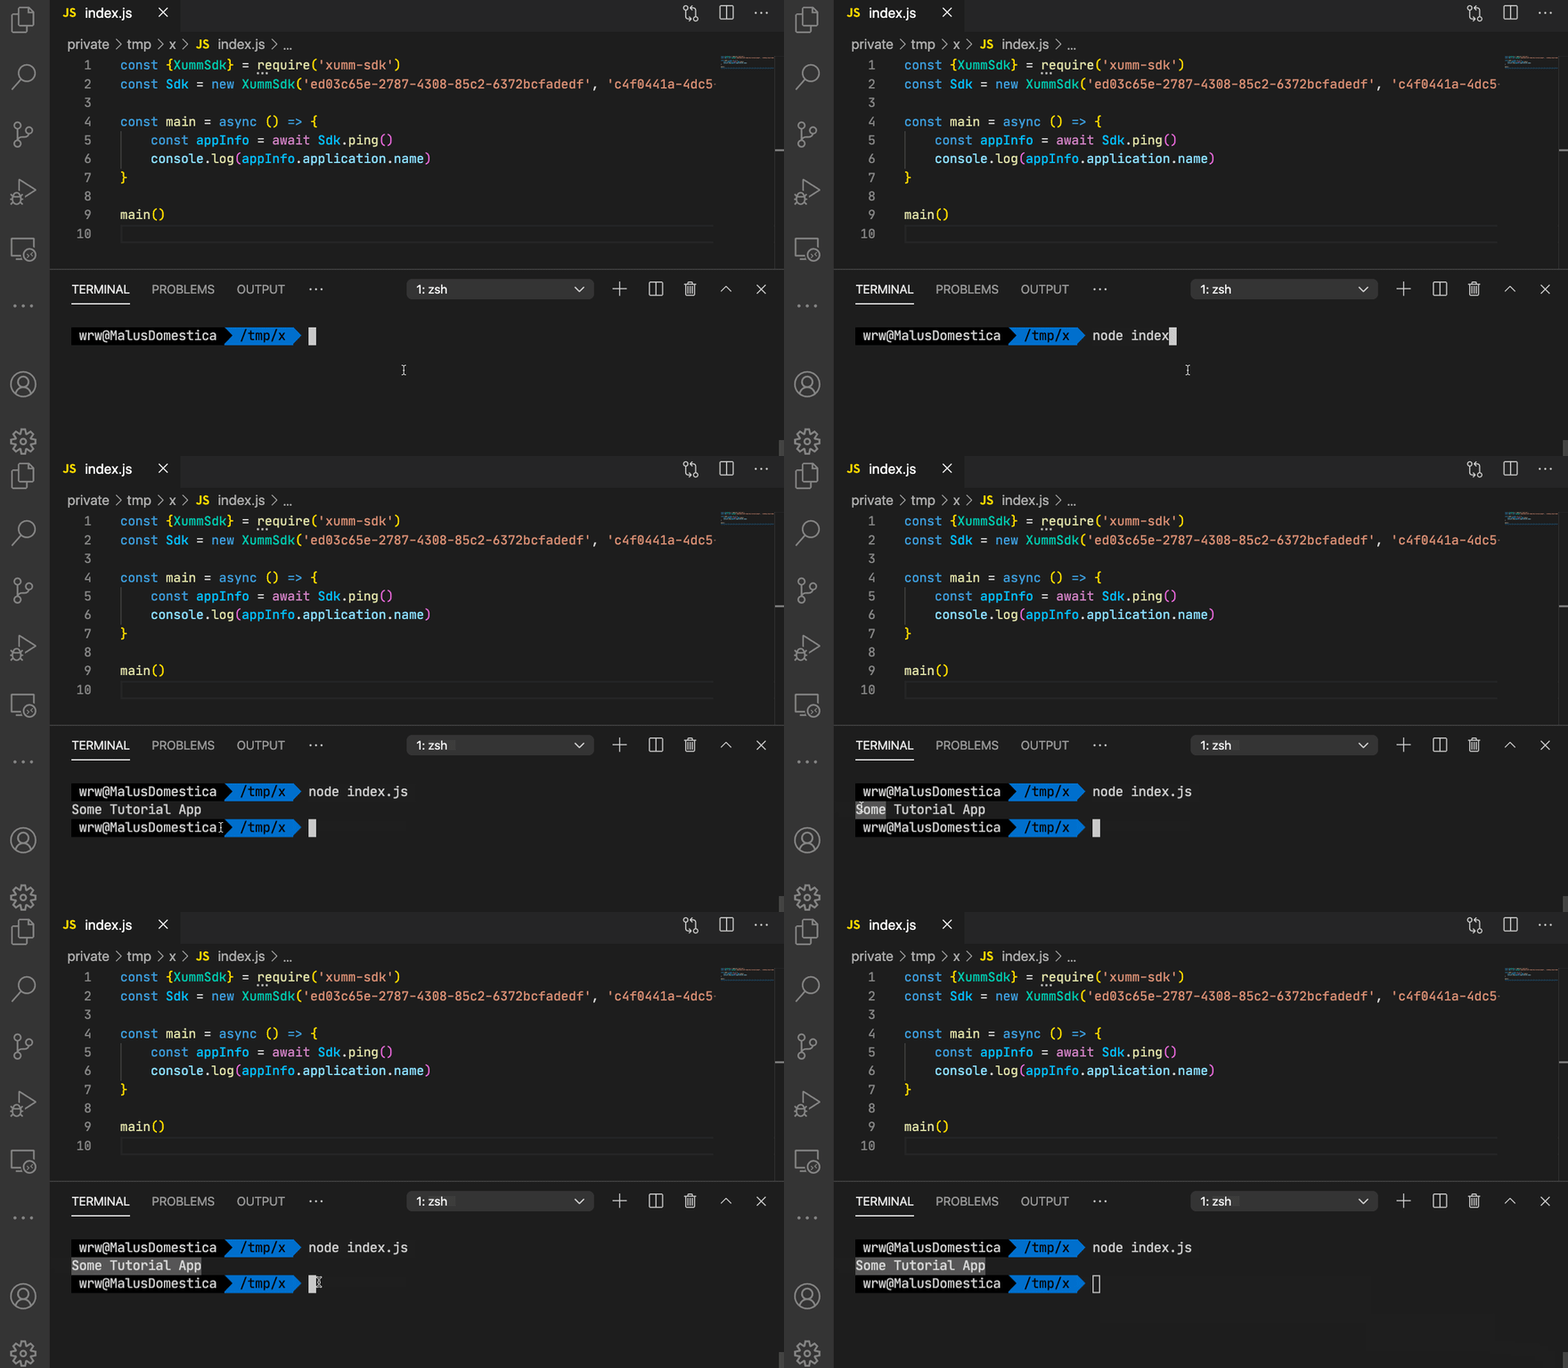
If you have your API Key and API Secret in place (see placeholder values in code above) you can check if everything is working by asking the XUMM Platform to return your registered XUMM app name.
Replace the line of code containing console.log(...) with a ping request to the XUMM platform:
const appInfo = await Sdk.ping()
This line of code calls the ping method of the XUMM SDK. We await the results, as it may take a brief moment to connect to the XUMM platform and get a response. When we get a response, we are making the results accessible under the name appInfo.
Now let us return the application name we retrieved from the XUMM platform to the console by using console.log once again. When you start typing, Visual Studio Code will suggest available properties:
Our main code should now look like this:
const main = async () => {
  const appInfo = await Sdk.ping()
  console.log(appInfo.application.name)
}
It looks like we are able to reach the XUMM platform 🎉 😎
Next:
3. Your first payload 🔔
4. Verify the results ⛑ and push 🚀
5. Security & finishing touch 🎉
Resources 📚
If you want to learn more about the XUMM SDK, platform, documentation, etc., make sure to check out:
- The XUMM SDK readme
- The XUMM SDK source code
- The XUMM API documentation & API reference
- XUMM (end user) support docs
- In case of questions: support@xumm.app


Oldest comments (0)