This article was originally posted on Medium. The original article is here
This article will show you how to build a Serverless Express application in Typescript using AWS Lambda and API Gateway. You will find the code here. The topics we will cover in this article are:
Serverless Framework is a more general-purpose tool for deploying and managing serverless applications. It simplifies the configuration and deployment of the function and its connected services. Serverless Architecture lets you execute a piece of code and only charges you for the resources you use, unlike static servers that charge a fixed price even if usage is low. As a developer, this means that you don’t have to think about managing servers and scaling. You just focus on code. This article will guide you through the steps to build a serverless API that runs on Express.js using AWS Lamda and AWS API Gateway. Typescript is used to write the code as it supports static typing which will reduce compile-time errors.
Before you start you will need to have
Basic knowledge of Typescript, Node.js, npm, Express.js.
Amazon web services (AWS) account.
This article assumes that you have Node.js and npm installed in your system.
Project setup
Let’s install the Serverless framework and AWS-SDK module globally using:
npm i -g serverless aws-sdk
Now create a project folder and initialize an npm to create a package.json file. Then create a new serverless service in the project folder.
mkdir my-serverless-project
cd my-serverless-project
serverless create --template aws-nodejs-typescript
npm install
The Serverless framework generates a boilerplate for the application. Out of these handler.ts and serverless.yml are significant. The filehandler.ts is like the index.js file in a traditional Node.js application. This is the file where execution starts.
Now we will install serverless-offline which is a plugin used to run the Serverless framework on the localhost. This will emulate the Lambda and API Gateway on your local machine to speed up your development cycles. Otherwise, you will have to deploy every time you test a change.
npm install -D serverless-offline
Modify the serverless.yml file to include the plugin.
service:
  name: serverless*
*custom:
  webpack:
    webpackConfig: ./webpack.config.js
    includeModules: true*
*plugins:
  - serverless-webpack
  - serverless-offline
provider:
  name: aws
  runtime: nodejs12.x
  apiGateway:
    minimumCompressionSize: 1024
  environment:
    AWS_NODEJS_CONNECTION_REUSE_ENABLED: 1
functions:
  hello:
    handler: handler.hello
    events:
      - http:
          method: get
          path: /
Now run the following command in your project folder to start the serverless offline server.
serverless offline start
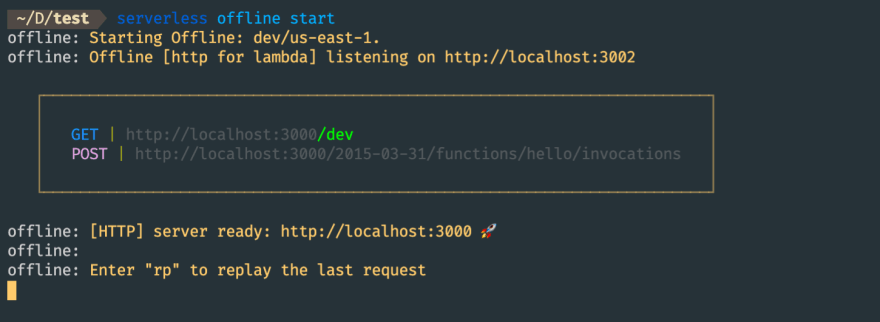
You will see the following screen and when you enter http://localhost:3000/dev in your browser you will be able to see the response from the server. By default, serverless-offline runs at port 3000
We have completed the basic setup of our serverless application. In the next section, we will add Typescript to our application.
Adding Express.js to our application
First, we will install the necessary packages required to run the express application in our project. We must replace the handler.js file with handler.ts .
npm i aws-lambda serverless-http express @types/express
rm handler.js
touch handler.ts
Add the following code to our handler.ts file to initialize our two routes:
A /message route.
A fallback route that sends **Server is running **message for all routes other than /message
  import { APIGatewayProxyHandler } *from* 'aws-lambda';
  import serverless *from* 'serverless-http';
  import express, { Request, Response } *from* 'express';

  const app = express();

  app.get('/message', (req: Request, res: Response) => {
    res.send({ message: 'This is message route' });
  });

  app.use((req: Request, res: Response) => {
    res.send({ message: 'Server is running' });
  });

  export const hello: APIGatewayProxyHandler = serverless(app);
We will need to modify serverless.yml to make the hello function capture all the HTTP requests.
service:
  name: serverless*
*custom:
  webpack:
    webpackConfig: ./webpack.config.js
    includeModules: true*
*plugins:
  - serverless-webpack
  - serverless-offline
provider:
  name: aws
  runtime: nodejs12.x
  apiGateway:
    minimumCompressionSize: 1024
  environment:
    AWS_NODEJS_CONNECTION_REUSE_ENABLED: 1
functions:
  hello:
    handler: handler.hello
    events:
      - http: ANY /
      - http: 'ANY {proxy+}'
Restart the server and go to http://localhost:3000/dev/message to see the response. Yaay! you have successfully created a serverless lambda function!
Deploying your first serverless application
Also, obtain a key and secret from your AWS account with all the necessary permissions to deploy the application. Running the following command will let you add the key and secret.
serverless config credentials — provider aws — key <your-access-key-id> — secret <your-secret-key>
Now run the following command to deploy your application to AWS.
serverless deploy
After successful deployment, a link will be shown in the command line. This will be the API gateway link
We have successfully created a lambda function and deployed it to AWS.
You can find the complete code in this repository.
What’s next?
Now you can add your routes to the application. You will need to add body-parser as middleware to parse the incoming request.
You can set up CI/CD pipelines to automate the deployment process.


Top comments (0)