In this blog post, we will look at how to write a Go app that authenticates against Azure AD in order to securely call the Computer Vision service to perform some OCR (Optical Character Recognition).
If you're a visual person, then you can watch the whole video where we build the full solution end-to-end with Aaron Schlesinger - a Microsoft Cloud Advocate.
Disclaimer: the MSAL library for Go is highly experimental at the point of writing this(see public preview) and therefore it's not ready for production yet. We wanted to have a play around and find out how easy it is to integrate Go with MSAL in its current state.
Create the Cognitive Service
If you have an existing Cognitive Service, you may not be able to use Azure AD authentication as there is a requirement for the service to run under a custom subdomain. At the time of writing this, there is no way to add a subdomain to an existing service. You'll need to deploy a new Cognitive service using your favorite tool. In this instance, we'll use the Azure CLI but PowerShell is also a valid option :)
az login
az account set -s <YourSubscriptionID>
az cognitiveservices account create --kind computervision -n <give it a name> -g <your resource group> --sku F0 -l <select the right location> --custom-domain <a globally unique subdomain>
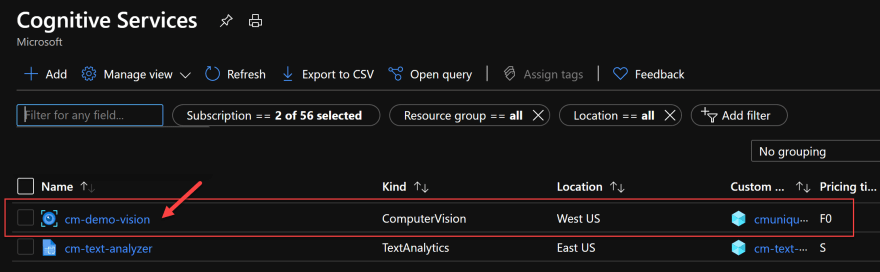
This should execute very quickly and our service should now be available in the Azure Portal, under the Cognitive Services resources
Create the Azure AD account
Before creating the Service Principal account that will be used by our application to authenticate to Azure AD and get the appropriate access token to speak to our Computer Vision service, we need to grab the Resource Id. You can easily do this from
a) the Azure Portal -> Cognitive Services -> -> Properties -> Resource ID
b) running this command in the Azure CLI
az cognitiveservices account show --name <Your ServiceName> -g <your resource group> --query id
Now that we know the Resource ID, we can use the Azure CLI to create the service principal account that will be used by our app. In the Azure CLI, type the following
az ad sp create-for-rbac -n <A name for your SP> --sdk-auth --role "Cognitive Services User" --scopes "<The Resource ID>"
Running the command successfully should result in the following (similar) output

We can confirm that the assignment was successful by checking in the Azure Portal. Go to your Cognitive Service -> Access Control (IAM) -> Role Assignments.

Notice how the service principal is assigned the right role and that it's scoped only to this resource!
Job done. Let's write some code!!
The Go application
Disclaimer - Aaron was kind enough to open source the PoC code we developed during the stream on GitHub. This blog post is based on his code :)
The Go application consists of 2 main files:
- main.go
- auth.go
The auth.go file contains the code that acquires the access token using MSAL for Go. The code is attached below:
package main

import (
    "context"
    "log"
    "os"

    // "github.com/AzureAD/microsoft-authentication-library-for-go/msal"
    msal "github.com/AzureAD/microsoft-authentication-library-for-go/apps/confidential"
)

const cogSvcScope = "https://cognitiveservices.azure.com/.default"
const clientID = "91cbc6d5-9a68-4437-848a-f17f16dbf7ea"

func getSecret() string {
    sec := os.Getenv("MSAL_SECRET")
    if sec == "" {
        log.Fatalf("MSAL_SECRET is missing")
    }
    return sec
}

type tokenProvider struct{}

func (t *tokenProvider) OAuthToken() string {

    clientCredential, err := msal.NewCredFromSecret(getSecret())

    if err != nil {
        log.Fatalf("Couldn't create client app (%s)", err)
    }
    app, err := msal.New(clientID, clientCredential, func(o *msal.Options) {
        o.Authority = "https://login.windows.net/72f988bf-86f1-41af-91ab-2d7cd011db47"
    })
    if err != nil {
        log.Fatalf("Couldn't get application (%s)", err)
    }

    ctx := context.Background()
    token, err := app.AcquireTokenByCredential(ctx, []string{
        cogSvcScope,
    })
    if err != nil {
        log.Fatalf("Error getting token (%s)", err)
    }
    return token.AccessToken
}
The main.go file is the main entry point to the application and contains the code that calls into the Computer Vision service with an image to get the OCR data back
// <snippet_imports>
package main

import (
    "context"
    "fmt"
    "log"
    "os"

    "github.com/Azure/azure-sdk-for-go/services/cognitiveservices/v2.0/computervision"
    "github.com/Azure/go-autorest/autorest"
)

// </snippet_imports>

// Declare global so don't have to pass it to all of the tasks.
var computerVisionContext context.Context

// </snippet_context>

func main() {

    endpointURL := "https://425streamjan.cognitiveservices.azure.com/"

    computerVisionClient := computervision.New(endpointURL)
    // We should use the BearerAuthorizer here:
    // https://pkg.go.dev/github.com/Azure/go-autorest/autorest#NewBearerAuthorizer
    //
    // The adal.OauthTokenProvider will need to be adapted to work with MSAL:
    // https://pkg.go.dev/github.com/Azure/go-autorest/autorest/adal#OAuthTokenProvider
    // computerVisionClient.Authorizer = autorest.NewCognitiveServicesAuthorizer(computerVisionKey)
    oauthTokenProvider := new(tokenProvider)
    computerVisionClient.Authorizer = autorest.NewBearerAuthorizer(oauthTokenProvider)

    computerVisionContext = context.Background()

    // this is an image url accessible from anywhere
    printedImageURL := "https://www.velvetjobs.com/resume/document-processing-resume-sample.jpg"
    RecognizePrintedOCRRemoteImage(computerVisionClient, printedImageURL)

    fmt.Println("-----------------------------------------")
    fmt.Println("End of quickstart.")
}

/*
 *  Recognize Printed Text with OCR - remote
 */
func RecognizePrintedOCRRemoteImage(client computervision.BaseClient, remoteImageURL string) {
    fmt.Println("-----------------------------------------")
    fmt.Println("RECOGNIZE PRINTED TEXT - remote")
    fmt.Println()
    var remoteImage computervision.ImageURL
    remoteImage.URL = &remoteImageURL

    fmt.Println("Recognizing text in a remote image with OCR ...")
    ocrResult, err := client.RecognizePrintedText(computerVisionContext, true, remoteImage, computervision.En)
    if err != nil {
        log.Fatal(err)
    }

    // Get orientation of text.
    fmt.Printf("Text angle: %.4f\n", *ocrResult.TextAngle)

    // Get bounding boxes for each line of text and print text.
    for _, region := range *ocrResult.Regions {
        for _, line := range *region.Lines {
            fmt.Printf("\nBounding box: %v\n", *line.BoundingBox)
            s := ""
            for _, word := range *line.Words {
                s += *word.Text + " "
            }
            fmt.Printf("Text: %v", s)
        }
    }
    fmt.Println()
    fmt.Println()
}
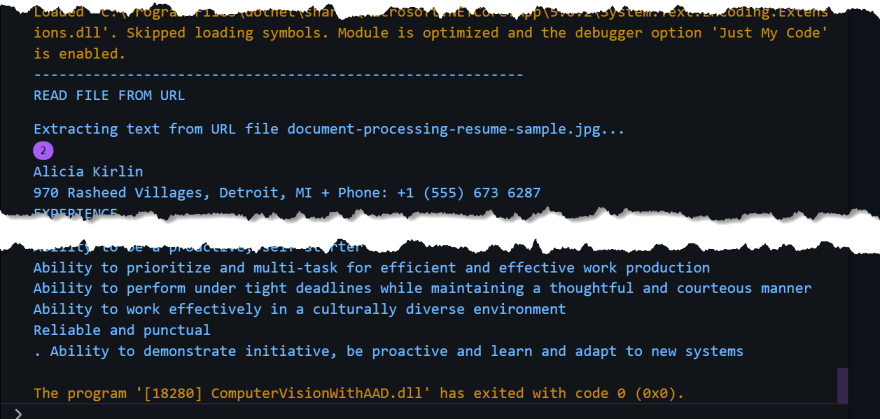
Want to see the application running? If you have Go installed locally, you can open your preferred terminal and type go run .
As long as you have configured everything correctly, you should be greeted with the results of the Computer Vision analysis.
Where is the code?
You can find the Go repo on Github
If you're a .NET developer and want to see the same exact solution written in .NET, then you can use my GitHub repo
Summary
We had a blast working with Aaron on this project. Go seems like an great language and the fact that there is a new (very new) MSAL library for Go is extremely encouraging. I hope that you enjoyed this blog post and, as always, make sure to reach out if you have any questions or requests.

Top comments (0)
Some comments have been hidden by the post's author - find out more