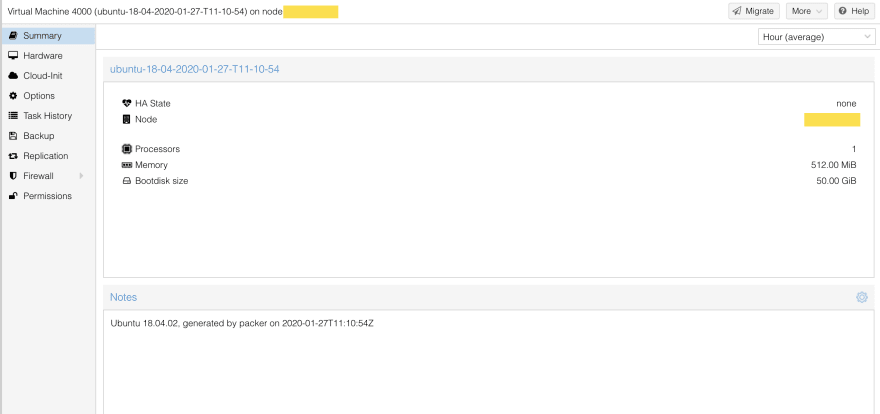
I've been using proxmox for a while now in my homelab as an open-source alternative to something like ESXi for a virtualization platform. With proxmox when can create templates for our VMS so we can have a standard starting point to install our applications on top of, these templates can be useful too so that you can pre-install packages for authentication, security, logging and etc without anyone else needing to think about it.
However, creating and managing these templates can become a challenge with how time-consuming and manual it can be. I want to show you how you can make this process more standardized and automated with the use of packer to allow you to declare your proxmox templates as code.
What is packer
Packer is a utility that allows you to build virtual machine images so that you can define a golden image as code. Packer can be used to create images for almost all of the big cloud providers such as AWS, GCE, Azure and Digital Ocean, or can be used with locally installed hypervisors such as VMWare, Proxmox and a few others.
To build an image with packer we need to define our image through a template file. The file uses the JSON format and comprises of 3 main sections that are used to define and prepare your image.
Builders: Components of Packer that are able to create a machine image for a single platform. A builder is invoked as part of a build in order to create the actual resulting images.
Provisioners: Install and configure software within a running machine prior to that machine being turned into a static image. Example provisioners include shell scripts, Chef, Puppet, etc.
Post Processors: Take the result of a builder or another post-processor and process that to create a new artifact. Examples of post-processors are compress and upload to compress and upload artifacts respectively, etc.
By using packer we can define our golden VM image as code so that we can easily build identically configured images on demand so that all your machines are running the same image and can also be easily updated to a new image when needed.
Preparing your packer template
For the following examples ill be referencing files from this example repo you can follow along with and should be a solid template to start off from for your own custom proxmox templates.
To create the template we will use the proxmox builder which connects through the proxmox web API to provision and configure the VM for us and then turn it into a template. To configure our template we will use a variables file, to import this variables file we will use the -var-file flag to pass in our variables to packer. These variables will be used in our template file with the following syntax within a string like so "passwd/username={{ user 'ssh_username'}}".
Now the builder block below will outline the basic properties of our desired proxmox template such as its name, the allocated resources and the devices attached to the VM. To achieve this the boot_command option will be used to boot the OS and tell it to look for the preseed file to automate the OS installation process. Packer has an inbuilt HTTP server to serve this preseed.cfg file to the VM as its installing by using the http_directory option in the builder to specify the public files of the HTTP server. Check out the ubuntu preseed documentation for info on modifying the automatic installation process of the OS via a pre seed file.
{
  "builders": [
    {
      "type": "proxmox",
      "proxmox_url": "https://{{user `proxmox_host`}}:8006/api2/json",
      "insecure_skip_tls_verify": true,
      "username": "{{user `proxmox_api_user`}}",
      "password": "{{user `proxmox_api_password`}}",

      "vm_id": "{{ user `vmid` }}",
      "vm_name": "{{user `template_name`}}",
      "template_description": "{{ user `template_description` }}",

      "node": "{{user `proxmox_node`}}",
      "cores": "{{ user `cores` }}",
      "sockets": "{{ user `sockets` }}",
      "memory": "{{ user `memory` }}",
      "os": "l26",

      "network_adapters": [
        {
          "model": "virtio",
          "bridge": "vmbr0"
        }
      ],

      "disks": [
        {
          "type": "scsi",
          "disk_size": "{{ user `disk_size`}}",
          "storage_pool": "{{user `datastore`}}",
          "storage_pool_type": "{{user `datastore_type`}}",
          "format": "raw",
          "cache_mode": "writeback"
        }
      ],

      "ssh_timeout": "90m",
      "ssh_password": "{{ user `ssh_password` }}",
      "ssh_username": "{{ user `ssh_username` }}",

      "qemu_agent": true,
      "unmount_iso": true,

      "iso_file": "{{user `iso`}}",

      "http_directory": "./http",

      "boot_wait": "10s",

      "boot_command": [
        "{{ user `boot_command_prefix` }}",
        "/install/vmlinuz ",
        "auto ",
        "console-setup/ask_detect=false ",
        "debconf/frontend=noninteractive ",
        "debian-installer={{ user `locale` }} ",
        "hostname={{ user `hostname` }} ",
        "fb=false ",
        "grub-installer/bootdev=/dev/sda<wait> ",
        "initrd=/install/initrd.gz ",
        "kbd-chooser/method=us ",
        "keyboard-configuration/modelcode=SKIP ",
        "locale={{ user `locale` }} ",
        "noapic ",
        "passwd/username={{ user `ssh_username` }} ",
        "passwd/user-fullname={{ user `ssh_fullname` }} ",
        "passwd/user-password={{ user `ssh_password` }} ",
        "passwd/user-password-again={{ user `ssh_password` }} ",
        "preseed/url=http://{{ .HTTPIP }}:{{ .HTTPPort }}/{{ user `preseed.cfg` }} ",
        "-- <enter>"
      ]
    }
  ]
}
In this template, we will also be using the shell provisioner to configure our VM os once it has been installed onto the virtual machine and is available via SSH. This can be helpful for installing the minimum required packages on your VM's such as the QEMU quest agent and cloud init or any other software required. You can also switch this provisioner auto for any of the other provisioners such as ansible, chef or puppet for example.
{
  "provisioners": [
    {
      "pause_before": "20s",
      "type": "shell",
      "environment_vars": ["DEBIAN_FRONTEND=noninteractive"],
      "inline": [
        "date > provision.txt",
        "sudo apt-get update",
        "sudo apt-get -y upgrade",
        "sudo apt-get -y dist-upgrade",
        "sudo apt-get -y install linux-generic linux-headers-generic linux-image-generic",
        "sudo apt-get -y install qemu-guest-agent cloud-init",
        "sudo apt-get -y install wget curl",
        "exit 0"
      ]
    }
  ]
}
And finally, we will use the post processors to run some commands locally. This will make an SSH connection to the PVE host and run some commands manually to set up the virtual devices necessary for cloud init. This post-processor is using the shell-local post processor to run the commands on the local machine running packer but you could always move this configuration to something like an ansible playbook to make the configuration more readable and portable.
{
  "post-processors": [
    {
      "type": "shell-local",
      "inline": [
        "ssh root@{{user `proxmox_host`}} qm set {{user `vmid`}} --scsihw virtio-scsi-pci",
        "ssh root@{{user `proxmox_host`}} qm set {{user `vmid`}} --ide2 {{user `datastore`}}:cloudinit",
        "ssh root@{{user `proxmox_host`}} qm set {{user `vmid`}} --boot c --bootdisk scsi0",
        "ssh root@{{user `proxmox_host`}} qm set {{user `vmid`}} --ciuser {{ user `ssh_username` }}",
        "ssh root@{{user `proxmox_host`}} qm set {{user `vmid`}} --cipassword {{ user `ssh_password` }}",
        "ssh root@{{user `proxmox_host`}} qm set {{user `vmid`}} --vga std"
      ]
    }
  ]
}
Now with your configuration complete, you will be ready to build your proxmox template with packer. Run the command packer build -var-file="./config.json" ./ubuntu-18.04.json You should see some output for each of the builders, provisioners and post-processors.
$ packer build -var-file="./config.json" ./ubuntu-18.04.json
proxmox: output will be in this color.

==> proxmox: Creating VM
==> proxmox: Starting VM
==> proxmox: Starting HTTP server on port 8771

...

Build 'proxmox' finished.

==> Builds finished. The artifacts of successful builds are:
--> proxmox: A template was created: 4444
--> proxmox:
When the process is complete you should see your template ready in the proxmox interface and ready to be cloned into virtual machines.
Further reading on packer
You should now have a good starting point for building proxmox templates with packer. If your looking to extend its usefulness a little further check out these useful articles.
- Getting started with packer
- Ubuntu docs for the pre-seed file
- Automated image builds with Jenkins, Packer, and Kubernetes
- Continuous Deployment of Golden Images with Packer and Semaphore
Connect further
- Make sure to follow on Medium, Twitter or Email
- If you are thinking of subscribing on Medium, you can use my referral link
- Connect with me on LinkedIn if you want to chat
Cover photo by chuttersnap on Unsplash


Latest comments (5)
I don't think this applies anymore. Ubuntu 20.04 switched to subquity and gave up debian-installer (so preseeding). You're supposed to be using cloud-init directly. That doesn't work for me either, but this is what they announced quite a long time ago (since 2019).
Yep that’s right cloud unit is the way to do with the newer distributions. I’ve been meaning to spend some time to do another write up for what that looks like with cloud unit but unfortunately I had to tear down my proxmox lab during a recent move 😬
I was able to solve it, actually, up to the point where you have a readily available template with cloud-init ready to read the user-data. Just to give you a head start :)
This configures autoinstall, which can run cloud-init commands. And will run cloud-init anyway.
These are the variables:
Then you can reset cloud-init through ansible (run by packer), for example.
If you want to write an updated article, I'll be happy to help, if you think you need any, of course!
I wrote a script to create a base template on Proxmox that supports cloud-init.
Then you can use proxmox-clone packer builder off of that.
dev.to/mike1237/create-proxmox-clo...
Thank you from France :)