
Introduction
Welcome! This blog post will help you be well on your way to creating your very own web components with open-wc. In order to create your first component you'll have to download and learn about some software/tools that will be required in order to create the component. Don't worry though! This post will take you step by step through the installation process as well as help you understand a little more about the things you're installing.
This is tutorial was made on a mac machine, different operating systems may yield different results
What is NodeJS?
To start, you're going to download a JavaScript runtime called, "NodeJS." NodeJS is simply a JavaScript runtime environment that runs JavaScript code outside of the actual web browser. This allows us to build scalable network applications (About NodeJS).

Installing NodeJS
Now let's install NodeJS onto your machine! To start, head over to the NodeJS website at, NodeJS
From here, you should see a website that looks like this: ↓

You'll want to click on the big green button that says, "16.13.2 LTS - Recommended For Most Users"

Once you click on the button, it'll download a "pkg" file and from there you can run it and go through the download process. Once you're done installing NodeJS you will have also gotten NPM (Node Package Manager) installed with it, so now all that's left is to check and make sure everything is installed correctly.
Confirming NodeJS + NPM Installation
In order to confirm that both NodeJS and NPM were installed correctly, you're going to want to open up the terminal. My terminal might look slightly different from yours, that's because I'm using Oh My Zsh, which you can install through their website here: Oh My Zsh
Once the terminal is opened, it'll look something like this: ↓

From here, type in "node -v"
Assuming that everything is installed correctly, you should see something like this: ↓

As long as there is a version number displayed, that means that NodeJS was installed correctly!
Next, we just have to do the same thing but for NPM. The command in terminal to check NPM's version is "npm -v"

As long as you can see a version number for both NodeJS and NPM, then you can move onto the next section of the tutorial. If you do not see version numbers, check and make sure that you downloaded the correct version of NodeJS and that the installation finished successfully.
Creating Open-WC Web Component
In order to actually create your web component you first have to pick a file directory that you want to save it in.
The file directory for my folder is, "Documents/edtechjoker/edtechjoker-lab1"
You want to cd into the directory using the terminal, it should look similar to the image below: ↓

Once inside of the directory you want the component to live in, you should type "npm init @open-wc" into terminal. Doing so should bring up a dialog box like this: ↓

Here are the steps to actually creating the web component within the directory you specified:
- ❯ Scaffold a new project
- ❯ Web Component
- ❯ No
- Input the name you want for the component
- ❯ Yes
- ❯ Yes, with npm
As long as you hit all the correct responses you should have created the component and get a terminal window that looks like this.

As mentioned, you can open the component by typing,
 cd hello world
 npm run start
That will launch the component within a web browser. If you type those commands now, it should look something like this: ↓

If you see a page like the one above, then you're ready to edit your code in any editor of your choice. I mainly use Visual Studio Code for web-related programming.
Editing Web Component through Visual Studio Code
You can install Visual Studio code through their website at, Visual Studio Code
Once you have Visual Studio Code installed, you should see a screen similar to this once it's launched: ↓

Follow these next steps to open the web component we just created in Visual Studio Code
- File
- Open
- Navigate to the directory where you saved the component
- Open the "hello-world" folder
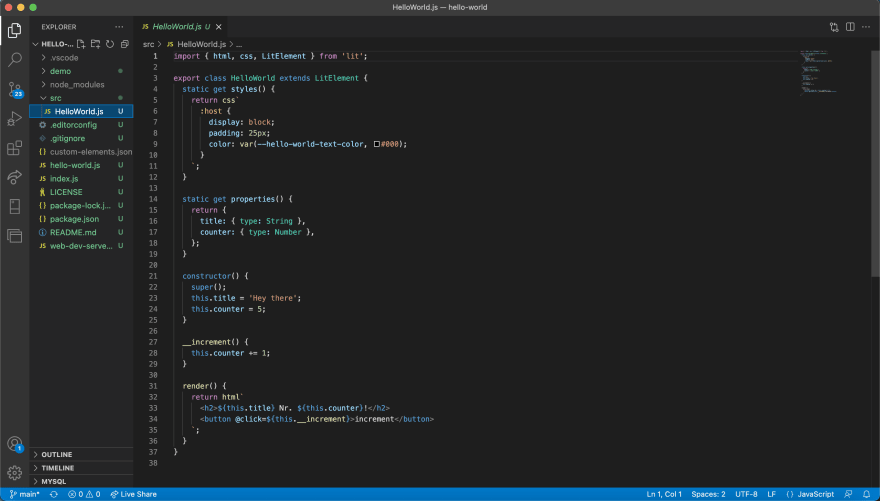
You then should get a screen like this, the .js code you will want to edit is within the "src" folder
Final Product
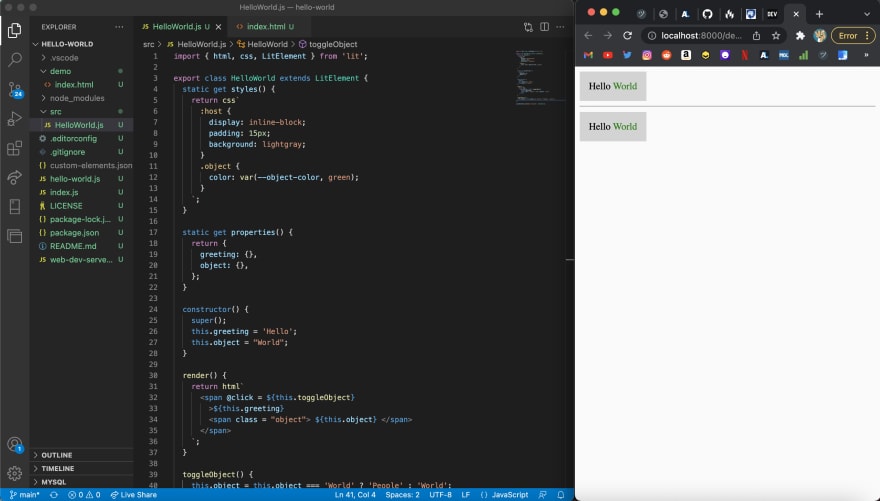
Using Lit's Playground as a reference, I was able to make this very quick and easy Hello World web component. Hopefully you all will now be well on your way to creating web components as well!
GitHub Repository
Here is the GitHub Repository that I uploaded my web component to, My Lab 1 GitHub Repository

Top comments (0)