
Ever felt a bit Starky?
You can deny all you want but seeing Tony Stark designing the sophisticated Iron Man suit had an oomph factor to it.
Now, I want you folks to pause for a moment and think, how unbelievably amazing it will be if you can also design something like this. Not an Iron Man suit ( maybe :P ) exactly but cool stuff like home automation suite or a simple portable gaming console?
The answer lies in exploring this small yet potent device called the Raspberry Pi.
What exactly is Raspberry Pi?
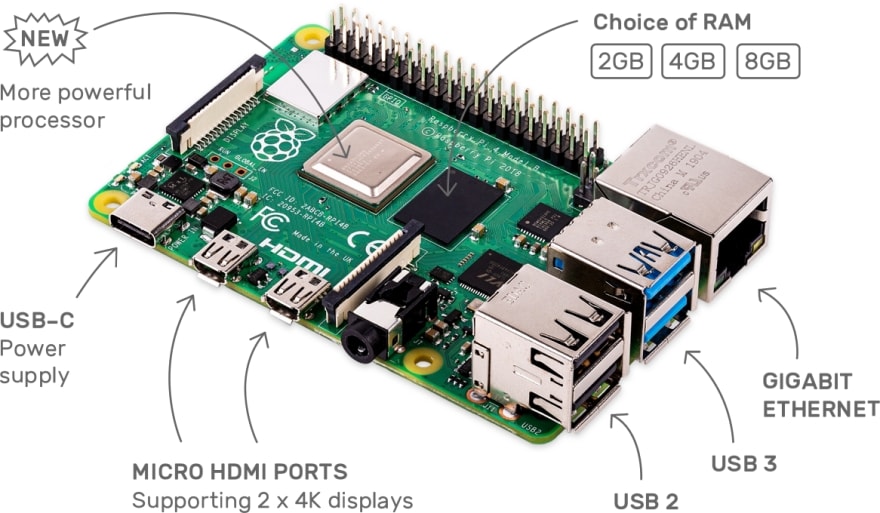
Raspberry Pi 4 Model B
According to the official website, Raspberry Pi can be simply seen as:
A small and affordable computer that you can use to learn programming.
But if we really dive deep into the potential of this device, the above statement will surely look like an oversimplification.
This is essentially a hardware device with computing ability quite similar to your usual desktops or laptops but what makes so useful is the presence of programmable I/O pins popularly known as GPIO pins ( General Purpose ).
It is due to these pins that we are able to interface a variety of sensors to the board to make awesome utilities.
But it can be a bit daunting for a beginner to start working with this marvelous piece of technology as unlike a normal computer the learning curve is a bit steeper here.
So let’s simplify this and bake our very own Raspberry Pi.
Ingredients:
There are several ways to set it up but mostly they require the use of a screen to follow installation instructions.
We are going to set up the Pi in a completely headless (without any output display screen) way.
Let’s look at the tools we need:
- Raspberry Pi
- Raspberry Pi 15.3W USB-C Power Supply
- Raspberry Pi Imager
- A Desktop/Laptop
- Micro SD card (16 GB or above)
Flashing OS on the SD card:
Since the operating system for Raspberry Pi resides on a micro SD card, we need to flash the downloaded image to the card and boot the Pi from it.
Below are the detailed steps that will help you create a bootable SD Card.
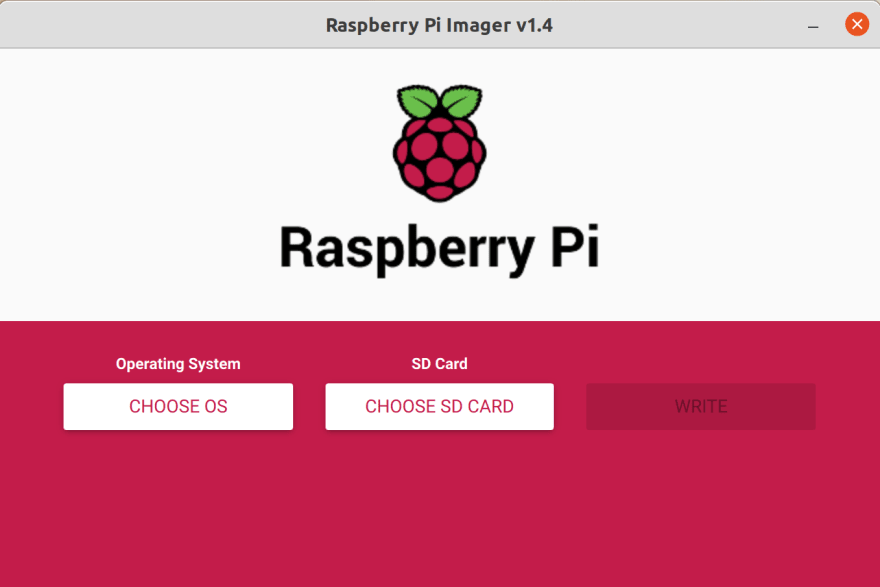
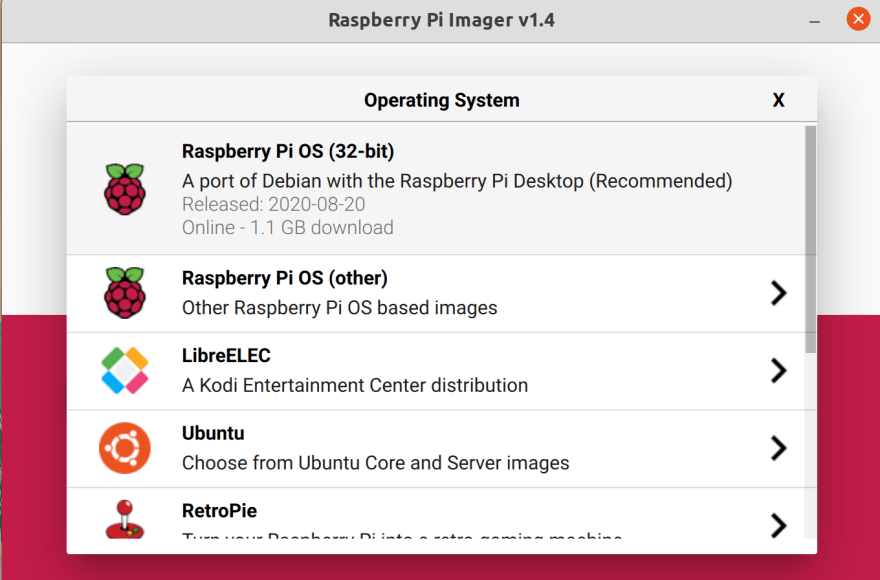
Download the latest version of Raspberry Pi Imager based on the link above and select the OS of your choice to install.
For this tutorial, we are selecting Raspberry Pi OS (32 bit).
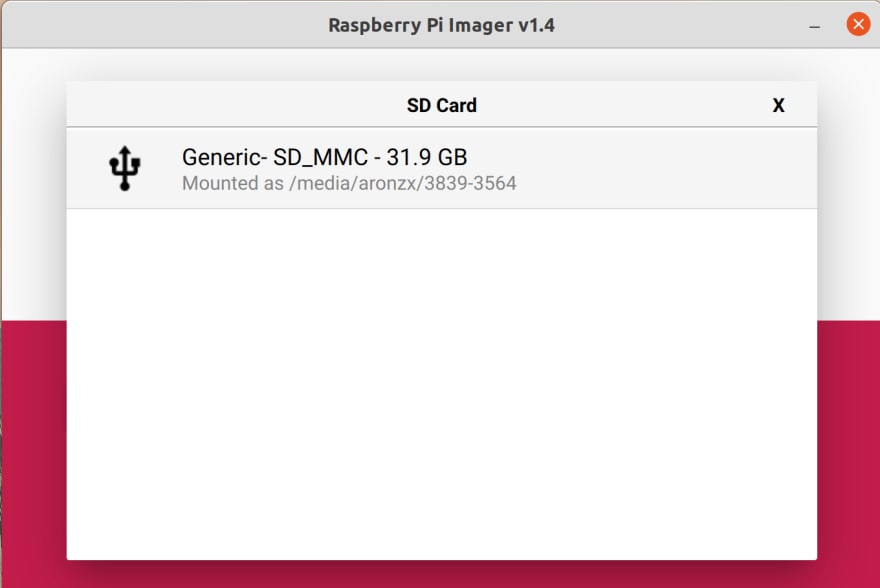
Connect your SD card to your computer (use card reader if required) and use the Pi Imager to burn a bootable version of the selected OS on the SD card.
Connecting the Pi to a computer:
Before we can start working on the Pi, we need to provide a way to connect it with our computer. Raspberry Pi can be independently used as a computer, just by attaching a keyboard and a monitor to it.
Since over here we are focusing on the headless setup, we will be using just our computer to work on the Pi remotely. We will be using SSH to connect over a wireless network, using the following steps:
Put an empty file and rename it to ssh in the boot directory of the SD Card.
This will enable the SSH daemon just after the first boot. Now you can directly connect your computer to the Pi over SSH once you are on the same network.-
For allowing the Pi to securely connect to your WiFi network, then you can open
wpa-supplicantconfiguration file in an editor (say nano) and add your entry.-
sudo nano /etc/wpa_supplicant/wpa_supplicant.confand add the below code to the end of the file. -
 network={
           ssid="testing"
           psk="testingPassword"
        }
- For other network configurations visit this detailed guide.
-
Make sure that the Pi and your computer are on the same network and do an SSH to it. Please note that depending upon the OS your computer is running you will have different methods for this.
You can find out the IP address of your Pi by simply looking at devices connected to your Router's dashboard.
There are other ways to access this information as well due to simplicity we won't go into those details.For doing ssh, the default username is pi and password is **raspberry.
Use it to log in into the Pi with the shell withssh pi@192.168.0.80assuming *192.168.0.12 is Pi's IP.Now when you are logged in, you need to enable SSH for the subsequent sessions. For doing this, write
sudo raspi-configin the terminal and press enter.Select Expand File System option from the list to so that we can use the entire card space.
Select Interfacing options -> SSH and enable it. Also, enable VNC while we are at this (We will see this next).
Reboot the Pi.
Setup Visuals for the Pi:
Now when we had successfully configured Raspberry Pi to work with the basic command line, we can think more ambitiously in terms of assigning visual access to it.
We will be using Virtual Network Computing (VNC) which is a graphical desktop sharing system. It will allow us to remotely control the desktop interface of the Pi with the help of our computer.
It transfers the keyboard and mouse events to the server running on the Pi and returns the respective updates on the screen. Since we have already allowed VNC above we can just install it by using sudo apt-get install tightvncserver.
Just type tightvncserver in the terminal to start the VNC server on the Raspberry Pi.
You will have to install a VNC client on your computer to connect to the Pi.
Once done, you will be able to communicate with Raspberry Pi, directly from your computer.

Congratulations you have just baked your Raspberry Pi 🎉
If you liked this post, you can find more by:
Following me on Twitter: @abshekha
Connecting on LinkedIn: abhimanyubitsgoa
Visiting my website: https://abhimanyutimes.com
Thanks for reading!

Top comments (0)