
Unlock the full potential of your AI assistant by connecting it to a PostgreSQL MCP server on Claude Desktop. This integration makes workflows smoother, allowing for easy data access and queries.
This powerful setup enables Claude to securely access and query your PostgreSQL databases, providing deeper insights and seamless data interaction. In this guide, you'll learn how to configure the MCP server, allowing Claude to inspect database schemas and execute read-only queries efficiently.
Prerequisites
Before you begin, ensure you have:
Claude Desktop Installed: If not, download it from the official Claude website.
Node.js Installed: MCP servers often run on Node.js. Download it from the official Node.js website.
Once all installed, open Claude Desktop
Step 1 - Configure Claude Desktop to Use the PostgreSQL MCP Server
To integrate the PostgreSQL MCP server with Claude Desktop, you'll need to modify the claude_desktop_config.json file.
Locate the Configuration File:
from the application
File -> Settings -> Developer
click on Edit Config button
Or you can locate it manually:
On Windows: Navigate to C:\Users<YourUsername>\AppData\Roaming\Claude\claude_desktop_config.json.
On macOS/Linux: Navigate to /Users//Library/Application Support/Claude/claude_desktop_config.json.
Edit the Configuration File: Open the claude_desktop_config.json file in your preferred text editor and add the following configuration:
{
  "mcpServers": {
    "postgres": {
      "command": "npx",
      "args": ["-y", "@modelcontextprotocol/server-postgres", "postgres://username:password@localhost:5432/your_database"]
    }
  }
}
Replace the placeholder values:
-
username: Your PostgreSQL username. -
password: Your PostgreSQL password. -
localhost: The host where your PostgreSQL server is running. -
5432: The port number (default is 5432). -
your_database: The name of your PostgreSQL database.
Save and Close the configuration file.
Step 2 - Restart Claude Desktop
After configuring the MCP server:
Close Claude Desktop completely(You may need to locate its process and end it using the task manager on Windows or the Activity Monitor application on mac).
Reopen Claude Desktop to apply the new configuration.
Upon restart, Claude will initialize the PostgreSQL MCP server, enabling secure interactions with your database.
Step 3 - Verify the Integration
To ensure everything is set up correctly:
Open Claude Desktop.
Access MCP Tools:
Click on the hammer icon (🛠️) located at the bottom right corner of the input box.

You should see tools related to the PostgreSQL MCP server, such as options to inspect schemas or execute read-only queries.
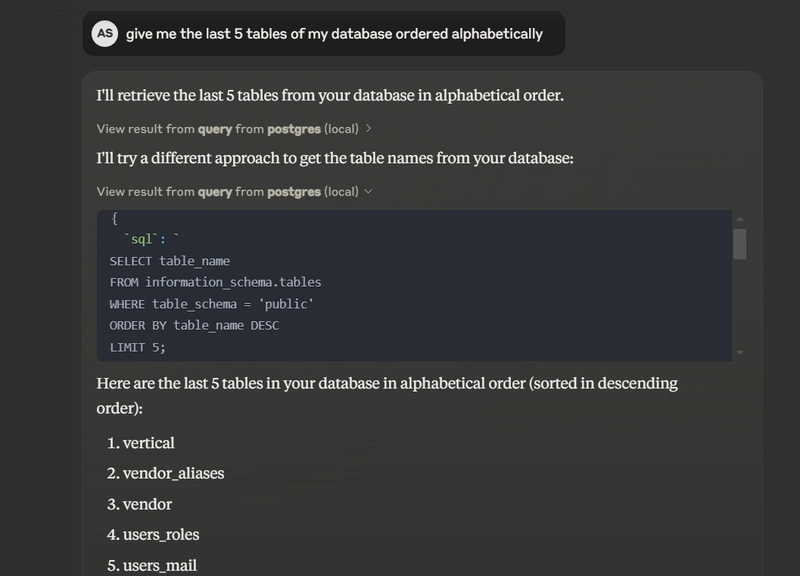
Test a Query:
Use Claude to run a simple read-only query on your PostgreSQL database to verify the integration.


Conclusion
By following these steps, you've successfully integrated the PostgreSQL MCP server with Claude Desktop. This setup allows Claude to securely access and query your PostgreSQL databases, enhancing its utility in tasks like data analysis and reporting.
If you encounter any issues or have questions, feel free to ask in the comments section below.

Top comments (0)