Installation
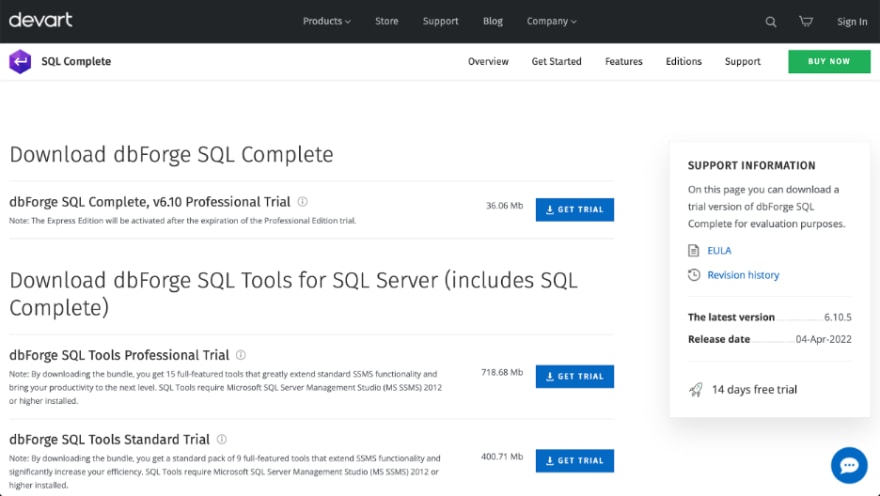
You can get dbForge SQL Complete by clicking the Get Trial button. If you go for the SQL Tools Professional Trial, it will also include the whole suite of SQL Server Management Studio extensions, which adds a whole lot of extra value.
Note: SQL Complete is an add-in for SQL Server Management Studio, so I would recommend having the latest version installed, although if you have an older version (e.g. 2012, 2014), then it will probably work as well.
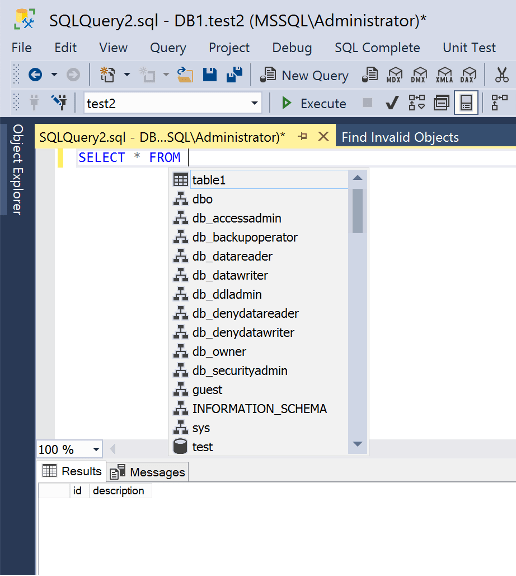
Since SQL Complete is not a stand-alone tool, the first thing you must do is open SQL Server Management Studio and establish a connection against a target SQL Server instance of your choosing. Once in there, you can fire up a new query window and start laying out a query, just to see what it does:
In my case, I’m currently connected to my database called “test2” which only has 1 table right now. As I’m writing my SELECT statement, you can see that SQL Complete is listing that table for me in the context menu, which is very helpful when your databases are flooded with dozens of objects.
Now, if you don’t want to type the whole name of the desired table, then you can simply select it and it will complete it within your query.
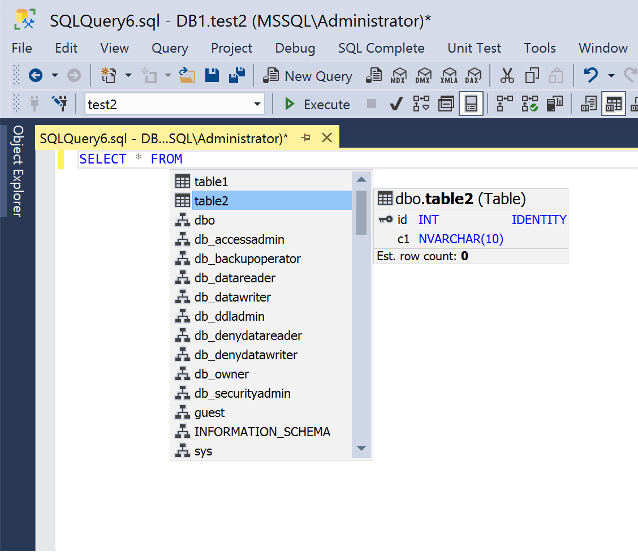
For demonstration purposes, I have created a new table called “table2” and re-tried writing the same SELECT statement again. However, this time I noticed that only “table1” was showing in the context menu; it showed only after I dropped the connection to the instance and re-established it, so that you are fully aware. As you can see in the screenshot, it is showing as expected.
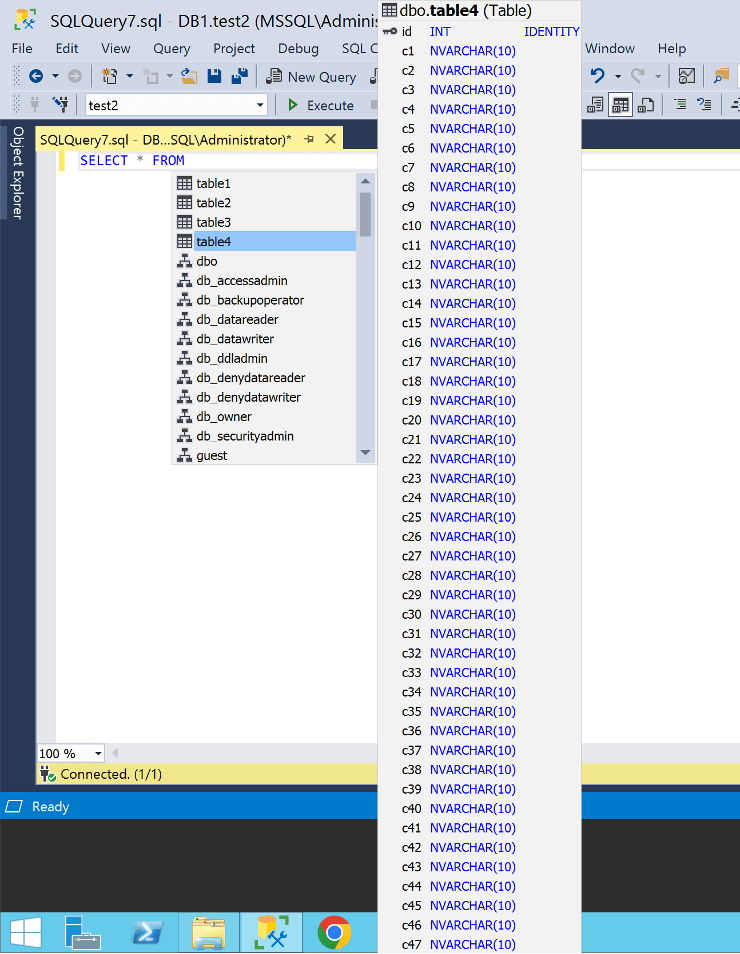
There’s one additional detail that I would like to bring up, and it is that if you select a particular table with the arrow keys on your keyboard, then it will list you all the fields with their respective data types. It will also tell you which fields conform the Primary Key, and an estimate of the row count. That feature by itself is a massive productivity booster for all of us SQL Server DB Developers!
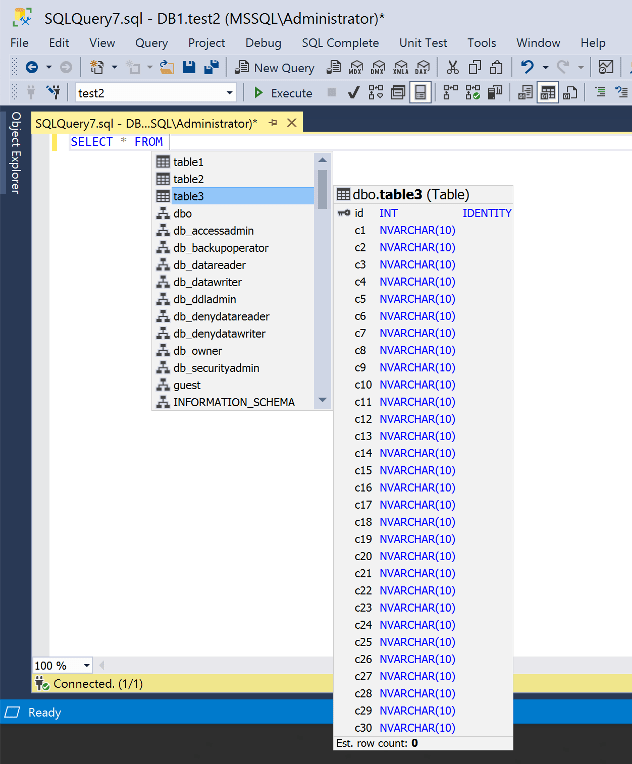
Just out of pure curiosity, I have created a third table called “table3” with 31 fields (1 id and 30 NVARCHAR fields) just to see how SQL Complete presents a wide table:
With my on-going curiosity, I want to try with an even wider table (61 fields) to see the behavior:
It will display as much as your screen can handle. It would be neat to include a scrollable view for the context menu for cases like this though, but I’m sure that the Devart team will address it if the demand for it is high enough because they are constantly improving their suite of tools for the greater good.
*I would like to make a tiny pause here and take back what I mentioned earlier in regards to the need to re-establish a connection to the SQL Server instance so that my newly-created table would appear in the context menu. It turned out that after I created my tables “table3 and table4”, I got up from my seat for a few minutes, and when I got back, the tables were there, without the need for me to re-establish my connection.
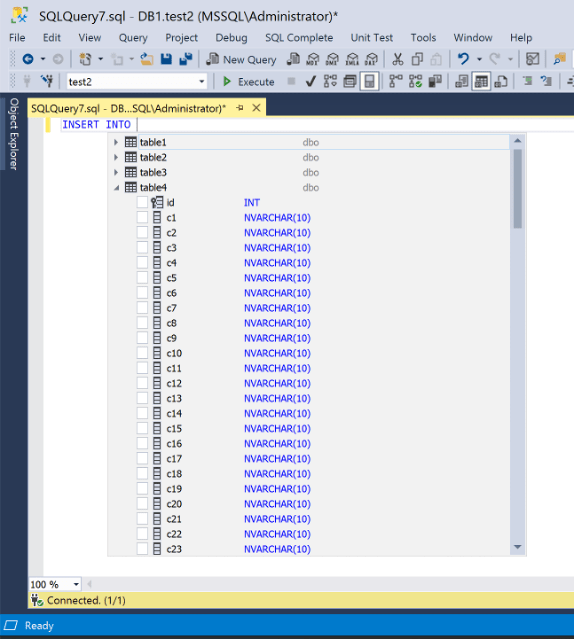
Now let me move on to an INSERT statement to see what we get:
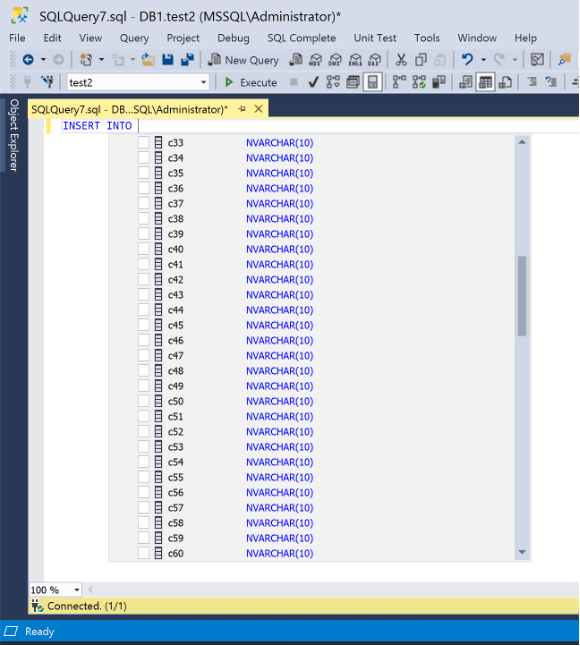
Interestingly enough, here you get a scrollable view for all the fields if you have wide tables!
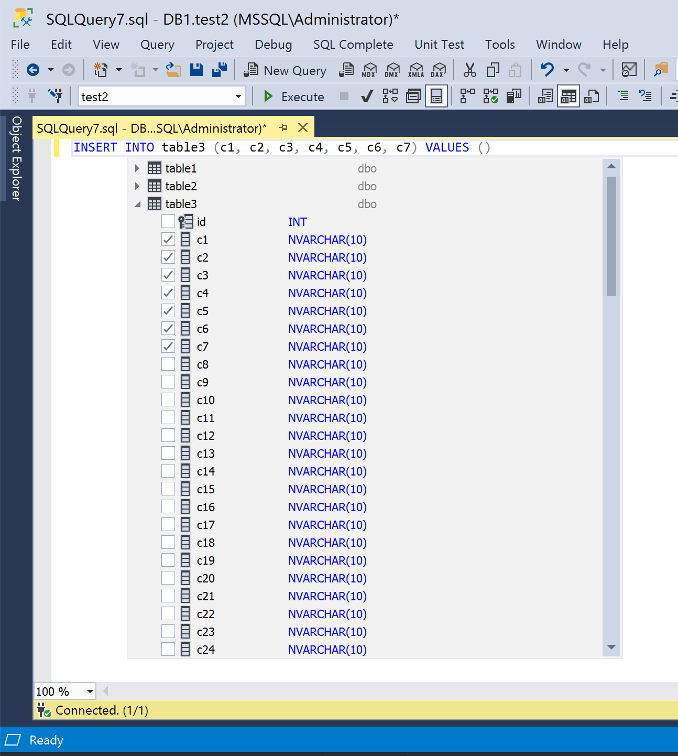
With that detail out of the way, I want you to notice that next to each field name there’s a white/unmarked checkbox, so if you start clicking them you will see how your INSERT statement is being completed for you (it’s just SQL Complete living up to its name ;) ):
Now, if you move on to the VALUES section of your INSERT statement and start filling in the values, then SQL Intellisense will indicate which column you are specifying the value for:
This visual feedback alone is worth every penny!
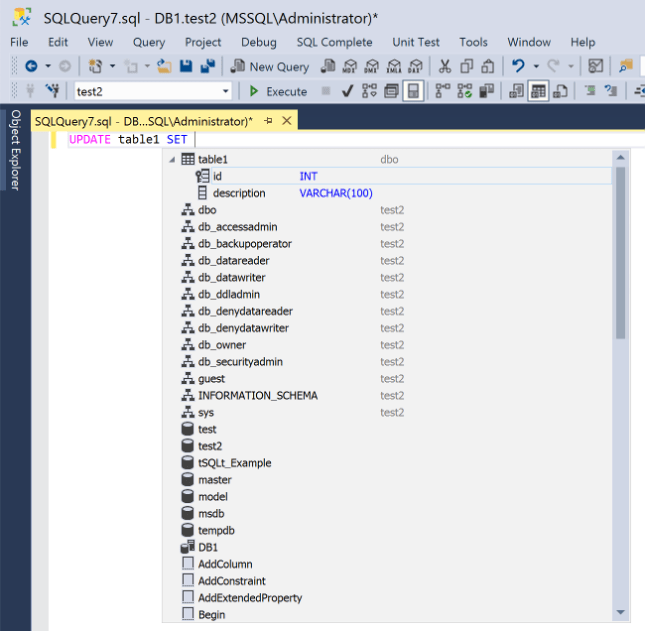
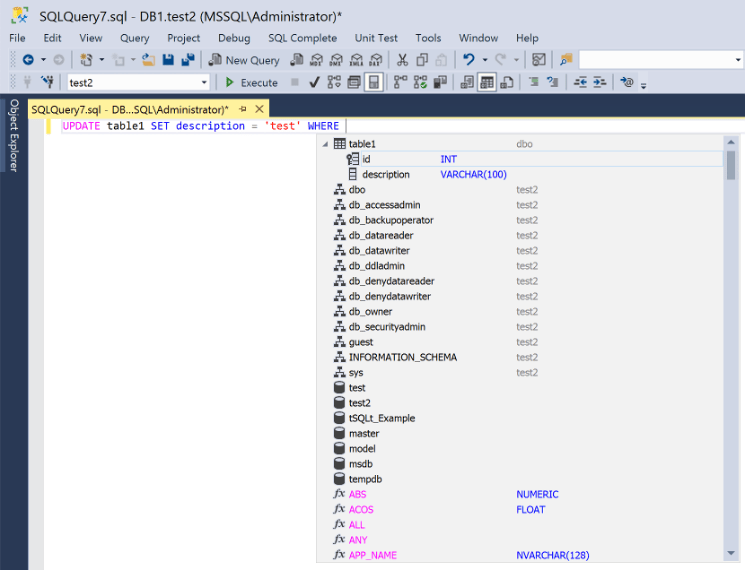
For the UPDATE statement you pretty much get the same treatment, as you are typing it you will be getting the help from SQL Complete to write a valid statement:
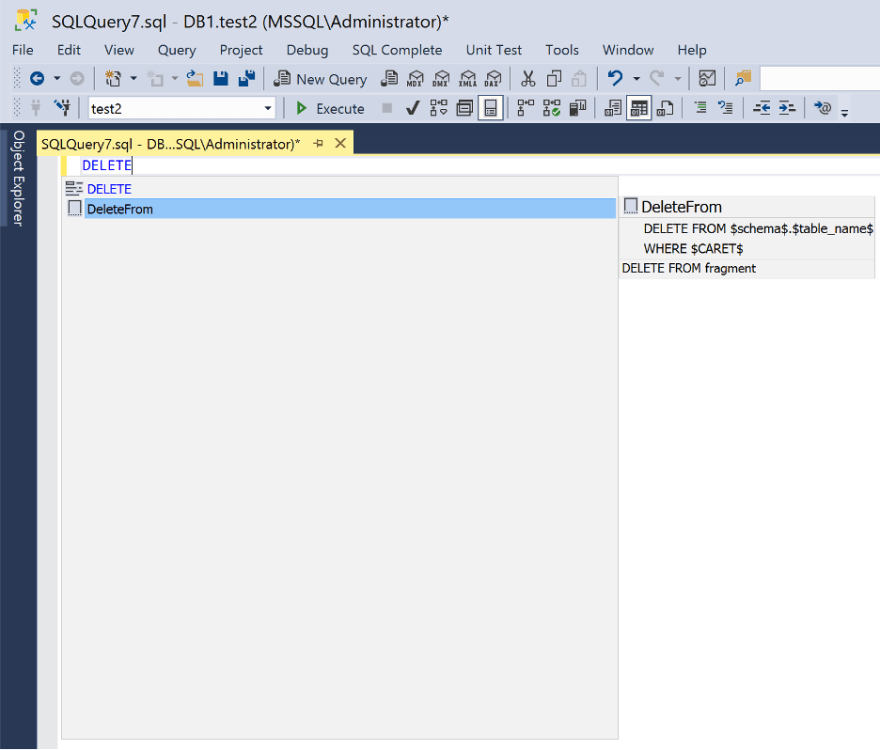
Moving to the DELETE statement, as soon as I enter the word DELETE, then I’m presented with 2 options:
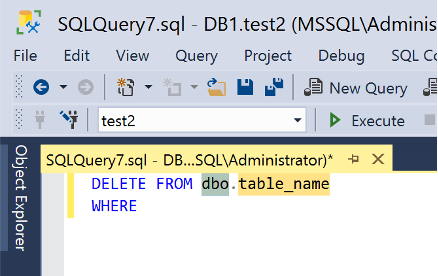
If I pick the “DeleteFrom” option, you will notice that SQL Complete will layout a full skeleton for a formal DELETE statement that you simply have to accommodate to your own case:
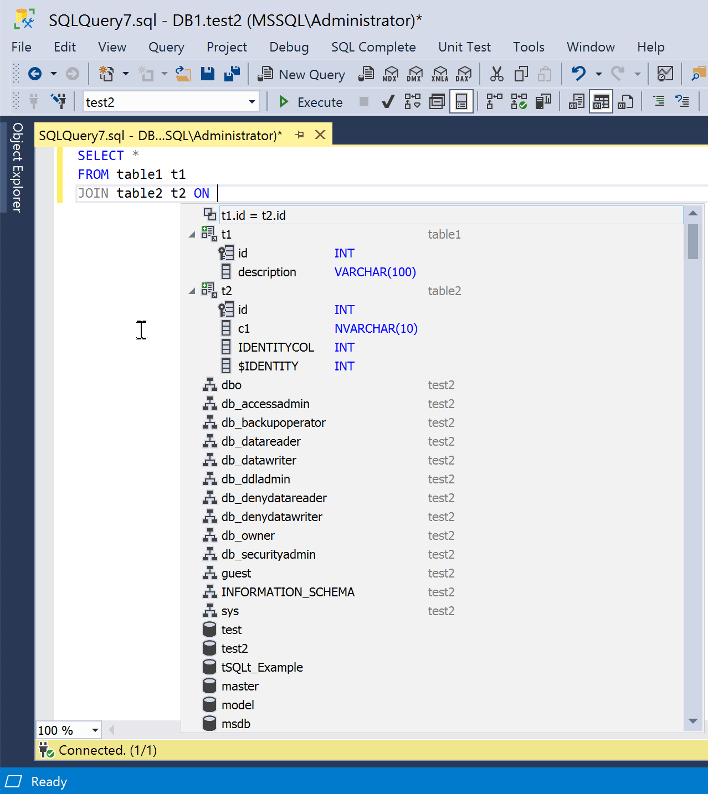
Moving on to a SELECT with a JOIN statement, this is what I’m able to see when I reach the part where I have to specify the fields to perform the match:
As you can see, it is suggesting to me that the JOIN can be done using the id fields of both tables, and it will also show the participating tables along with their respective fields.
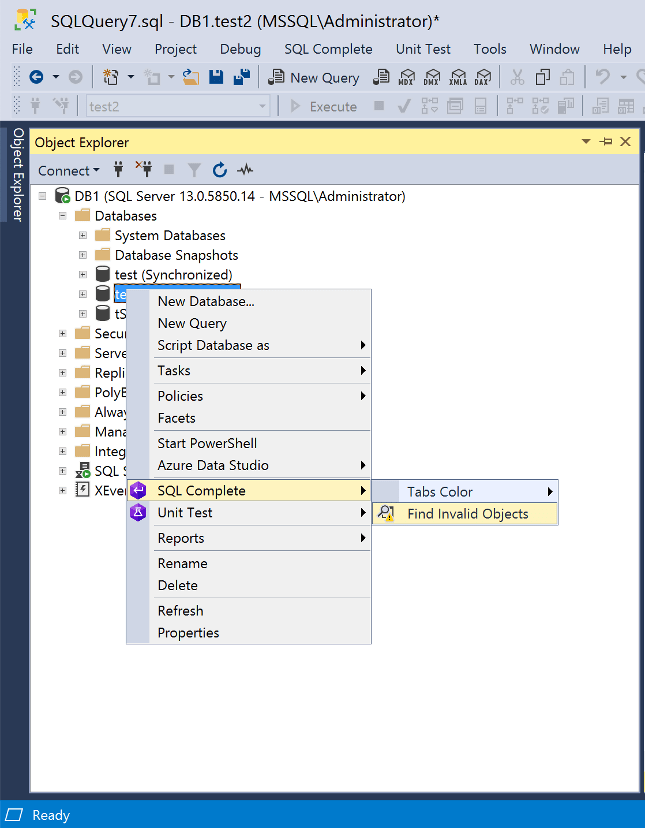
Moving on to the last section of this article, I want to show you a feature that SQL Complete also has baked in. If you right-click on any database, you will see a section called “SQL Complete” and then an option called “Find Invalid Objects”:
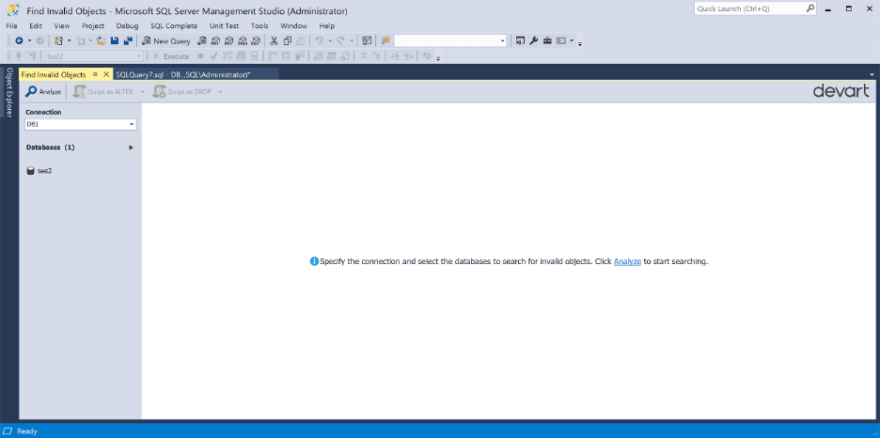
After you click that option, you will see something like this:
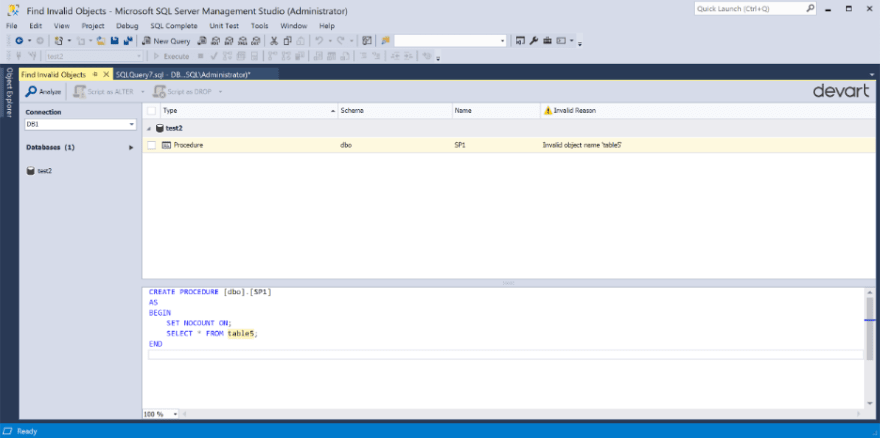
If I hit the “Analyze” button or link, this is what I’ll get:
For this particular demonstration, I have created on purpose a Stored Procedure that is trying to do something on a table that doesn’t exist within my “test2” database, just to show you that SQL Complete will not only let me know that there’s something wrong with my Stored Procedure, but it will also pin-point where the issue is. Once again, hats off to the Devart team!
Final thoughts
● I have definitely just shown you the surface of what SQL Complete has to offer, so if you’d like to dig deeper, then I highly recommend you check the documentation center for even more information. I will continue with the coverage of SQL Complete in a second part so that the content is presented to you in a digestible format.
● If your workflow revolves heavily around DB Development for SQL Server, then SQL Complete is definitely the tool to have to boost your productivity.
● SQL Complete is the perfect complement, whether you are an experienced senior or a not-so-experienced junior database developer.




Top comments (0)