First we create our react app.
npx create-react-app my-app

cd my-app

npm start
You can see more about create-react-app here.
We create our SnakeBoard which will be displaying our rows and snake.
and we import and call it on the src/App.js

src/SnakeBoard.js
First we define two dimensional array full of ‘blank’ values.

Then we use useState hook to display blank cells.
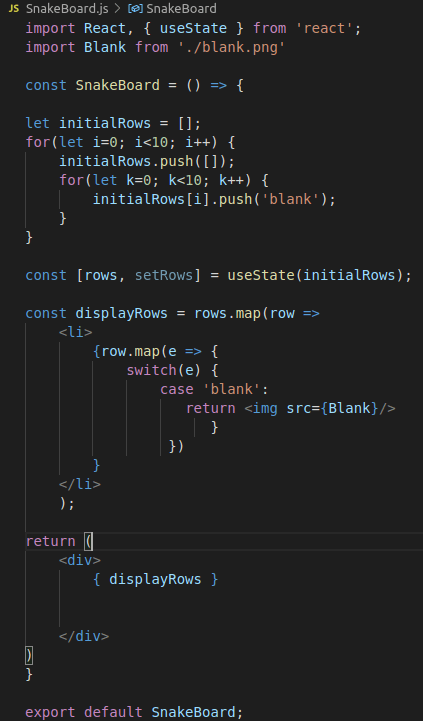
useState hooks take a parameter that will set initial value, and returns an array with two values. First is the value which we will be using to access rows data, the second is the function that we will use to change rows value.
We could name them anything and that could work but in order to remember, that is a better way to name them.
Then we map our rows and return blank images for all the blank values.

Our snake board is ready. Now we will create our snake.
So our snake is basically an array of objects. These objects hold snake’s cell’s x and y position.
We will initiate our snake with {x:0, y:0}
const [snake, setSnake] = useState([{x:0,y:0}]);

const displaySnake = () =\> {

const newRows = rows;

snake.forEach(cell =\> {

newRows[cell.x][cell.y]='snake';

})

setRows(newRows);

}
displaySnake will change the rows according to snake’s cell positions.
switch(e) {

case ‘blank’:

return \<img src={Blank}/\>

case ‘snake’:

return \<img src={Snake}/\>

}
We change our switch case in displayRows like this.

We should move our snake. Snake will move according to direction.
const [direction, setDirection] = useState(‘right’);

const moveSnake = () =\> {

const newSnake = [];

switch(direction) {

case ‘right’:

newSnake.push({x: snake[0].x, y: (snake[0].y + 1)%10})

}

setSnake(newSnake);

displaySnake();

}
Javascript’s initial setInterval didn’t work well with the hooks so I searched it on the internet and found a function that will call the functions at the right time.
function useInterval(callback, delay) {

const savedCallback = useRef();

// Remember the latest callback.

useEffect(() =\> {

savedCallback.current = callback;

}, [callback]);

// Set up the interval.

useEffect(() =\> {

function tick() {

savedCallback.current();

}

if (delay !== null) {

let id = setInterval(tick, delay);

return () =\> clearInterval(id);

}

}, [delay]);

}
We call moveSnake with useInterval and voila.
useInterval(moveSnake, 250);

We want to change its direction according to keypress so we add the code below.

This function changes the direction based on our key press. So we can play with our arrow keys.

Added other directions and changed 10 number with a variable. So we can change our dimensions anytime we want.
Now we are going to put food on the board.
const randomPosition = () =\> {

const position = {

x: Math.floor(Math.random()\*width),

y: Math.floor(Math.random()\*height)};

return position; }
We will use randomPosition function to initialize our food and change our food position when the snake eats food.
const [food, setFood] = useState(randomPosition);
We add this line to displaySnake
newRows[food.x][food.y]=’food’;
And this case to our return displayRows
case ‘food’:
return \<img src={Food}/\>
We want to change food position if snake eats the food.And if it doesn’t eat, we want to remove the last piece of tail.So we write:
if(snake[0].x === food.x && snake[0].y === food.y) setFood(randomPosition);
}
else {
newSnake.pop();
}
To the moveSnake function.
And we have our food.

I made the snake images opacity 0 and added a background photo.

And that’s it.
I hope that was a useful article for you. Thank you for reading.
You can fork the code from here .
Don’t forget to follow us on linkedin :)

Top comments (0)