Update: part two is also out 😉
The canonical way to judge a JavaScript framework is its implementation of TodoMVC, a simple app to manage a todo list.
Phoenix LiveView promise is to create interactive webapps without having to writing (almost) any JavaScript. I decided to give it a try and check if that promise holds up.
This guide assumes a certain familiarity with Elixir and Phoenix; if you're new to them and want to follow along, feel free to do so and to ask for clarifications in the comments or by DMing me!
You can follow along the commits of this repo.
Create the app
You can check out a guide on how to install Phoenix if needed.
Once you have Phoenix installed, create the app:
mix phx.new todo_mvc --module TodoMVC --no-ecto
We're not going to persist the todos, so we'll not use Ecto.
Follow the instructions to make the app work with LiveView (skip the CSS bit).
Now you can prepare the layout.
Take the base HTML of a TodoMVC app and place it in lib/todo_mvc_web/templates/layout/app.html.eex
Add the base CSS by adding its dependency to assets/package.json
"dependencies": {
  "todomvc-app-css": "^2.0.1"
}
Run:
npm install --prefix assets
And finally add the CSS to the pipeline:
/* assets/css/app.css */
@import "../node_modules/todomvc-app-css/index.css";
Let's prepare the main template you'll be working on:
# lib/todo_mvc_web/views/main_view.ex
defmodule TodoMVCWeb.MainView do
  use TodoMVCWeb, :view
end
From the layout, move <section> to lib/todo_mvc_web/templates/main/index.html.leex and replace it with
<%= render @view_module, @view_template, assigns %>
N.B.: the .leex extension will make sure that the contents can be updated dynamically when the state associated with a live view changes
Finally, set up the protagonist of this tutorial, the live view:
# lib/todo_mvc_web/live/main_live.ex
defmodule TodoMVCWeb.MainLive do
  use Phoenix.LiveView

  def render(assigns) do
    Phoenix.View.render(TodoMVCWeb.MainView, "index.html", assigns)
  end
end
Amend the main get "/" route so that the live view is used instead
# lib/todo_mvc_web/router.ex
live "/", MainLive
Now you're ready to tackle the more interesting bits!
Add a todo
Throughout this tutorial, we'll need a way to track what todo we'll be actioning. We'll use uuids for this.
Install the UUID module as a dependency in mix.exs
{:uuid, "~> 1.1"}
Let's start by creating a struct for todos. We'll use this struct extensively!
# lib/todo_mvc/todo.ex
defmodule TodoMVC.Todo do
  @enforce_keys [:id, :text, :state]
  defstruct [:id, :text, :state, :editing]

  def new(text) do
    %__MODULE__{id: UUID.uuid4(), text: text, state: "active"}
  end
end
Add the alias call, and mount and handle_event functions to the live view
defmodule TodoMVCWeb.MainLive do
use Phoenix.LiveView
alias TodoMVC.Todo
def render(assigns) do
Phoenix.View.render(TodoMVCWeb.MainView, "index.html", assigns)
end
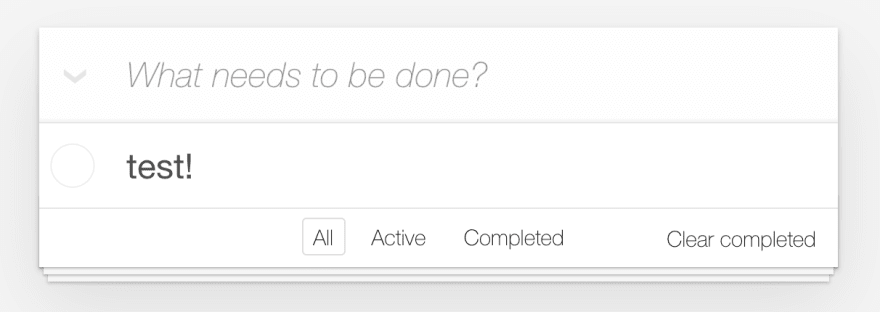
def mount(_params, socket) do
{:ok, assign(socket, todos: [Todo.new("test!")])}
end
# We don't want to add a todo if the text is empty
def handle_event("add-todo", %{"text" => ""}, socket) do
{:noreply, socket}
end
def handle_event("add-todo", %{"text" => text}, socket) do
todos = socket.assigns[:todos] ++ [Todo.new(text)]
{:noreply, assign(socket, todos: todos)}
end
end
Expand the ul in lib/todo_mvc_web/templates/main/index.html.leex to accomodate the todos:
<ul class="todo-list">
  <%= for todo <- @todos do %>
    <%= content_tag :li do %>
      <div class="view">
        <%= content_tag :input,
          nil,
          type: "checkbox",
          class: "toggle"
        %>
        <label>
          <%= todo.text %>
        </label>
        <button class="destroy"></button>
      </div>
    <% end %>
  <% end %>
</ul>
The page should now look like this:
Replace the class="new-todo" input with this small form
<form phx-submit="add-todo">
  <input name="text" class="new-todo" placeholder="What needs to be done?" autofocus>
</form>
Now, when you type text in the "What needs to be done?" box and press Enter, a new todo will appear at the bottom of the list!
Delete a todo
Remember that we added an id field to the todos? This will come in handy to remove them selectively off the list.
Modify the button with class="destroy" like this:
<button class="destroy" phx-click="destroy" phx-value-todo-id="<%= todo.id %>"></button>
We now need a matching event in the live view
# lib/todo_mvc_web/live/main_live.ex
def handle_event("destroy", %{"todo-id" => id}, socket) do
  todos = socket.assigns[:todos] |> Enum.reject(fn t -> t.id == id end)

  {:noreply, assign(socket, todos: todos)}
end
As we're simply persisting the todos in the live view state, we'll just recreate the todos list by omitting the deleted todo.
Complete a todo
Now, for something a bit more complex!
First of all, define the behaviour to change state of a todo in the struct module
# lib/todo_mvc/todo.ex
def toggle(%__MODULE__{state: "active"} = todo), do: complete(todo)
def toggle(%__MODULE__{state: "completed"} = todo), do: activate(todo)

def complete(todo), do: %{todo | state: "completed"}

def activate(todo), do: %{todo | state: "active"}
Got to love some pattern matching!
We'll need to add some functionality to the checkbox of the todo view items:
<%= content_tag :input,
  nil,
  type: "checkbox",
  class: "toggle",
  phx_click: "toggle",
  phx_value_todo_id: todo.id,
  checked: if todo.state == "completed", do: "checked"
%>
Tie up the relevant event in the live view:
# lib/todo_mvc_web/live/main_live.ex
def handle_event("toggle", %{"todo-id" => id}, socket) do
  toggle = fn
    %Todo{id: ^id} = todo -> Todo.toggle(todo)
    todo -> todo
  end

  todos = socket.assigns[:todos] |> Enum.map(toggle)

  {:noreply, assign(socket, todos: todos)}
end
This won't strikethrough the todo when completed. To achieve that, we need to add a class to the <li> that contains the todo:
<%= content_tag :li, class: todo_classes(todo) do %>
You can define the helper function in the main view for convenience:
# lib/todo_mvc_web/views/main_view.ex
alias TodoMVC.Todo

def todo_classes(%Todo{state: "completed"}), do: "completed"
def todo_classes(_), do: ""
Et voilà!

Toggle all todos
First, we'll change the little chevron at the top to carry more information about our current state, and only show it if we actually have todos in the list:
<%= if Enum.any?(@todos) do %>
  <%= content_tag :input,
    nil,
    type: "checkbox",
    id: "toggle-all",
    class: "toggle-all",
    name: "toggle-all",
    phx_click: "toggle-all",
    phx_value_checked: all_todos_completed?(@todos) |> to_string(),
    checked: if all_todos_completed?(@todos), do: "checked"
  %>
  <label for="toggle-all">Mark all as complete</label>
<% end %>
Again, let's define a helper function in the view file to check whether all todos are completed:
# lib/todo_mvc_web/views/main_view.ex
def all_todos_completed?(todos) do
  !Enum.any?(todos, fn t -> t.state == "active" end)
end
Now, we'll be passing a value checked (see phx_value_checked above) to the live view to decide what to do with our items. We need to cast the boolean into a string, otherwise on a value of false the phx-value-checked attribute won't be printed in the HTML.
Add the associated live view event:
# lib/todo_mvc_web/live/main_live.ex
def handle_event("toggle-all", %{"checked" => "false"}, socket) do
  todos = socket.assigns[:todos] |> Enum.map(&Todo.complete/1)

  {:noreply, assign(socket, todos: todos)}
end

def handle_event("toggle-all", _params, socket) do
  todos = socket.assigns[:todos] |> Enum.map(&Todo.activate/1)

  {:noreply, assign(socket, todos: todos)}
end
Click events will pass a host of other information (e.g.: where in the page the click occurred). The only think we're interested in is the checked value, so we can ignore the rest.
Clear all completed
Change the "Clear completed" button to show only if at least a todo is completed, and wire it up with a live view event:
<%= if Enum.any?(@todos, fn t -> t.state == "completed" end) do %>
  <button class="clear-completed" phx-click="clear-completed">
    Clear completed
  </button>
<% end %>
And this is the corresponding event handler:
# lib/todo_mvc_web/live/main_live.ex
def handle_event("clear-completed", _params, socket) do
  todos = socket.assigns[:todos] |> Enum.reject(fn t -> t.state == "completed" end)

  {:noreply, assign(socket, todos: todos)}
end
Hide the footer
Last thing for part one: hide the footer if there are no todos. All you need to do is to wrap the footer element in:
<%= if Enum.any?(@todos) do %>
  ... footer here ...
<% end %>
Let's also remove the sample todo in the live view:
def mount(_params, socket) do
  {:ok, assign(socket, todos: [])}
end
That's it for part one!
In part two we'll explore the handle_params function, which allows us to get information from the URL we're visiting, and hooks, which we'll use for some JavaScript interoperability. Stay tuned!

Top comments (0)