
1. Overview
In this tutorial, we'll look into the different ways we can create a Spring Boot project.
2. Using Spring Initializer in spring.io
We can create a Spring Boot project by using the Spring Initializer in start.spring.io. This is the quickest way to create an application in Spring Boot which is one of the most popular frameworks for creating web applications.
The Spring Initializer offers different options for choosing the build tools, programming languages, Spring Boot versions, and the related dependencies.

2.1. Build Tools
We have the option to choose between Maven and Gradle as our build tool. In this case, we'll choose Gradle as our build tool for the Spring Boot application.
2.2. Language
Spring Initializer supports multiple JVM languages like Java, Kotlin, and Groovy to build a web application. In this case, we'll choose Kotlin as our programming language.
2.3. Version
We should always aim to choose the latest stable Spring Boot version for building our application. The SNAPSHOT versions are not stable and should be avoided. The versions labeled with M signifies Milestone versions. It refers to a future stable version.
In this case, the latest stable version is 2.4.2 while M1 is supposed to have version 2.5.0 (M1). So, version 2.5.0 (M1) is the future stable release version.
2.4. Project Metadata
We can also define the project metadata which includes the group, artifact, name, description, package name, packaging, and Java version. In this case, we'll choose Jar as the packaging option. The Java version will be 11.
2.5. Dependencies
Finally, we have to define the dependencies by selecting the Add Dependency button. In this case, we can add a Spring Web dependency which should be sufficient to build a simple RESTful web application.
We can select the Generate button and download the ZIP archive locally. After that, we can extract the project and import it into an IDE like IntelliJ IDEA, Spring Tools, Eclipse, etc.
3. Using Spring Initializer in IntelliJ IDEA
We can create a Spring Boot project by using the Spring Initializer plugin in IntelliJ IDEA.
3.1. Create a New Project
Firstly, we select the option Create New Project.

3.2. Use Spring Initializer
After that, we select the Spring Initializer to generate a Spring Boot application. Then we have to download or assign a project SDK and select Next.

3.3. Configure Project Settings
Now we'll configure the project settings as per our requirements. In this case, we choose Gradle as the build tool, Kotlin as the programming language, Jar as the packaging option, and Java version 11.
Select Next to continue.

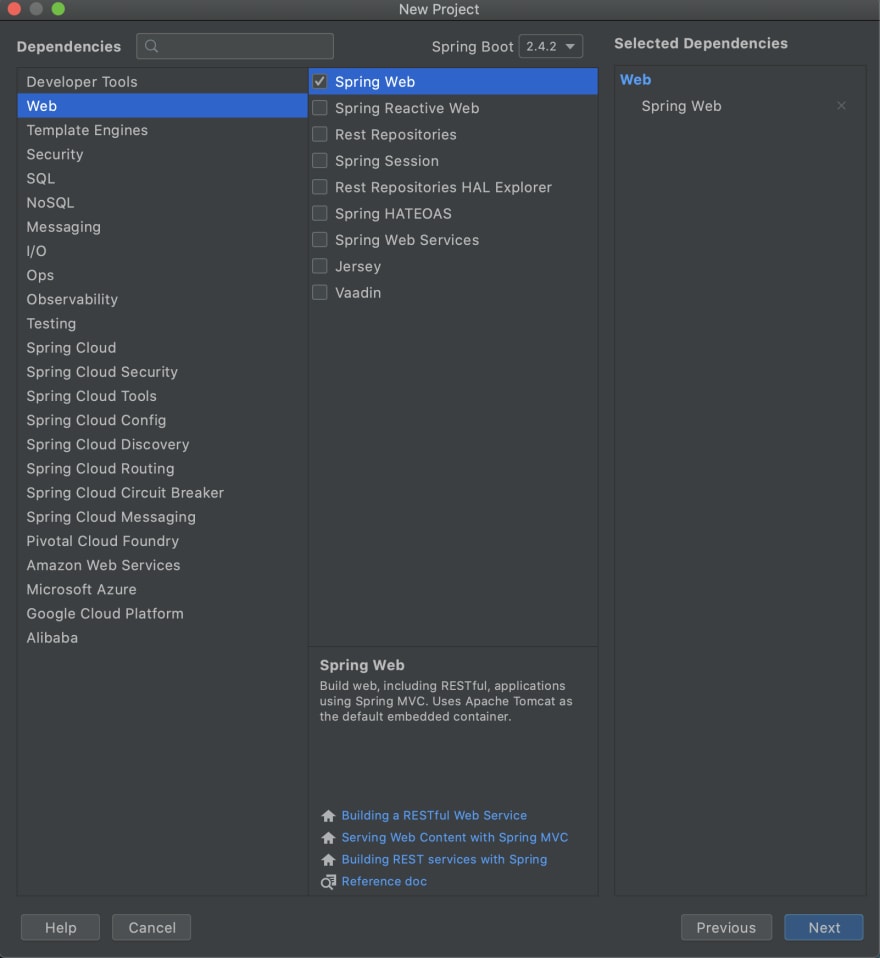
3.4. Select Dependencies
Also, we need to define the external dependencies of our Spring Boot application. We can choose Spring Web dependency which should be sufficient to build a simple RESTful web application.
Select Next to continue.
3.5. Project Name and Location
Finally, we can define a name for the Spring Boot project and the directory in the local machine. In this case, we continue with the default values.
Select Finish and the Spring Boot project is created.

4. Conclusion
In this tutorial, we discussed the different ways to create a Spring Boot project.
Originally published on Anirban's Tech Blog.

Top comments (0)