
In an ideal world, Docker containers should be ephemeral without any reliance on external storage. In the microservice world, this is achievable when services are connecting to external databases, queues, and other services.
Sometimes though, we need persistent storage, when we're running services such as Jenkins, Prometheus, or Postgres. Fortunately, there's a straightforward way to set this up now for our ECS Clusters using Docker volume drivers. In this article, you'll learn how to attach EBS volumes to your ECS Tasks, which detach and reattach automatically when your ECS Task gets restarted.
Overview of volumes in ECS
By default, when you run an ECS Task it's going to have an area of storage on the host that's running it. This host is known as the ECS Container Instance, and is in actual fact an EC2 instance. This is fine for temporary data, but as soon as our ECS Task restarts we lose the data. What we need is a way to connect to external storage, such as AWS EBS or AWS EFS.
With Docker volume plugins (also known as volume drivers), such as REX-Ray, we can now achieve this. The REX-Ray plugin can configure AWS services, such as creating volumes and attaching volumes to EC2 instances.
As you can see in the diagram below, if we have an ECS Task running on an EC2 Instance, then the volume (e.g. EBS) needs to be attached to that instance:

REX-Ray takes care of all of this for us, and also specifically can manage:
- creating the volume if it doesn't already exist, including configuring volume type and size
- making sure our Docker container/ECS Task is mounted with the volume
- detaching re-attaching the volume when the ECS Task moves from one EC2 instance to another
ECS launch types
ECS has the EC2 and Fargate launch types. With EC2 you are responsible for provisioning the underlying EC2 instances on which your ECS Tasks will be deployed. With Fargate, you just have to specify the CPU and memory requirements, then AWS provisions everything needed to run your ECS Task.
It's worth noting that you can only use persistent storage with the EC2 launch type, not with Fargate. That's why in this article we will only be considering the EC2 launch type.
Setting up a persistent Docker volume: a working example
You can follow along with this example, where we'll:
- create an ECS Cluster built on top of 2 EC2 instances. The REX-Ray docker plugin will be installed on both of the instances.
- create an ECS Task definition for the Postgres database. The task definition will include the Docker volume configuration required to use the REX-Ray volume driver to attach a new EBS volume.
- launch the ECS Service for our ECS Task, which will deploy to one of our EC2 instances
- connect to our Postgres container, and create some data in a new database
- move the ECS Task from one EC2 instance to the other, which will restart the task
- connect to Postgres again, and see that data has persisted
You'll need access to the AWS Console and AWS CLI to complete this example.
Provisioning an ECS Cluster
First up, we're going to create an ECS Cluster built on two ECS Container Instances (EC2 instances), provisioned by an AutoScalingGroup. The CloudFormation template below contains everything you need.
Since it's a rather large template, in particular, pay attention to the following parts which are specific to the fact that we're using volumes:
- When each of our ECS Container Instances is launched,
docker plugin install rexray/ebsis run to install the required REX-Ray plugin (see UserData in ContainerInstances). - The IAM Role attached to our EC2 instances has permissions which include
ec2:CreateVolume,ec2:DeleteVolume, andec2:DetachVolume. This allows the REX-Ray volume driver to manage the EBS volumes (see EC2Role).
AWSTemplateFormatVersion: "2010-09-09"
Parameters:
  VPCID:
    Type: String
  SubnetId:
    Type: String
  InstanceType:
    Type: String
    Default: t2.small
  ECSAMI:
    Description: AMI ID
    Type: AWS::SSM::Parameter::Value<AWS::EC2::Image::Id>
    Default: "/aws/service/ecs/optimized-ami/amazon-linux/recommended/image_id"
  KeyName:
    Type: String
  AllowedCIDRIp:
    Type: String
    Default: 0.0.0.0/0
Resources:
  ECSCluster:
    Type: AWS::ECS::Cluster
    Properties:
      ClusterName: docker-volume-demo
  ECSAutoScalingGroup:
    Type: AWS::AutoScaling::AutoScalingGroup
    Properties:
      AvailabilityZones:
        - Fn::Select:
            - 0
            - Fn::GetAZs:
                Ref: AWS::Region
      VPCZoneIdentifier:
        - Ref: SubnetId
      LaunchConfigurationName:
        Ref: ContainerInstances
      MinSize: 2
      MaxSize: 2
      DesiredCapacity: 2
      Tags:
        - Key: Name
          Value: ECS host
          PropagateAtLaunch: true
    CreationPolicy:
      ResourceSignal:
        Timeout: PT15M
    UpdatePolicy:
      AutoScalingRollingUpdate:
        MinInstancesInService: 1
        MaxBatchSize: 1
        PauseTime: PT15M
        WaitOnResourceSignals: true
        SuspendProcesses:
          - HealthCheck
          - ReplaceUnhealthy
          - AZRebalance
          - AlarmNotification
          - ScheduledActions
  InstanceSecurityGroup:
    Type: AWS::EC2::SecurityGroup
    Properties:
      VpcId:
        Ref: VPCID
      GroupDescription: Enable SSH access via port 22
      SecurityGroupIngress:
        - IpProtocol: tcp
          FromPort: 22
          ToPort: 22
          CidrIp: !Ref AllowedCIDRIp
        - IpProtocol: tcp
          FromPort: 5432
          ToPort: 5432
          CidrIp: !Ref AllowedCIDRIp
  ContainerInstances:
    Type: AWS::AutoScaling::LaunchConfiguration
    Properties:
      ImageId:
        Ref: ECSAMI
      InstanceType:
        Ref: InstanceType
      IamInstanceProfile:
        Ref: EC2InstanceProfile
      KeyName:
        Ref: KeyName
      AssociatePublicIpAddress: true
      SecurityGroups:
        - Ref: InstanceSecurityGroup
      UserData:
        Fn::Base64:
          Fn::Sub: "#!/bin/bash\nyum install -y aws-cfn-bootstrap\n/opt/aws/bin/cfn-init
            -v --region ${AWS::Region} --stack ${AWS::StackName} --resource ContainerInstances\n/opt/aws/bin/cfn-signal
            -e $? --region ${AWS::Region} --stack ${AWS::StackName} --resource ECSAutoScalingGroup\n\nexec
            2>>/var/log/ecs/ecs-agent-install.log\nset -x\nuntil curl -s http://localhost:51678/v1/metadata\ndo\n
            \  sleep 1\ndone\ndocker plugin install rexray/ebs REXRAY_PREEMPT=true
            EBS_REGION=us-west-2 --grant-all-permissions\nstop ecs \nstart ecs\n"
    Metadata:
      AWS::CloudFormation::Init:
        config:
          packages:
            yum:
              aws-cli: []
              jq: []
              ecs-init: []
          commands:
            01_add_instance_to_cluster:
              command:
                Fn::Sub: echo ECS_CLUSTER=${ECSCluster} >> /etc/ecs/ecs.config
            02_start_ecs_agent:
              command: start ecs
          files:
            "/etc/cfn/cfn-hup.conf":
              mode: 256
              owner: root
              group: root
              content:
                Fn::Sub: |
                  [main]
                  stack=${AWS::StackId}
                  region=${AWS::Region}
            "/etc/cfn/hooks.d/cfn-auto-reloader.conf":
              content:
                Fn::Sub: |
                  [cfn-auto-reloader-hook]
                  triggers=post.update
                  path=Resources.ContainerInstances.Metadata.AWS::CloudFormation::Init
                  action=/opt/aws/bin/cfn-init -v --region ${AWS::Region} --stack ${AWS::StackName} --resource ContainerInstances
          services:
            sysvinit:
              cfn-hup:
                enabled: true
                ensureRunning: true
                files:
                  - /etc/cfn/cfn-hup.conf
                  - /etc/cfn/hooks.d/cfn-auto-reloader.conf
  EC2Role:
    Type: AWS::IAM::Role
    Properties:
      Path: /
      AssumeRolePolicyDocument: |
        {
          "Statement": [{
              "Action": "sts:AssumeRole",
              "Effect": "Allow",
              "Principal": {
                "Service": "ec2.amazonaws.com"
              }
          }]
        }
      Policies:
        - PolicyName: ECSforEC2InstanceRolePolicy
          PolicyDocument: |
            {
              "Version": "2012-10-17",
              "Statement": [
                {
                  "Effect": "Allow",
                  "Action": [
                    "ecs:CreateCluster",
                    "ecs:DeregisterContainerInstance",
                    "ecs:DiscoverPollEndpoint",
                    "ecs:Poll",
                    "ecs:RegisterContainerInstance",
                    "ecs:StartTelemetrySession",
                    "ecs:Submit*",
                    "ecr:GetAuthorizationToken",
                    "ecr:BatchCheckLayerAvailability",
                    "ecr:GetDownloadUrlForLayer",
                    "ecr:BatchGetImage",
                    "logs:CreateLogStream",
                    "logs:PutLogEvents"
                  ],
                  "Resource": "*"
                }
              ]
            }
        - PolicyName: RexrayPolicy
          PolicyDocument: |
            {
              "Version": "2012-10-17",
              "Statement": [{
                "Effect": "Allow",
                "Action": [
                  "ec2:AttachVolume",
                  "ec2:CreateVolume",
                  "ec2:CreateSnapshot",
                  "ec2:CreateTags",
                  "ec2:DeleteVolume",
                  "ec2:DeleteSnapshot",
                  "ec2:DescribeAvailabilityZones",
                  "ec2:DescribeInstances",
                  "ec2:DescribeVolumes",
                  "ec2:DescribeVolumeAttribute",
                  "ec2:DescribeVolumeStatus",
                  "ec2:DescribeSnapshots",
                  "ec2:CopySnapshot",
                  "ec2:DescribeSnapshotAttribute",
                  "ec2:DetachVolume",
                  "ec2:ModifySnapshotAttribute",
                  "ec2:ModifyVolumeAttribute",
                  "ec2:DescribeTags"
                ],
                "Resource": "*"
              }]
            }
  EC2InstanceProfile:
    Type: AWS::IAM::InstanceProfile
    Properties:
      Path: "/"
      Roles:
        - Ref: EC2Role
Save the CloudFormation into a file ecs-cluster.yml, then run the following AWS CLI command:
$ aws cloudformation create-stack --stack-name docker-volume --parameters ParameterKey=VPCID,ParameterValue=<default-vpc-id> ParameterKey=SubnetId,ParameterValue=<public-subnet-id> ParameterKey=KeyName,ParameterValue=<key-pair-name> --template-body file://./ecs-cluster.yml --capabilities CAPABILITY_IAM
Make sure to add the parameters values specific to your setup:
- VPCID: you can use the default VPC
- SubnetId: you need to select a public subnet, so you can always use one of the default subnets
- KeyName: this needs to be an existing keypair. Required so you can SSH into the ECS Container Instances later.
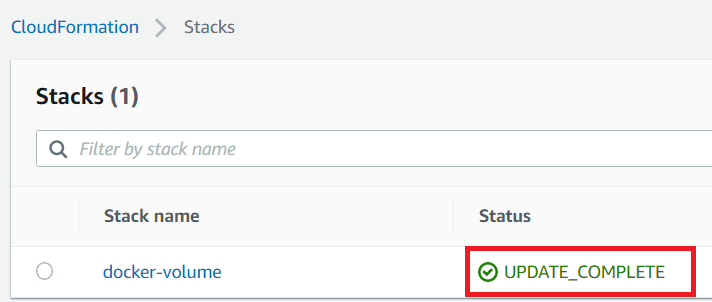
In the AWS Console go to Services > CloudFormation After some time you'll see your stack reach the UPDATE_COMPLETE status. This may take up to 10 minutes.
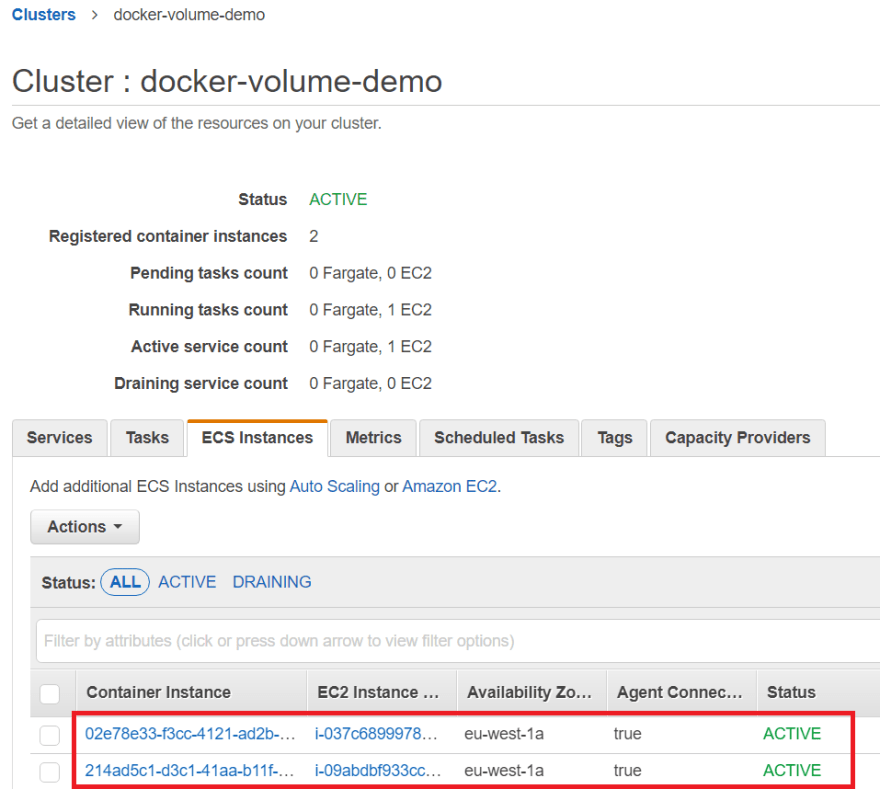
Head over to Services > ECS, and you'll see you've got a new ECS Cluster called docker-volume-demo. Click on the name and you'll see you don't have any services or tasks yet, but go to ECS Instances and you'll see details of your two EC2 instances:
Provisioning an ECS Task and Service
Now that our ECS Cluster is setup, we just need to deploy an ECS Task and ECS Service. Remember that the ECS Task can be thought of as a Docker container, whereas the ECS Service manages the ECS tasks, including ensuring enough replicas are running and setting up networking.
You can add the following template to the end of your ecs-cluster.yml file. Specifically, it's worth noting the following sections, specific to volumes:
- In
TaskdefinitionourContainerDefinitionshasMountPointsdefined./var/lib/postgresql/datais where Postgres stores it's data, and in this case, it will be mounted into therexray-volvolume. - In the
TaskdefinitionVolumessection, we have a volume namedrexray-vol. Here we're saying we want an AWS EBS volume to be auto-provisioned of type gp2 with size 5Gb. The type and size are specific to the REX-Ray driver we're using and are passed to the underlyingdocker volume createcommand.
Taskdefinition:
    Type: AWS::ECS::TaskDefinition
    Properties:
      Family: postgres
      Cpu: 512
      Memory: 512
      NetworkMode: awsvpc
      RequiresCompatibilities:
        - EC2
      ContainerDefinitions:
        - Name: postgres
          Image: postgres
          Essential: true
          MountPoints:
            - SourceVolume: rexray-vol
              ContainerPath: /var/lib/postgresql/data
          PortMappings:
            - ContainerPort: 3306
              Protocol: tcp
          LogConfiguration:
            LogDriver: awslogs
            Options:
              awslogs-group: !Ref LogGroup
              awslogs-create-group: true
              awslogs-region: !Ref AWS::Region
              awslogs-stream-prefix: ecs
      Volumes:
        - Name: rexray-vol
          DockerVolumeConfiguration:
            Autoprovision: true
            Scope: shared
            Driver: rexray/ebs
            DriverOpts:
              volumetype: gp2
              size: 5
  Service:
    Type: AWS::ECS::Service
    Properties:
      Cluster: !Ref ECSCluster
      ServiceName: postgres
      DesiredCount: 1
      TaskDefinition: !Ref Taskdefinition
      LaunchType: EC2
      DeploymentConfiguration:
        MaximumPercent: 100
        MinimumHealthyPercent: 0
      NetworkConfiguration:
        AwsvpcConfiguration:
          SecurityGroups:
            - !Ref InstanceSecurityGroup
          Subnets:
            - !Ref SubnetId
  LogGroup:
    Type: AWS::Logs::LogGroup
    Properties:
      LogGroupName: postgres
Let's run the AWS CLI update-stack command to update our existing CloudFormation stack. You can use all the same parameters as you used in the create-stack command:
$ aws cloudformation update-stack --stack-name docker-volume --parameters ParameterKey=VPCID,ParameterValue=<default-vpc-id> ParameterKey=SubnetId,ParameterValue=<public-subnet-id> ParameterKey=KeyName,ParameterValue=<key-pair-name> --template-body file://./ecs-cluster.yml --capabilities CAPABILITY_IAM
Once your CloudFormation stack update has completed, check out your cluster again in the AWS Console:

We now have an active service, with one running Postgres ECS Task. ✅
Connecting to the postgres container
Since our Postgres container doesn't have a public IP and isn't connected to a load balancer, we'll have to connect via an SSH tunnel. This way we can have a Postgres client on our local machine, with a connection to our Postgres container routed via the ECS Container Instance on which it's deployed:

To set this up you need the private IP address of the ECS Task, which you can find on the task details page of the AWS Console under Network:

We'll also need the public IP of one of the ECS Container Instances, which you can grab by clicking on the container instance id on the same the task details page.
Now run:
ssh -N -L 5432:<task-private-ip>:5432 ec2-user@<container-instance-public-ip>
This will setup the tunnel and continue running in the foreground. Note that if you already have Postgres installed on your local machine, you may have to choose a port other than 5432.
Create database data
To create some data on the EBS volume, we're going to create a Postgres database and add some test data. To do that, you can either use the psql command line tool or follow along with steps below which use pgAdmin, which is free to download.
pgAdmin data setup
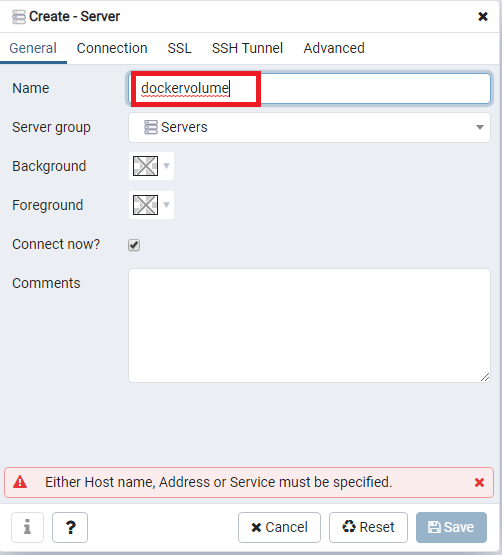
Once you've installed pgAdmin, starting it will open up a page in your browser. Right click on Servers and select Create > Server. Enter a server name:
Click on the Connection tab, enter localhost as the Host name, then click Save:
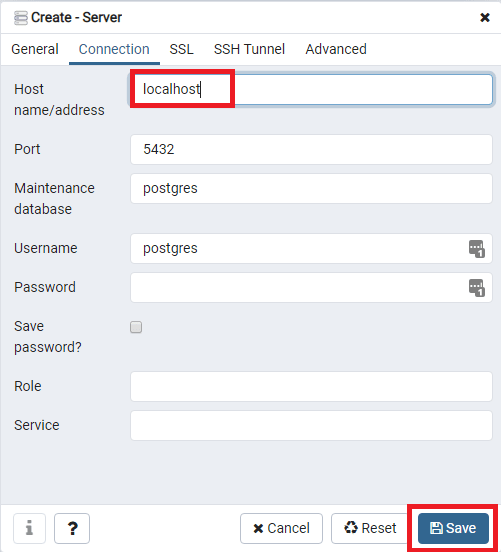
If prompted, the default password is Postgres.
Right click on the new dockervolume server, and select Create > Database. Enter a database name, then click Save:

Click on the new database, then select Tools > Query Tool, and we can start running some SQL.
Execute the following SQL (shortcut to execute is F5) which will create a table with some healthy test data: 🥕
CREATE TABLE vegetables (vegetable_name text, colour text);

INSERT INTO vegetables VALUES ('carrot', 'orange');
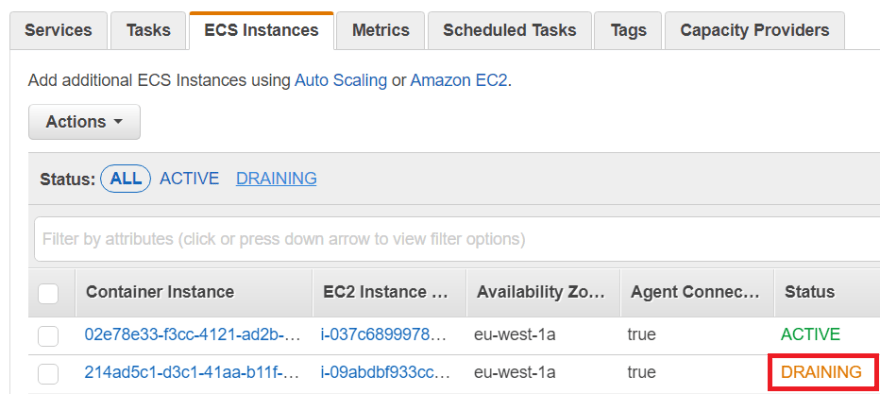
Drain the instance
We're going to change the container instance state to DRAINING, which will force ECS to deploy our task onto the other container instance. If we can still access the database data once the ECS Task moves over, then that proves it's successfully persisted in the EBS volume.
To make sure we're draining the correct container instance, in ECS grab the container instance id that the task is currently running in:

You'll need the full ARN of the container instance, which you can get with this AWS CLI command and picking the matching result:
$ aws ecs list-container-instances --cluster docker-volume-demo
{
    "containerInstanceArns": [
        "arn:aws:ecs:eu-west-1:299404798587:container-instance/02e78e33-f3cc-4121-ad2b-4e039cb610b9",
        "arn:aws:ecs:eu-west-1:299404798587:container-instance/214ad5c1-d3c1-41aa-b11f-7afcac542939"
    ]
}
Now we have the ARN, it's time to run the following update-container-instances-state command to change the state to DRAINING:
aws ecs update-container-instances-state --cluster docker-volume-demo --container-instances <container-instance-arn> --status DRAINING
Head on over to Tasks and eventually, you'll see a new task coming up on the remaining ACTIVE container instance.
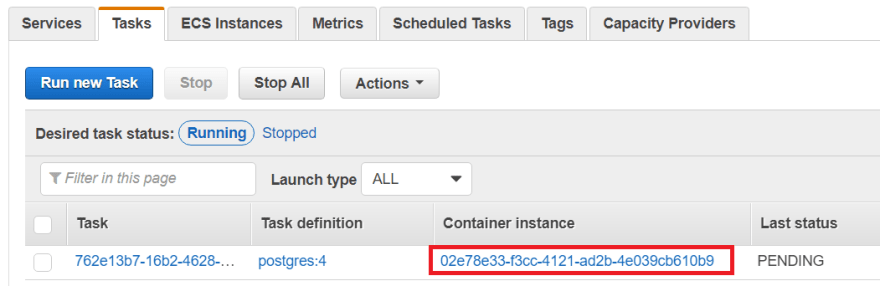
Wait for it's status to reach RUNNING.
Verify that the database has come back
Now that our ECS Task has moved over to the other container instance, we can validate that the data has persisted by running an SQL SELECT query.
First though, your old SSH tunnel will now have a connection error. You'll need to grab the new private IP address from the ECS Task details page, then run the ssh command again:
$ ssh -N -L 5432:<task-private-ip>:5432 ec2-user@<container-instance-public-ip>
Back in pgAdmin, disconnect and reconnect your dockervolume Server. Then run the following SELECT query on the dockervolume database:
SELECT * FROM vegetables;

You'll see we still have the same data. Awesome!
Cleanup
You can remove the CloudFormation stack with the following command:
aws cloudformation delete-stack --stack-name docker-volume
Note that this won't delete the EBS volume, which was created automatically by REX-Ray outside of CloudFormation. Find the correct volume id with the following command:
$ aws ec2 describe-volumes --filter Name=tag:Name,Values=rexray-vol
{
    "Volumes": [
        {
            "Attachments": [],
            "AvailabilityZone": "eu-west-1a",
            "CreateTime": "2020-01-25T18:17:00.927Z",
            "Encrypted": false,
            "Size": 5,
            "SnapshotId": "",
            "State": "available",
            "VolumeId": "vol-08670b6c65571df51",
            "Iops": 100,
            "Tags": [
                {
                    "Key": "Name",
                    "Value": "rexray-vol"
                }
            ],
            "VolumeType": "gp2"
        }
    ]
}
Now run aws ec2 delete-volume --volume-id <volume-id>
Final words
You should now understand that with the correct configuration, ECS Tasks can easily be setup to connect to AWS EBS volumes. The REX-Ray Docker volume driver does the hard work for us, and AWS ECS easily integrates with it to make sure that volumes are always attached to the correct EC2 host.
Please remember that this CloudFormation stack was designed as a simple example, and should not be used in production. For example, the Postgres instance should ideally not be exposed over the internet, and the ECS Container Instances should be deployed in a private subnet.
REX-Ray can also be configured to use AWS Elastic File System (EFS) too. If you have a requirement to access a volume from multiple ECS Tasks at the same time, you'll want to check out this option.

Oldest comments (0)