Welcome, Linux-on-Windows-er!
I recently wrote about my experience with WSL 2 and Windows, coming from a Mac perspective. This is an unboxing post for how I went from vanilla Windows 10 to a full working dev environment based on VS Code and WSL 2.
If you're like me and were initially too lazy to read that link above, WSL 2 stands for "Windows Subsystem for Linux". The first version, WSL 1, was a syscall emulator that gave Linux programs most of the POSIX APIs they need.
WSL 2 is a lightweight hypervisor that actually runs a full Linux kernel.
In other words, WSL 2 is better than WSL 1 in a lot of ways.
The pre-reqs
At the moment, you have to jump through a hoop to get your Windows 10 setup to get WSL 2 working.
Join Windows Insiders
WSL 2 will be stable and generally available in the upcoming Windows 2004 release. When that new release comes out, you won't need to be on Insiders and you'll be able to ignore this whole section. I'm excited for that!
Being an Insider sounds exclusive but anyone can join. It just means that you'll run less stable versions of Windows. I haven't had any problems with it yet, though.
There's a cool tradeoff here, though. You run a development build of the OS, so you get new features in development. Such as ... drumroll please ... WSL 2!
It's pretty easy to get on Windows Insiders. Go here, sign up, and follow the instructions.
Get WSL 1
You need WSL 1 for WSL 2 to work. That process is basically a PowerShell command and downloading/running a distro from the Microsoft app store. Yes, the app store has Linux distros. I use Debian and Ubuntu.
After you download it, make sure to fire up your distro at least once before you move on. Windows requires that, but also it'll let you set up your username and password on startup, which is handy. It'll look a little like this:

Notice how many times I mistyped my password =P
Check out the instructions for all the details.
WSL2-ify your distro
Now it's time for your WSL 1 distro to grow up and get a real job! Convert it to WSL 2 with a PowerShell command. Make sure you run your PowerShell as an administrator.
For Debian, which is my jam, it's wsl --set-version Debian 2. You can swap out Debian for your distro name and it'll work just the same. It should look like this in PowerShell:

Check out that
wsl -lcommand in the above screenshot. You can always run that to see the distros you have installed
If you ever need to delete a distro, you can always run wsl --unregister Debian and it'll just disappear. That means everything in the VM is gone and you'll have to re-install your distro from the app store, so be careful with that one.
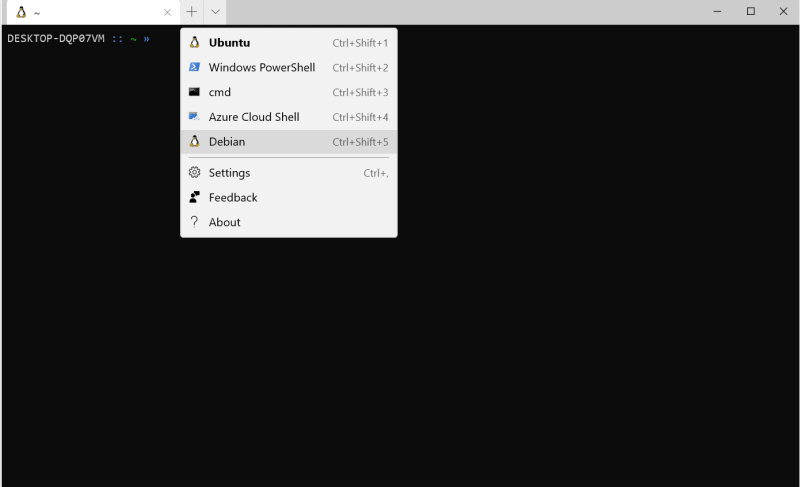
Get Windows terminal
I mentioned Windows terminal in my previous post about WSL 2. I really, super, highly recommend it for a bunch of reasons:
- It's a modern Windows app, so it has the most important thing: a cool icon
- It's customizable
- It's open source!
Back in the day, you had to download the installer from GitHub and install it yourself. That wasn't terrible by any means, but I'm super lazy and it felt like a chore. I'm happy to report you can now get it from the app store with a click.
The app ties together the traditional command prompt (cmd), PowerShell, Azure cloud shell, and all your installed Linux distros. When you fire up the app, it'll have a tab that's probably open to PowerShell. Go click on the dropdown arrow next to the tab, choose your distro, and BAM, you're in a Linux terminal.
Congratulations, you're WSL2-ing!
Now that you're in a Linux terminal, you can start acting all Linux-ey and do everything on the command line with bash.
Set your distro up
I mentioned in my previous post that I use Yadm to configure everything. Yadm works on all Linux OSes, but I'm gonna be talking about Debian/Ubuntu distros.
Here's how to bootstrap your install with Yadm so you can download all your dotfiles:
$ sudo apt update
$ sudo apt install yadm
On almost all setups, you'll need to run these two commands with
sudo
Here's what it looks like:

SSH keys
From here on out, you'll need to interact with GitHub repos a lot. So you'll need to set up your SSH keys and add them to GitHub. IF you don't know what to do, follow GitHub's guides in order:
- Generating a new SSH key. Make sure to click on the Linux tab at the top of that page, not the Windows one.
-
Adding your SSH key to GitHub. Again, make sure to click the Linux tab. In the first section, they say to use
xclipbut that won't work on WSL 2. Instead, runcat ~/.ssh/id_rsa.pub, highlight the whole public key that gets spit out, and pressshift-ctrl-c. That's how you copy something out of WSL 2 so you can paste it somewhere else (including Windows apps)
Here are my super condensed instructions for how to do the SSH key dance, if you prefer.
Get those dotfiles!
Now we have yadm, let's do my favorite part: run one command and watch magic:
$ yadm clone https://github.com/arschles/dotfiles.git
You can swap our my dotfiles repo name for yours. If you want to use mine, that's all good too (PRs welcome!)
Here's what it looks like:

What's next
You're in a Linux terminal using Windows Terminal, running on a hypervisor, on top of Windows 10. WAT. I know, right?
I'll shamelessly plug my other post again here. It explains how WSL 2 was the reason I decided to go over and give Windows a try.
To complete your Linux-on-Windows coding experience, go get VS Code for Windows. Install it, and go into a directory inside of your ... WSL 2 terminal. Type code . and watch more magic happen.
Your WSL 2 directory will open up in the VS Code Windows app. WAT. This magic works via a fast server that VS Code uses to communicate everything you do (saving, debugging, etc...) back to WSL 2. You're editing in Windows and running on Linux.
You can take this a step further and store your Linux-ey things in the cloud with VS Online. That's a whole other topic but worth checking out sometime.
Finally, if you use Docker, that works for WSL 2 too. Check out these instructions for how to set it up.

Top comments (0)