Steps for adding a user authentication to the Laravel application

Laravel Breeze starter kit
In this part, we going to add user authentication to our Admin panel. Part 1 we completed the Laravel installation and DB setup.
Laravel create an admin panel from scratch — Part 1— Installation
I have installed my Laravel application on Docker using Sail. The Authentication is explained detailed in Laravel's official Authentication document.
Laravel’s authentication facilities are made up of “guards” and “providers”. Guards define how users are authenticated for each request. Guards define how users are authenticated for each request
Out Laravel application’s authentication configuration file is located at config/auth.php. View the full file on GitHub
Laravel Breeze starter kit
The Laravel Breeze is a starter kit for Laravel’s authentication functionality. This starter kit will take care of scaffolding your entire authentication system.
The following steps are involved to set up authentication to our Laravel Admin panel.
- 1. Install Laravel Breeze
- 2. Compile assets
- 3. Running Migration
1. Install Laravel Breeze
We need to install Laravel Breeze using Composer.
./vendor/bin/sail composer require laravel/breeze --dev
We going to create an alias forvendor/bin/sail Sail commands:
alias sail='[-f sail] && bash sail || bash vendor/bin/sail'
Once the Bash alias has been configured, you may execute Sail commands by simply typing sail. The remainder of this blog examples will assume that you have configured this alias:
sail composer require laravel/breeze --dev
After the Laravel Breeze package installation, we need to run the breeze:install Artisan command. This command will publish the authentication views, routes, controllers, and other resources to our application.
sail artisan breeze:install
2. Compile assets
After Breeze is installed, run the npm to compile the assets.
npm install && npm run dev
3. Running Migration
Run your database migrations using artisan migrate
sail artisan migrate
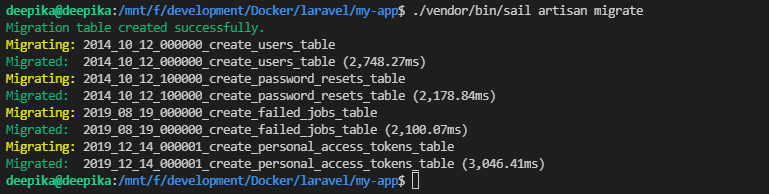
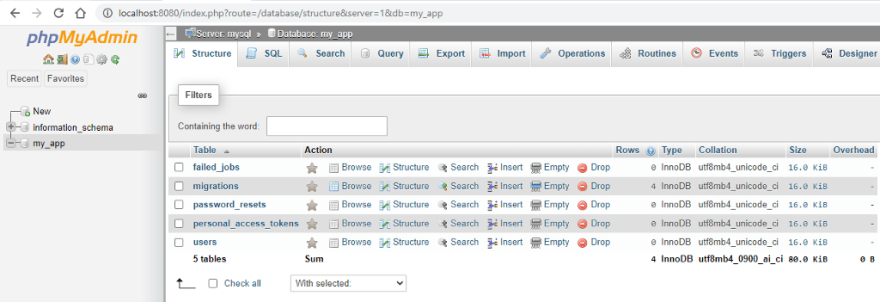
After your migration users and other tables are created on your Database.
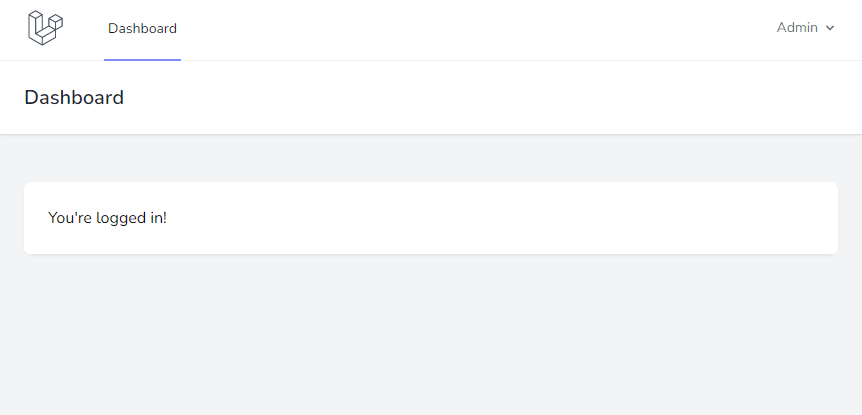
Now you navigate to application’s /login or /register URLs in your web browser.
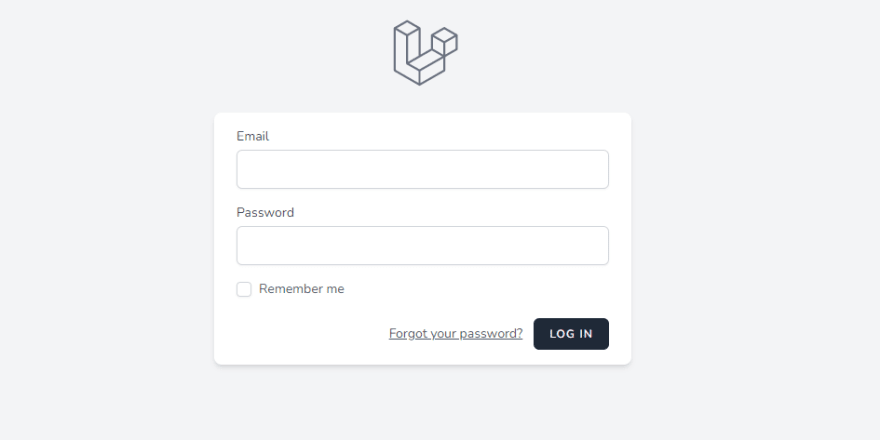
Users will be redirected to the dashboard after successful registration or login.
Laravel Breeze Walkthrough
We successfully added authentication to your application. Now walk through the Laravel Breeze file structure and learn how Laravel’s authentication functionality is implemented.
Controllers
All the controllers located inside the Auth folder app/Http/Controllers/Auth
AuthenticatedSessionController.php
ConfirmablePasswordController.php
EmailVerificationNotificationController.php
EmailVerificationPromptController.php
NewPasswordController.php
PasswordResetLinkController.php
RegisteredUserController.php
VerifyEmailController.php
Routes
The /login, /register and all auth routing is defined in routes/auth.php . The dashboard route is available on routes/web.php
Middleware ->middleware(‘auth’) provides a convenient mechanism for inspecting and filtering HTTP requests entering your application.
Route::get('/register', [RegisteredUserController::class, 'create'])
                ->middleware('guest')
                ->name('register');

Route::post('/register', [RegisteredUserController::class, 'store'])
                ->middleware('guest');

Route::get('/login', [AuthenticatedSessionController::class, 'create'])
                ->middleware('guest')
                ->name('login');

Route::post('/login', [AuthenticatedSessionController::class, 'store'])
                ->middleware('guest');
Views
Auth views include inside the resources/views/auth/ folder. Dashboard view is resources/views/dashboard.blade.php
Login Request
The login request form is handled in LoginRequest.php on app/Http/Requests/Auth/LoginRequest.php file.
GitHub repository
I have created a GitHub repository for our “Basic Laravel Admin Panel”. https://github.com/balajidharma/basic-laravel-admin-panel
The installation and authentication codes are available on the 1.0.1 branch
Thank You For Reading!
Follow me at balajidharma.medium.com.
Previous part — Part 1: Laravel installation steps in Docker or Install Laravel via Composer in WAMP or XAMPP
Next Part — Part 3: Laravel user roles and permissions

Top comments (0)