Overview
This is a guide on how to set up a AWS EC2 free tier with GUI. The EC2 instance will be able to connect via Remote Desktop Protocol (RDP) or SSH.
You need to create a AWS account: https://portal.aws.amazon.com/billing/signup. You may need to provide your credit card information during the signup process.
Sign in to your AWS Account and go to the AWS EC2 Console: https://aws.amazon.com/console/
Table of Contents
Create an AWS EC2
Set up the security groups
Defining the security groups before setting up the instance. Setting up the security groups first can give you a better understanding on what inbound/outbound traffic is allowed in the instances you are going to create.
Choose Security Groups at the left menu of your EC2 Dashboard. Create 2 security groups:
-
rdp: Allow inbound traffic via port3389 -
ssh: Allow inbound traffic via port22 - Allow all outbound traffic
Choose the OS, instance type and storage
Choose Services > EC2 from the menu. At the EC2 Dashboard , choose Instances.
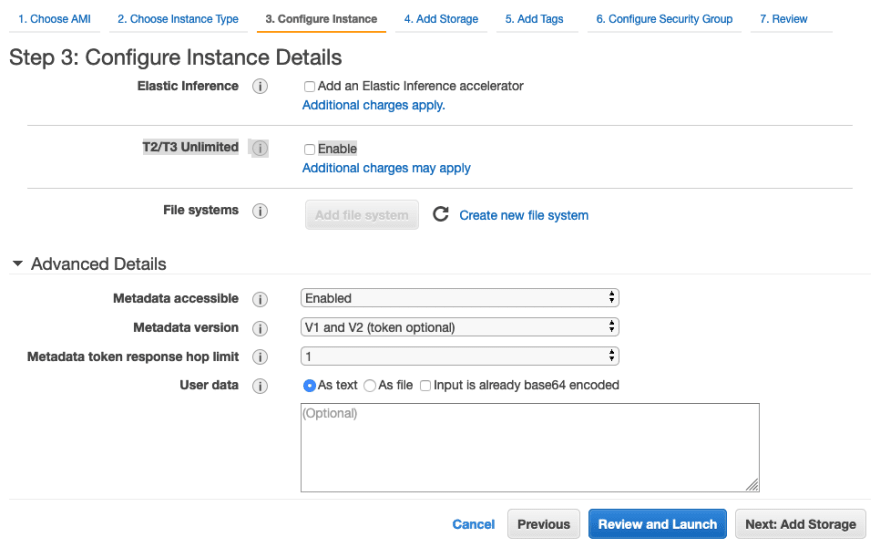
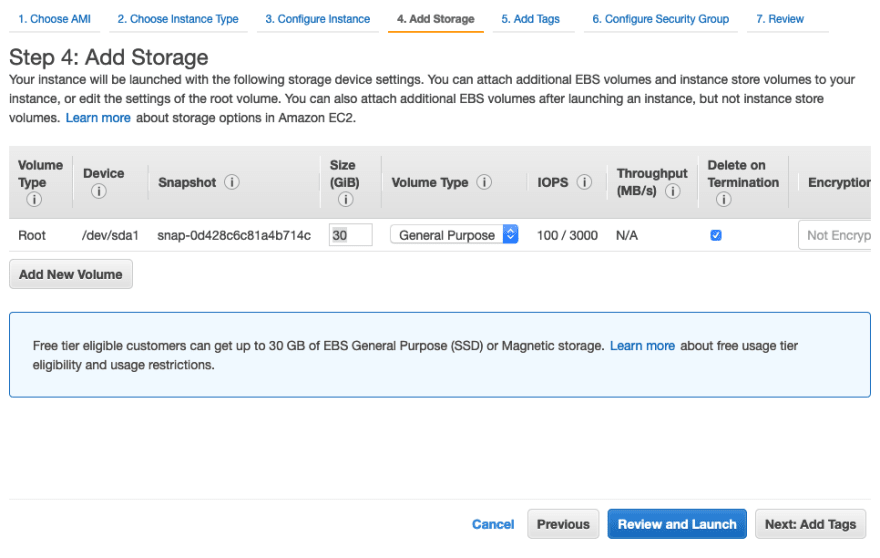
Click the Launch Instance and choose the suitable AMI (Amazon Machine Image). Here I choose a t2.micro instance with Ubuntu Server 18.04 LTS image. Choose the suitable Storage as not all kinds of storage are free. In this example I set up a 30GB General Purpose storage.
Allow SSH and RDP connections
Choose the security groups created in the previous step:
Create and download a .pem key file
You should create the key file. If you don’t create this and link it to the instance, you will not be able to connect to the instance via SSH or RDP. Here I create a new key file named ssh_private_key.
After that, click Download Key Pair and keep the key file safe.
Do a chmod on the key file
We better to make sure that the ssh_private_key.pem downloaded is just read-only. Run chmod to change the permission:
❯ ll ~/Downloads/ | grep "ssh_private_key.pem"
-rw-r--r--@ 1 BEN staff 1.7K Jul 2 18:41 ssh_private_key.pem

❯ chmod 400 ~/Downloads/ssh_private_key.pem

❯ ll ~/Downloads/ | grep "ssh_private_key.pem"
-r--------@ 1 BEN staff 1.7K Jul 2 18:41 ssh_private_key.pem
Connect to EC2 via SSH
Once you click the Launch instance , you should be able to see your instance in running state in the web console. Then, you can connect to the EC2 via ssh using the pem key file. Assuming that your DNS name of your EC2 is ec2-0-1-2-3.ap-northeast-1.compute.amazonaws.com and it is running at ap-northeast-1 region, you can connect to it using user ubuntu:
❯ ssh -i ~/Downloads/ssh_private_key.pem ubuntu@ec2-0-1-2-3.region-name.compute.amazonaws.com
The authenticity of host 'ec2-0-1-2-3.region-name.compute.amazonaws.com (0.1.2.3)' can't be established.
ECDSA key fingerprint is SHA256:8t8ey5IqoiGOKGc9WuDc5SXaYqFHPnKph1mRtzbQNTc.
Are you sure you want to continue connecting (yes/no/[fingerprint])?
You need to confirm your fingerprint at the first connection attempt.
Welcome to Ubuntu 18.04.4 LTS (GNU/Linux 5.3.0-1023-aws x86_64)

 * Documentation: https://help.ubuntu.com
 * Management: https://landscape.canonical.com
 * Support: https://ubuntu.com/advantage

  System information as of Thu Jul 2 10:54:37 UTC 2020

  System load: 0.0 Processes: 90
  Usage of /: 3.7% of 29.02GB Users logged in: 0
  Memory usage: 16% IP address for eth0: 172.31.4.8
  Swap usage: 0%

0 packages can be updated.
0 updates are security updates.

The programs included with the Ubuntu system are free software;
the exact distribution terms for each program are described in the
individual files in /usr/share/doc/*/copyright.

Ubuntu comes with ABSOLUTELY NO WARRANTY, to the extent permitted by
applicable law.

To run a command as administrator (user "root"), use "sudo <command>".
See "man sudo_root" for details.

ubuntu@ip-172-31-4-8:~$
Install a GUI and RDP
GUI: LXDE
I choose LXDE as the GUI of the ubuntu server: https://lxde.sourceforge.net/about.html.
LXDE is a new project aimed to provide a new desktop environment which is lightweight and fast
RDP: XRDP
xrdp is an open-source Remote Desktop Protocol server: http://xrdp.org
xrdp provides a graphical login to remote machines using RDP (Microsoft Remote Desktop Protocol)
Install the packages:
sudo apt-get update -y
sudo apt-get install lxde -y
sudo apt-get install xrdp -y
Set a password for your account
You need to also set up a password for the user ubuntu. This is for your later use in RDP as RDP only allows you to login an password-protected account.
sudo passwd ubuntu
Connect to EC2 via remote desktop
For mac user, you need to download the Microsoft Remote Desktop. If you are using Windows, you should already have the Remote Desktop application preinstalled.
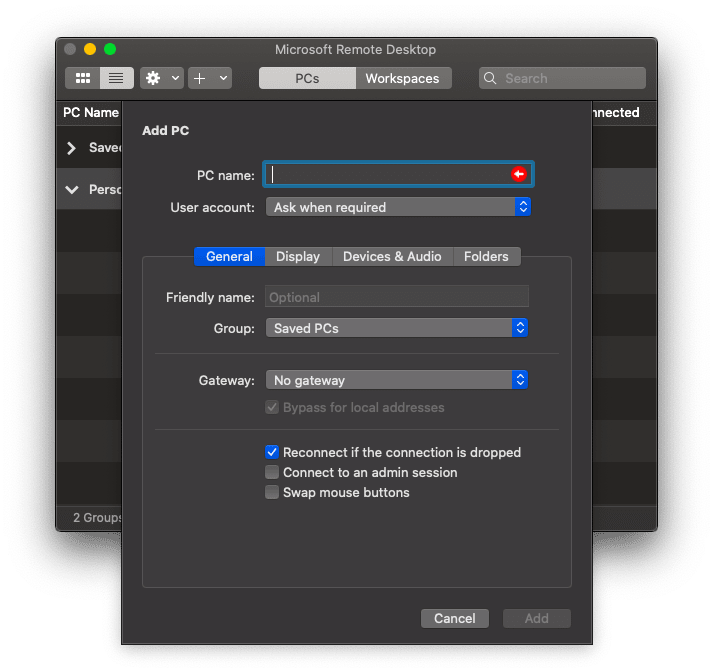
 Launch the app and click Add PC :
Set the PC name (i.e. the DNS name of your machine): 
Login with user ubuntu and the password you set in the previous step.
Bonus Materials
1. Install additional IBus input method
If you want to type Japanese, Chinese, etc. you may need to install an input method. For cangjie, you can install Cangjians via the terminal:
sudo apt-get install ibus-cangjie
2. Install Midori browser from .deb package
Midori Browser is a browser web light, fast, secure, free software & open source
Download .deb file: https://astian.org/en/midori-browser/download/ or using wget:
cd ~/Downloads
sudo wget -qnc https://packages.astian.org/pool/main/m/midori/midori_9.0.0-1_amd64.deb


ubuntu@ip-172-31-4-8:~/Downloads$ ll
total 1492
drwxr-xr-x 2 ubuntu ubuntu 4096 Jul 2 11:29 ./
drwxr-xr-x 17 ubuntu ubuntu 4096 Jul 2 11:22 ../
-rw-r--r-- 1 root root 1517328 Jan 11 23:26 midori_9.0.0-1_amd64.deb
After that, install the deb package using dpkg
sudo dpkg -i midori_9.0.0-1_amd64.deb
You may see the dependency problems like the following:
ubuntu@ip-172-31-4-8:~/Downloads$ sudo dpkg --configure -a
dpkg: dependency problems prevent configuration of midori:
 midori depends on libpeas-1.0-0 (>= 1.15); however:
  Package libpeas-1.0-0 is not installed.
 midori depends on libxml2-utils; however:
  Package libxml2-utils is not installed.
 midori depends on gstreamer1.0-plugins-bad; however:
  Package gstreamer1.0-plugins-bad is not installed.
 midori depends on gstreamer1.0-libav; however:
  Package gstreamer1.0-libav is not installed.

dpkg: error processing package midori (--configure):
 dependency problems - leaving unconfigured
Errors were encountered while processing:
 midori
In this case, update the packages and reinstall midori:
sudo dpkg --configure -a
sudo apt-get -f install
sudo apt-get update
sudo apt-get install midori
3. Set up a swapfile for better performance
ubuntu@ip-172-31-4-8:~$ sudo fallocate -l 1G /swapfile
ubuntu@ip-172-31-4-8:~$ sudo chmod 600 /swapfile
ubuntu@ip-172-31-4-8:~$ sudo mkswap /swapfile
Setting up swapspace version 1, size = 1024 MiB (1073737728 bytes)
no label, UUID=9a121c2c-cd6f-48bf-b928-e550095a3efd
ubuntu@ip-172-31-4-8:~$ sudo swapon /swapfile
ubuntu@ip-172-31-4-8:~$ sudo swapon --show
NAME TYPE SIZE USED PRIO
/swapfile file 1024M 0B -2
ubuntu@ip-172-31-4-8:~$


sudo nano /etc/fstab


/swapfile swap swap defaults 0 0
After that, reboot the machine.
4. Use EC2 as a VPN server
Create a new security group allows all TCP and UDP inbound connections and add this security group to the EC2 instance:
Install openvpn scripts
This repo contains scripts for VPN server set up and profile management. Install it into your EC2:
Download the script:
sudo apt update
sudo apt upgrade -y
mkdir ~/vpn && cd ~/vpn
wget https://git.io/vpn -O openvpn-install.sh


ubuntu@ip-172-31-4-8:~/vpn$ ll
total 32
drwxrwxr-x 2 ubuntu ubuntu 4096 Jul 2 12:11 ./
drwxr-xr-x 19 ubuntu ubuntu 4096 Jul 2 12:11 ../
-rw-rw-r-- 1 ubuntu ubuntu 23085 Jul 2 12:11 openvpn-install.sh
Make the openvpn-install.sh exectable in your EC2:
chmod +x openvpn-install.sh
sudo ./openvpn-install.sh
Add a new profile by running openvpn-install.sh:
Welcome to this OpenVPN road warrior installer!

This server is behind NAT. What is the public IPv4 address or hostname?
Public IPv4 address / hostname [18.183.12.213]:

Which protocol should OpenVPN use?
   1) UDP (recommended)
   2) TCP
Protocol [1]: 1

What port should OpenVPN listen to?
Port [1194]:

Select a DNS server for the clients:
   1) Current system resolvers
   2) Google
   3) 1.1.1.1
   4) OpenDNS
   5) Quad9
   6) AdGuard
DNS server [1]: 1

Enter a name for the first client:
Name [client]: demo-ec2-client

OpenVPN installation is ready to begin.
Press any key to continue...


Finished!

The client configuration is available in: /home/ubuntu/demo-ec2-client.ovpn
New clients can be added by running this script again.
Use another Terminal to download the .ovpn file. Assuming that the machine name is ec2-0-1-2-3.ap-northeast-1.compute.amazonaws.com and the generated .ovpn file is place under ~/:
scp -i ssh_private_key.pem ubuntu@ec2-0-1-2-3.ap-northeast-1.compute.amazonaws.com:~/demo-ec2-client.ovpn ~/Downloads/demo-ec2-client.ovpn
Connect to the VPN
Pritunl Client is a easy-to-use OpenVPN client. Downlaod and install it.
Launch the client and click Import Profile :
After that, click the burger menu of the profile and Connect.


Top comments (0)