Building Your 1st WebApp — Integrating With FrontEnd
How to Integrate Backend APIs to ReactJS Frontend.
This is the 3rd blog in Building Your 1st WebApp with Python series. In the first blog, we saw how to orchestrate and design a backend system, write Python Flask code to expose REST APIs followed by how to split a frontend design and arrive at a react UI.
In this session/blog we are going to integrate it to a Frontend ReactJS app. Getting it one step closer to your users.
Now, I am not a Frontend developer. I might not be the best at teaching the best practices. So what I did is I have researched for years(just did a Google search) and found the best tutorial(The first Github repo) for you to get started.
You might be urged to run away at this point. But remember, I just gave away my hack to you. If you suck at something, say CSS, don’t start with an empty slate. Search for a clean, documented codebase from Github and play around with it.
For the simplicity of this exercise, I had forked the code and removed the complicated parts.
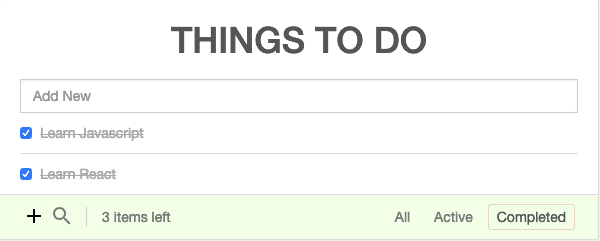
The final output we are looking for looks something like this.
Before Moving On
Though the blog is aimed to be beginner friendly, you need to do some work before moving on.
- Do you know python?
- Have you tried and implemented flask backend from the previous blog.
- Do you know React? — At least what setState does?
WARNING !!! — Don’t put yourself through the frustration of not understanding anything without the pre-requisites.
Let’s Begin
At this point, I’m assuming and praying to all gods that you had read and tried out the first blog because from here where it gets a bit steeper.
- Fork and Clone the repo
- cd react-todo
- npm install
- npm start
It will start your development server. On your browser, open localhost:3000 and ta-da you will already see a fully functioning To-do App. But don’t get too excited already. Add a couple of items and refresh the page, It’s gone, isn’t it. That is why you need a backend system coupled with a DB. To persist the Data that we enter.
What’s In the Code?
react-todo-app
    |\_\_\_ node\_modules # virtualenv for JS apps
    |\_\_\_ public # rendered react items are in public
    |\_\_\_ src # Actual code you write
         |\_\_ assests # all the images, icons required
         |\_\_ components # Common items like textbox, buttons are
                         # designed and maintatined for reuse

         |\_\_ service **# business logic handler**
    |\_\_ index.js # Entry point of the app
Though it seems like a lot, we are going to focus only on a single folder src and index.js. Index.js is the starting point of the application. The file has nothing much more than linking to Let’s see what App.js got.
class App extends Component {
     render() {
         return (
              <StateProvider>
                    <TodoList/>
              </StateProvider>
          );
}}
On digging deeper into each of these elements StateProvider, TodoList you will see how the components come together to form this beautiful UI.
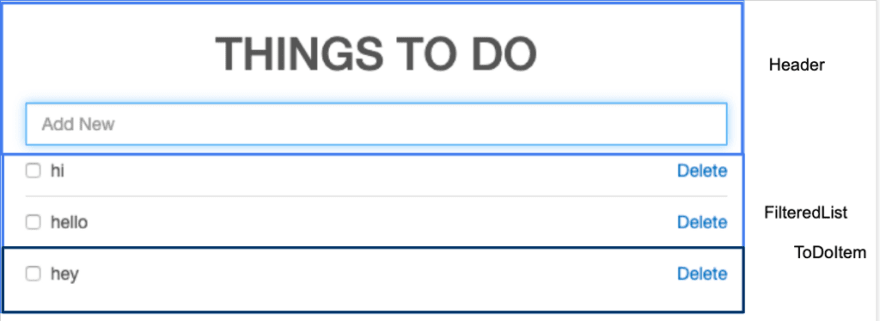
Just like you see, the main component StateProvider is not in the picture. It is a wrapper that gives the state of the data to all the other components. In React terms this is called Context. To learn more about Context Check the official blog here.
Integration
We just saw how the UI is orchestrated into different react components and how the StateProvider wraps them around with required data( state )
Before we move on to the code, let’s list out the APIs we need and write a utility to consume them.
- On opening the app for the first time we would call /todo GET API to list all the todo items created.
export function getAll() {
    return service.get(BASE\_URL + `/todo`, { data: {} })
})
- On typing out a todo item and press enter, it should call our flask API — /todo POST with the params {"title": }
export function addToList(list, data) {
     return service.post(BASE\_URL + `/todo`,
                         { body: JSON.stringify(data)})
}
- On clicking the checkbox, we would update the todo item’s {is_done:true} using /todo/todo_id PUT API
export function updateStatus(itemId, completed) {
    return service.put(BASE\_URL + `/todo/` + itemId,
            {body: JSON.stringify({"\_is\_done":completed})})
}
- On Clicking delete, we would use /todo/ DELETE API to delete the item
export function deleteItemService(itemId) {
     return service.delete(BASE\_URL + `/todo/` + itemId, {})
}
So we redid the 4 major functions which contribute to the data part of the todo. Now every time someone enters a todo item, it gets stored in a DB.
Here is the repo I forked and integrated with the backend, go ahead clone it and plug it in with the backend we wrote last time.
Liked what you just read? Give me a shout out on twitter(@geeky_bhavani).

Top comments (0)