This guide will walk you through installing free Let’s Encrypt SSL on your WordPress site without having to use any plugin. In order to complete the guide you will need the following:
- Access to cPanel
- A hosting provider that supports Let’s Encrypt (check this list)
- SSL certificate generated on ZeroSSL site or Let’s Encrypt cPanel plugin
- 15 minutes to spare (at the most)
All check? Great! Before we move on…
Why adding HTTPS to your WordPress Site?
If you are here, this means that you already made up your mind about installing an SSL certificate. We are going to assume that you don’t need a lot of convincing, therefore, we are going to keep it short and just list what SSL brings to the table.
Using SSL is important because:
- It encrypts the connection between your WordPress site and the visitor thereby protecting sensitive data transferred like Credit Card numbers and login details.
- Visitors are able to determine that you are a legitimate business, therefore, they will trust you more.
- With the ever-changing Google Search Results algorithm, the SSL has also become a ranking factor.
How to install a WordPress SSL using Let’s Encrypt
The process will be different depending on whether or not your hosting account comes equipped with the Let’s Encrypt cPanel plugin. This plugin automates the process of generating the certificate signing request, domain verification, generating the certificate itself, and installation of the certificate on the server.
Method 1: Using the Let’s Encrypt cPanel plugin
This is the easiest method of installing the SSL certificate with only a few steps to follow. Firstly you need to access your cPanel dashboard. Then, scroll down to locate the Let’s Encrypt plugin. You will see it under the Security section.

Once selected you will be redirected to another page where you will see your domain name (or a list of domain names). Click Issue next to the desired domain to begin the installation process.
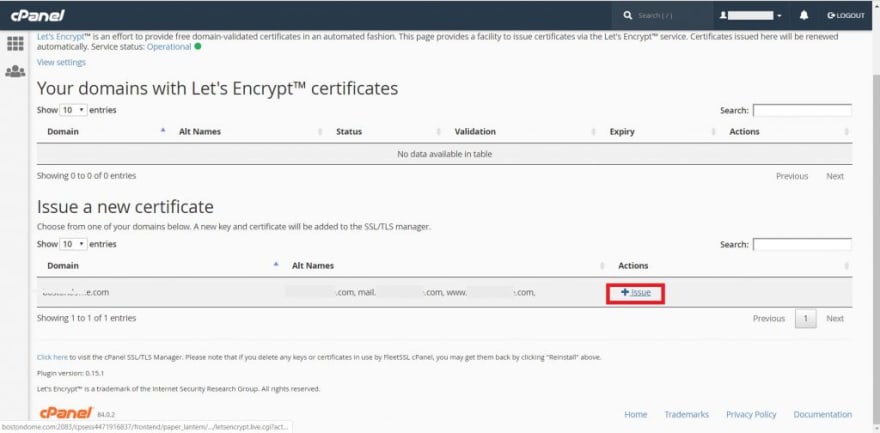
After you click on the Issue link, you will see another page with a few options. You will see an option to include cPanel subdomains and to include/exclude the www version of the domain name from the certificate. Depending on your hosting provider, there might be other aliases (like mail.domain.com or similar) that you can include or exclude from the certificate.

Domain Verifications for Let’s Encrypt
An important part of this step is choosing the verification method. The HTTP verification method requires that some files are placed on the server for domain verification. The plugin handles this automatically. The DNS verification requires adding a record to your DNS settings, which can take a certain time to propagate. I would advise against DNS verification since the HTTP method is much more simple and immediate.
After you click on the blue Issue button (displayed above), you will see the following message:

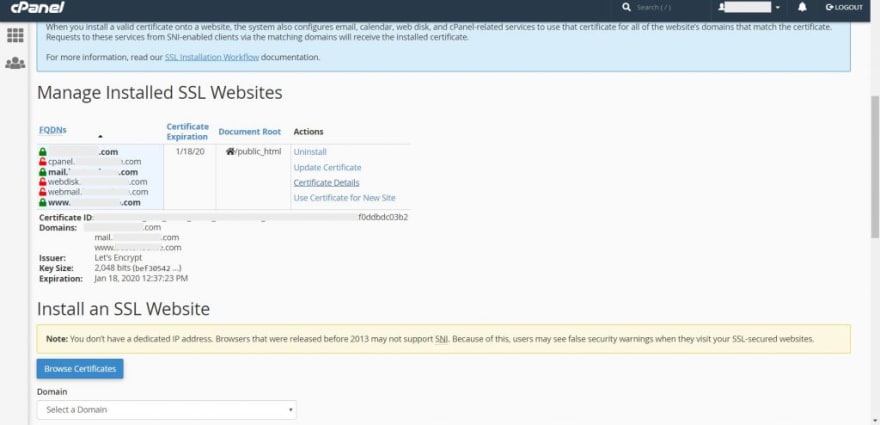
This means that the process is complete. You can double-check by going back to the cPanel home page, finding the SSL/TLS in the Security section, and then clicking on Manage SSL Sites. You can check the certificate details on that page too.
After confirming, proceed to redirect your site to the HTTPS version
(more about replacing HTTP with HTTPS below).
Method 2. Generating the certificate without the Let’s Encrypt cPanel plugin
Everything you need to do will be laid out in 5 simple steps, so just follow through and it should all be easy. We will go a bit back and forth between your cPanel (and file manager) and ZeroSSL. These are the steps:
- VisitZeroSSLand start the FREE SSL Certificate Wizard
- Verify your domain ownership
- Paste the Certificate, Private Key and CA Bundle
- Apply certificate to the site
*IMPORTANT* Make a backup of your site before proceeding. If your site is too big, make a backup of your database at least.
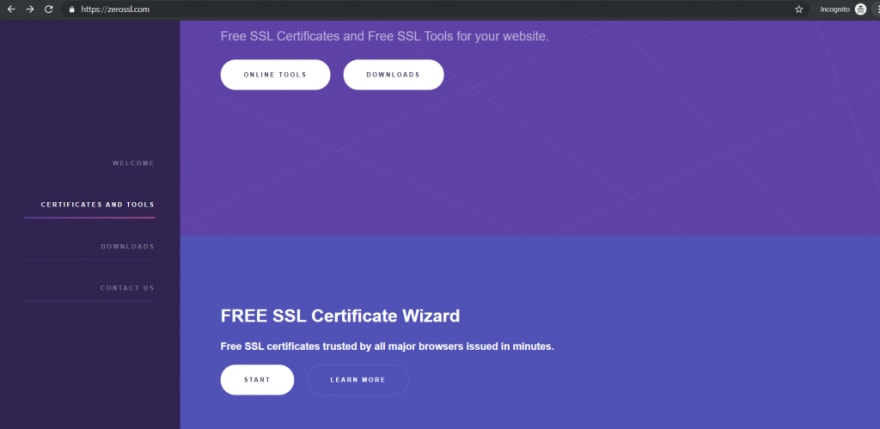
Starting the FREE SSL Certificate Wizard
Go tozerossl.com and scroll a bit down until you see FREE SSL Certificate Wizard option. Then click START.
This will take you to the next screen. Since this is the first time you are generating a certificate for your site, you should only enter the domain name, click checkboxes to accept TOS, choose HTTP verification and click ‘Next’.

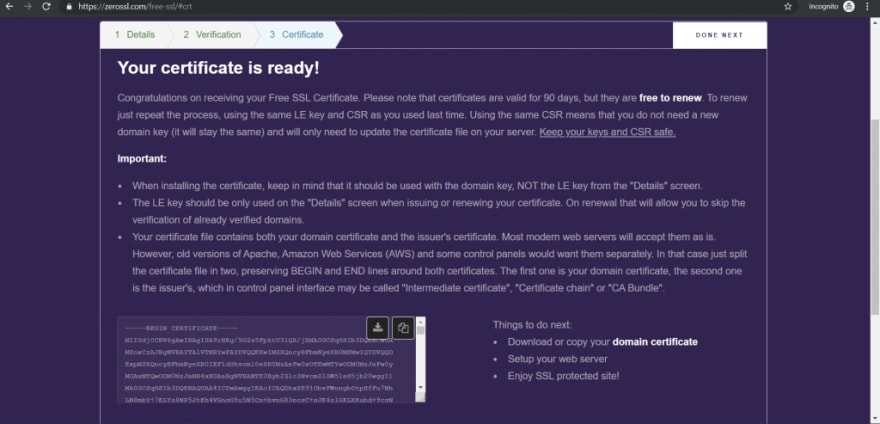
This will generate your Let’s Encrypt account key and CSR (Certificate Signing Request). Download and save them locally. You will not need them now, but you will need them in 90 days. Unfortunately, this certificate expires after 90 days and you will need to repeat this process.
The only difference is that you will paste the Account Key and the CSR into corresponding boxes above. The rest of the process is the same.
Domain verification
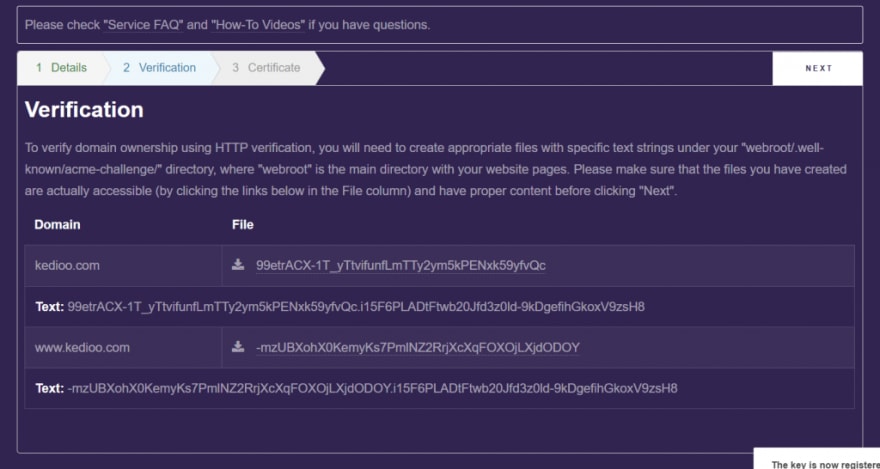
This step confirms that you have ownership (or at least control) over the domain name and the server. You will need to access the root of your site and create two directories. If your site is located in the root (public_html), navigate there and create a directory and name it ‘.well-know’.
You will need to enable hidden (dot) files to be displayed. First, click on the Settings option at the top right in the File Manager. Next, click on Show Hidden Files (dotfiles). Then, click Save. You should now see the .well-known directory.
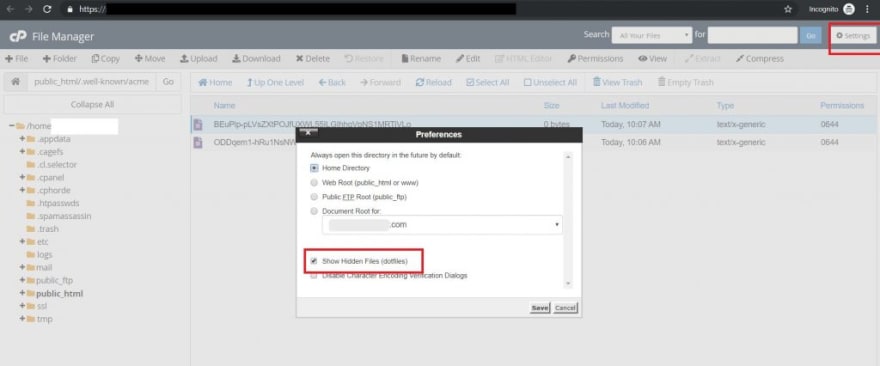
Inside this directory, create another one and name it acme-challenge. After that, browse the acme-challenge directory. In there will need to create two files.
These files should have titles and content that is provided on the Verification tab on ZeroSSL. Just create one file, copy the title from ZeroSSL, than copy the content and repeat that for the second file.
Paste the Certificate, Private Key and CA Bundle
ZeroSSL generates the Certificate and the CA Bundle together. However, they can be separated in case your hosting provider has separate boxes on cPanel where they should be entered.
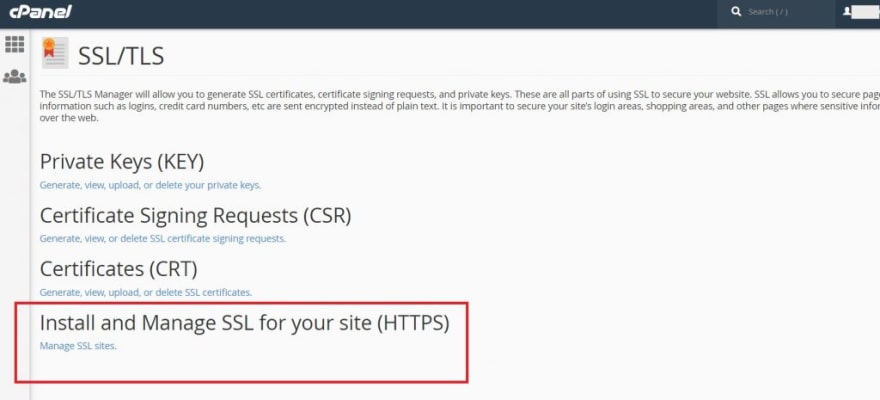
First off, navigate to your cPanel and click on SSL/TLS. It will be under the Security tab.

Next, click on Manage SSL Sites under the Install and Manage SSL for your site (HTTPS) option.
Depending on your hosting provider, you might see 2 or 3 input fields where you should paste the certificate, private key, and CA Bundle (if required).

Go back to ZeroSSL and copy the certificate text. If there’s a CA Bundle box (like in the image before) you will have to split the certificate text and paste the first half in the Certificate (CRT) box and paste the second in the Certificate Authority Bundle (CABUNDLE) box.
Run the same steps for pasting the private key.
Installing the certificate
After you’ve pasted the required text, click on Install Certificate at the bottom. That’s it! You’ve installed Let’s Encrypt Free SSL certificate on your WordPress site.

Finally, You will need to check whether or not your site is loading over HTTPS. Just add https:// in front of your domain name. If the site is resolving, all went well.
Some thoughts about AutoSSL
As with any free 3rd party products, the safety of using this certificate has been questioned by many. This is a matter of trust that you can put in a 3rd party SSL issuer. Since ZeroSSL controls an important part of the certificate, they can at any time do you harm if they decided to become evil. This is, however, highly unlikely. They have many users and a great reputation.
Redirect WordPress Site HTTP Traffic to HTTPS
This might seem redundant. You just added the SSL, why would you need to redirect your WordPress site to the HTTPS version? That’s because your site is still accessible under HTTP protocol. You don’t trust me? Fine. Type http:// in front of the domain name in the browser address bar and see for yourself.
In order to make sure your visitors are always viewing the HTTPS version of the site, you need to redirect those who access the HTTP version.
In order to achieve this you’ll need to do the following:
- Replace the HTTP home and siteurl records in your database with the HTTPS version.
- Change any database data that contains your domain URL HTTP entries and replace them with the HTTPS.
Adding HTTPS to your ‘home’ and ‘siteurl’ WordPress Database Records
This can be done from your WordPress Dashboard. However, I consider that an amateur move that can get you in trouble or redirect loops (which is unlikely but possible). Instead, you should install a plugin that will change any string of data containing http to https. This is called ‘Search and replace‘ and there’s a plugin for that.
How to Search for HTTP and Replace with HTTPS
Visit your WordPress Dashboard as an admin and click on Plugins – > Add New. In the search bar, type search and replace. Install the Search & Replace plugin and activate it.

After the activation is complete you can find the Search and Replace plugin inside the ‘Tools’ menu in your WordPress dashboard.

What I really like about this plugin is the first thing it does – it offers you to create a database backup. If you didn’t take my advice last time, it would be wise to create a backup now.

You should enter the http as the term to be searched for and https as a term to be replaced with. Select all the database tables. Also, you will see an option called ‘Dry run’. This option only scans and reports how many strings will be changed without making the actual changes. It is checked by default, therefore, you will need to uncheck it.
In our case, we would search for _ http://bitofwp.com and ask the plugin _ to replace it with _ https ://bitofwp.com_.
You are also given a choice to save changes to a separate SQL file thereby preventing live changes. This enables you to download the file and import it. Unless you have a big database on a server with very limited resources, this is not necessary.
Just proceed with the settings shown in this image below:

WordPress SSL should be now active
Once the plugin has finished replacing all http records to http you will be logged out of your WordPress Dashboard and already see the HTTPS lock in your browser.
The post How to Add a Free SSL for Your WordPress Site appeared first on WordPress Support Services by BitofWP.

Top comments (0)