
Azure Static Web Apps is an awesome new option for deploying single page applications, however I had specific goals that the current documentation didn't quite address, so here is how I met them.
My Goals
- Deploy to Azure Static Web Apps
- Deploy the same code to different environments (i.e. Sandbox, Test, Production)
- Automatically deploy to Sandbox (aka Test/Staging)
- Require approval to deploy to Production
The Microsoft Documentation for publishing from Azure Static Web Apps builds and deploys in a single step via Pipelines, however that doesn't support multiple deployments from same artifacts or an approval step.
All of those goals are possible using Azure DevOps, however it took some additional steps to get them working together.
Prerequisites
- A Single Page Application published as an Artifact built using Azure Pipelines
- My artifact contains two builds of an Angular app, 'sandbox' and 'prod'
- I happened to use an Angular app, but you can apply this to any single page application framework, such as React, Vue, Ember.js or Svelte.
- The Deployment Token from an already-created Azure Static Web App
Configure Your Release
- In your Azure DevOps project, go to Pipelines, then Releases
- Create a new Release Pipeline (using the "+ New \/" button)

- Select 'Empty job' as the Template
- We will be creating ours from scratch

- We will be creating ours from scratch
- Name your first Stage
- The Name can be whatever you like. I used 'Production Deployment'
- In the Artifacts, select the Artifact that you already built
- Select Build as Source type
- Select your Source - This is the Name of your Artifact from the Prerequisites.
- You can update the 'Source alias' to a simpler name if you prefer
- This will be used in your pipeline later
- Click the "Add" button to save your Artifact

- Now click the "View stage tasks" link ("1 job, 0 tasks") on your existing Stage

- Click "Agent job" above the tasks to edit the default settings
- Change the Agent Specification to a recent Linux build, such as
ubuntu-20.04
- Change the Agent Specification to a recent Linux build, such as
- Next to "Agent Job", click the "+" button to add a new Task
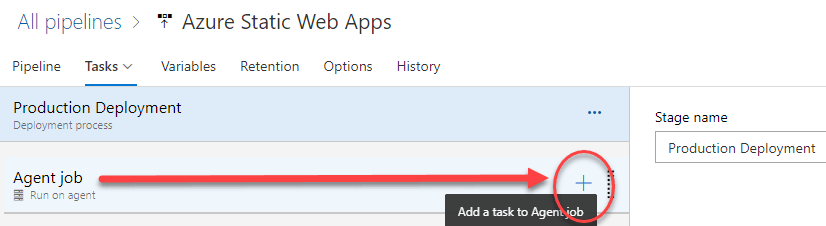
- Find the "Deploy Azure Static Web App" task (from Microsoft Corporation) and click "Add"

- At the time of this blog post, it is currently in PREVIEW and at version 0.* (preview)
- Fill in the following fields of the task:
- Display Name - Can be anything you want
- App Location - Set to path of your built app in the artifact
- Use the form "<ArtifactName>/<BuildName>/", i.e.
AngularBuildArtifact/prod/
- Use the form "<ArtifactName>/<BuildName>/", i.e.
- Output Location - Set to path of your built app in the artifact,
- Use the form "<ArtifactName>/<BuildName>/", i.e.
AngularBuildArtifact/prod/
- Use the form "<ArtifactName>/<BuildName>/", i.e.
- Skip App Build - Set to
true/checked. (The app is already being built and stored as an Artifact) - Azure Static Web Apps Api Token - Fill in with your Deployment Token variable:
$(deployment_token)- Follow Steps 5-10 in the Create the Pipeline Tasks section to configure a secret variable for your Deployment Token

- Follow Steps 5-10 in the Create the Pipeline Tasks section to configure a secret variable for your Deployment Token
- Save your Release
- You can find my YAML for this task at the end of this post
- Find the "Deploy Azure Static Web App" task (from Microsoft Corporation) and click "Add"
- Note: I didn't have an Azure Functions API or routes.json, so I have left the remaining fields blank. We are also skipping the app build, so we don't need to provide an App Build Command.
Congratulations! You can now run the Release to deploy to Azure Static Web Apps.
When this post was originally, a workaround was required for a docker error. That is no longer required, however the details can be found by clicking this if you are curious.


echo '##vso[task.setvariable variable=BUILD_SOURCESDIRECTORY]$(System.DefaultWorkingDirectory)'
Bonus Content - Adding Approval to the Stage
- On the Pipelines tab, click the Pre-deployment Conditions button (at the left of the Stage button)

- Enable Pre-Deployment Approvals

- Fill in Approvers from your organization
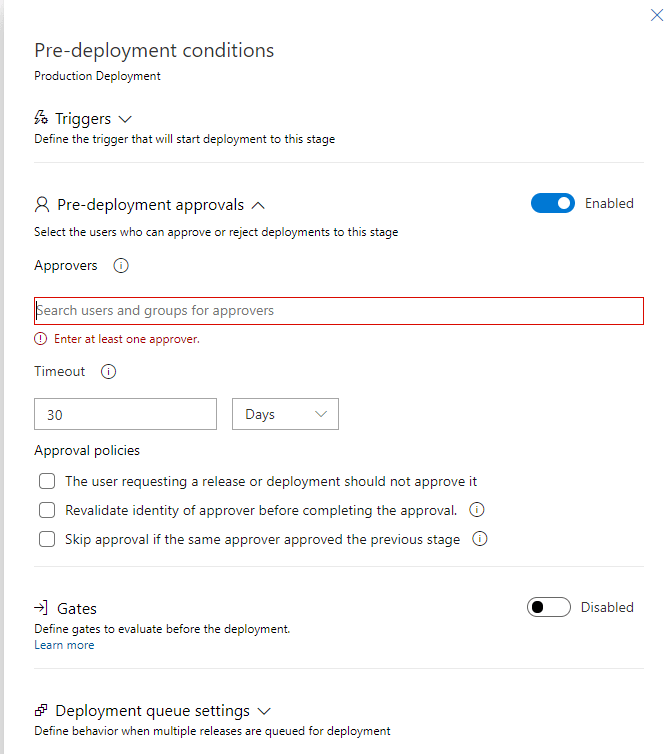
- Feel free to set the rest of the settings as necessary for your situation.
YAML for the Static Web App Task
variables:
  deployment_token: '<YourDeploymentToken>'

steps:
- task: AzureStaticWebApp@0
  displayName: 'Static Web App - Production Deployment'
  inputs:
    app_location: AngularBuildArtifact/prod/
    output_location: AngularBuildArtifact/prod/
    skip_app_build: true
    azure_static_web_apps_api_token: '$(deployment_token)'

Top comments (0)