
Written by Raphael Ugwu✏️
In early JavaScript frameworks like Angular JS, it was common to have all the state in your application embedded inside routes, services, controllers, local storage, and session storage. This practice soon became awkward due to the fact that as applications got larger, it got hard to keep track of what was being stored where. Improvement came in the form of state management libraries such as Redux and Vuex.
Newer frameworks like Svelte have taken a more simplistic approach to state management – eliminating the need to install libraries and instead offering stores that manage state within the framework. In this blog post, we’ll go through how Svelte manages and handles state in an application.
Context in Svelte
Svelte has a context API. It’s perfect for cross-component communication without having to complicate your codebase by passing around props. The context API is enabled by two inbuilt Svelte functions – getContext and setContext. You can make an object or value available anywhere within the app by setting it in the context and associating it with a key as shown in the code sample below:
<script>
  import { setContext } from 'svelte'

  const thisObject = {}

  setContext('thisKey', thisObject)
</script>
To make thisKey available in a different component within the app, simply import it using the getContext function:
<script>
  import { getContext } from 'svelte'

  const thisObject = getContext('thisKey')
</script>
Note that getContext can only be used to retrieve a key in the component that used setContext or a component within the same component tree. To communicate properties and values across two components within different trees, Svelte uses stores.

Working with Svelte stores
As an app increases in size, it tends to increase in complexity. At this point, it’s not a great idea to nest certain parts of the app’s state in the app’s component hierarchy. You’ll have some properties that need to be accessed by different components. Svelte handles this type of property via stores – a store is an object that holds a value and allows you to be notified of when that value changes. Svelte has two kind of stores for handling state in applications: writable and readable stores.
Writable stores
Writable stores are objects that hold values or properties that can be accessed by different components within an app. Let’s use the writable store to hold a value that we can then alter or pass around our app. To access this value, you would export it from the store and save it as a JavaScript file:
<!-- location.js -->

<script>
  import writable from 'svelte/store'

  export const city = writable('New York')
</script>
Then import it into any other component where it’s needed like this:
<scipt>
  import { city } from './location.js'
</script>
The value in a writable store can be altered. Should you need to change the value of city in any component where it is imported, you can use the set() method:
<!-- Map.svelte -->

<script>
  import { city } from './location.js'

  city.set('Washington')

</script>
Or you can use the update() method to run a callback that passes the current value as an argument:
<!-- Map.svelte -->

<script>
  import { city } from './location.js'

  const newCity = 'Washington'

  function changeCity() {
    city.update(existing => newCity)
  }

</script>
Another way you could have components watch out for changes to the value you set in your store is by using Svelte’s subscribe() method:
<!-- Map.svelte -->

<script>
  import { city } from './location.js'

  const watch = city.subscribe(value => {
    console.log(value);
  });
</script>
Readable stores
Like writable stores, readable stores hold objects but they cannot be updated from external components. When using a readable store, you have to set its value from when you create it. Readable stores are mostly used to handle data that you need to be immutable. Here’s an example of what you would handle using a readable store – a counter:
<!-- counter.js -->

<script>
  import { readable } from 'svelte/store'

  export const counter = readable(0, set => {
    setTimeout(() => {
     set(1)
    }, 1000)
  })
</script>
The counter above can then be imported into another component like this:
<!-- Home.svelte-->

<script>
  import { counter } from './store.js'
</script>

<h1>You have {$counter} seconds left!<h1>
Building datasets with Svelte stores
Let’s try to build an actual app where we’ll manage state in Svelte. Our app will be just a basic updated list. The first step to building our app is to create a Svelte project. In your terminal, navigate to the folder where you would want to have your project and then input the following command:
npx svelte3-app
A complete app should have a folder structure similar to this:
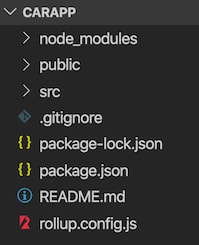
Once the app is built, deploy it by running npm run dev on your terminal. This deploys the app on the port localhost:5000.
Build a store
In the src folder in our project, let’s create a store folder which we’ll use for keeping our stores. Next, we’ll create a file to contain what we need to store and also define methods for updating the values of our store and resetting them to their default values. We’ll call this file cars.js:
 // src/store/cars.js

 import { writable } from 'svelte/store';

 const CARS = [
     { make: "Ford", model: "Taurus", year: "2015" },
     { make: "Toyota", model: "Avalon", year: "2013" }
 ];

 const { subscribe, set, update } = writable(CARS);

 const addCar = car => update(car => {
     return [...cars, car];
 });

 const reset = () => {
     set(CARS);
 };

 export default {
     subscribe,
     addCar,
     reset
 }
Thus the exported methods subscribe , addCar, and reset can now be imported into any component and used to subscribe, add new values, and reset our list of cars respectively.
Creating components
Our next step will be to create components that will receive the methods exported from our store. We will be creating two components, CarPage which we’ll use when we want to add a new car and CarList which will show the list of added cars. CarPage will update all added cars and respond to changes automatically:
 <!-- src/CarPage.svelte -->
<script>
        import cars from "./store/cars";
</script>

<div id="carPage">
        { #each $cars as car }
                <p>{car.make} {car.model}</p>
                <p>{car.year}</p>
                <hr />
        { /each }
</div>
Next we’ll create CarList which will just be a form that lets us update and remove vehicles accordingly:
<!-- src/CarList.svelte -->
<script>
        import cars from "./store/cars";

        // binding values
        let make = "";
        let model = "";
        let year = "";

        // submit car
        const submitCar = () => {
                cars.addCar({ make, model, year });
                // reset values
                make = model = year = "";
        }
</script>

<div id="carList">
    <input type="text"  bind:value={make} placeholder="Enter vehicle make" />
    <input type="text"  bind:value={model} placeholder="Enter vehicle model" />
    <input type="year" bind:value={year} placeholder="Enter vehicle year" />
    <input type="submit" on:click={submitCar} value="Include Vehicle" />
    <input type="submit" on:click={cars.reset} value="Reset Vehicle list" />
</div>
Lastly, we’ll import both CarList and CarPage into App.svelte:
<!-- src/App.svelte-->

<script>
    import CarList from "./CarList.svelte";
    import CarPage from "./CarPage.svelte";
</script>
<main>
    <h1>Car Dealership</h1>
    <CarList />
    <CarPage />
</main>
At this point, we should have an application that shows the rudiments of managing state using Svelte. Our app’s behavior should model the one in the video below:
Conclusion
Svelte’s adaptability makes it a great choice to use when building small scale apps that could require you to handle state to an extent. Its offering of customizable stores to choose from is brilliant as preferences can be isolated via stores. Certainly, we should see more promising features and alterations on this with more contributors to the Svelte repo on GitHub.
Plug: LogRocket, a DVR for web apps

LogRocket is a frontend logging tool that lets you replay problems as if they happened in your own browser. Instead of guessing why errors happen, or asking users for screenshots and log dumps, LogRocket lets you replay the session to quickly understand what went wrong. It works perfectly with any app, regardless of framework, and has plugins to log additional context from Redux, Vuex, and @ngrx/store.
In addition to logging Redux actions and state, LogRocket records console logs, JavaScript errors, stacktraces, network requests/responses with headers + bodies, browser metadata, and custom logs. It also instruments the DOM to record the HTML and CSS on the page, recreating pixel-perfect videos of even the most complex single-page apps.
Try it for free.
The post Application state management with Svelte appeared first on LogRocket Blog.

Top comments (0)