
Written by Kasra Khosravi✏️
What is Lando?
Lando will be your assistant in developing, running, and automating your project. Think of it as an abstraction layer of your development environment that is standardized across all major operating systems like MacOS, Windows, and Linux. Note that using Lando in production is not encouraged or supported by the Lando team, since its main purpose is to mimic the production environment locally.
By using Lando, any developer can set up the configs in the codebase for the services, tooling, and configs the application needs to run. Once that is set up, all team members have to do is to pull the repository and run lando start and start working on the project in an isolated development environment without worrying about inconsistencies in their development environments.
How does Lando work and why should we use it?
Now, you might have realized what we have described above has a lot of similarities with Docker and its related services. You probably asked yourself:
- The Lando setup configs they are talking about is really similar to
docker compose, right? - The isolated development environment seems very similar to
docker containers, isn’t that true?
You are right in both scenarios. But with that, why do we need Lando for our project, when we have docker compose and docker containers?

By using Lando:
- We get access to a more simplified process of defining Docker containers by using pre-defined recipes
- Even if our needed
docker containerenvironment is not supported by Lando recipes, we have an easier process of defining a container by defining a Lando service, which only exposes necessary configs compared todocker compose. This can help us get rid of setting upDockerfilesand having to type longdocker execcommands - In the case we still might need our own custom
docker composefiles for defining the development environment, we can use them alongside or in place of Lando recipes and services, while getting some extra benefits such as local development networking - On top of these, we get a lot more benefits like SSL handling per container, setting up proxy and custom URLs for each service, simplified build and run steps, CI local setup, and many more things. Read more about extra benefits you might gain by using Lando here
Now it is time to see Lando in action and see how it can help us in our development work. We start by installing Lando and then setting it up for a simple NodeJS web server project.
Install Lando
The first thing we need to do is to install Lando on our machine. Here are a few things to keep in mind:
- Make sure your machine’s hardware meets the requirements to install Lando
- Make sure your machine’s hardware meets the requirements to install Docker Engine
- Make sure your machine’s operating system meets the requirements
- Make sure you have admin access in your machine (ask the operator for access if you are on a network)
However, even if you meet the requirements, there are gotchas with Lando installation:
- Even if you meet the minimum hardware requirements, there is a chance Lando might not operate smoothly. Here are Lando’s preferred requirements. I am running Lando on a machine with these characteristics and have not faced any issues so far:
- 2,6 GHz 6-Core Intel Core i7
- 16 GB 2667 MHz DDR4
- 420GB+ of available disk space
- Lando depends on Docker for running and that is why the size of the installation file is a bit large, since the compatible Docker installation is shipped with Lando’s installation. So if you do not have Docker, it will be installed as part of the Lando’s installation process
If you already have Docker, you need to know that there might be a compatibility issue with your Docker version and what Docker version Lando is dependent upon. However, you can still skip the installation of Docker within the process of installing Lando. As an extra safety guard, you can reset Docker settings to factory defaults
- After checking the requirements above. Follow the installation guide based on your operating system here
- After the installation, just open a terminal in your machine and type the following command to make sure the installation has been successful:
lando version
// You should get the version of Lando that you installed .
// v3.0.0-rrc.1
Initialize Lando with Node HTTP server
We will build a simple Node HTTP server together and use Lando as a DevOPS tool to help us run, develop and test the project. Our goal, in the end, is that when you pull the Node server example from GitHub, you can just type lando start and have all of the configurations on your application ready.
Firstly, let’s focus on building our Node HTTP server app.
Node HTTP server
NodeJS is a powerful tool for running server-side services, web applications, and frontend tooling. For this article, we are going to focus on one of its most common use cases which is setting up a simple HTTP server and handle basic routing.
Setting up the HTTP server
We will use popular NodeJS modules called http for handling this; which is shipped by default with NodeJS:
// global dependencies
const http = require("http");

const requestHandler = function (req, res) {
  res.header('Content-type', 'text/html');
  res.end('I have built my own http server!');
};

http
  .createServer(requestHandler) //create a server object
  .listen(8080); //the server object listens on port 8080
As you can see, http has a method called createServer which returns a new instance of http.Server, when we get a new request coming in via requestHandler. This function accepts both a request and response object.
In this way, we can handle different scenarios when different request params like url path comes in and accordingly, send the right response results such as header or response code. Here we are making things simple by just setting the response body as a string.
This setup works for a simple example, but we need a bit of a more sophisticated process for handling other common web application use cases such as routing, error handling, request, and response processing. One option we have is to use a web framework like Express for this purpose.
Let’s see an example of separately handling requests coming with different URL paths:
// global dependencies
const http = require("http");
const express = require('express');
const app = express();

// request handlers
const homepageHandler = function (req, res) {
  res.header('Content-type', 'text/html');
  return res.end('I am on homepage');
};
const aboutpageHandler = function (req, res) {
  res.header('Content-type', 'text/html');
  return res.end('I am on about page');
};

http
  .createServer(app) //create a server object
  .listen(8080); //the server object listens on port 8080

// Basic HTTP response
app.get('/', homepageHandler);
app.get('/about', aboutpageHandler);
After Initializing const app = express() and passing it as a param to createServer, the server starts listening on port 8080 for different URL paths. For example, when the browser hits the URL /about, app.get('/about') invokes its callback which is aboutPageHandler. See it for yourself in this sandbox:
Configure Lando
Now that we have our Node server application ready, we can focus on setting up Lando. We are going to set up a simple Node Docker container with a supported patch version for our project, then handle some build step processes and serving the application on initial load. As a final goal, we want to explore setting two Docker containers for our project, one serving a http server while the other supporting https server.
There are two options for setting the base Lando configs:
- Invoking
lando initby passing necessary parameters for supported recipes and letting Lando set up the configuration for us. As of today, Lando supports several recipes likedrupal,joomla,laralvel,wordpress, etc, so make sure to check if your needed stack is supported or not - If your needed stack is not supported, do not worry. All you need is a service that can be configured by creating a
lando.ymlfile in the root of the application
Since our NodeJS server stack is not supported by the current recipes, we are going to focus on creating the configuration ourselves. We start by creating a lando.yml file in the root directory.
Setting up base config in lando.yml
In this file, we are going to define the basic services we need for our application development. Let’s start by defining the name and base node service called node-http:
// lando.yml
name: lando-node-server
services:
  node-http:
    type: node:12
We use the patch version 12 of Node, which is compatible with our express dependency:
// express's node compatibility

"engines": {
  "node": ">=0.10.0"
}
Lando allows us to run commands in the shell against our services. So, we can test that the Node version of the container that was set up with our Lando defaults service is in fact correct:
// terminal
lando ssh --service defaults --command "env | grep NODE_VERSION"

// You get
NODE_VERSION=12.16.2
// which is what we expect
Build steps
As a first step, we will focus on the application’s build steps. In general, we have four config params for installing dependencies or building the application in our service. These configs are build, build_as_root, run_ run_as_root. Please note that these commands are only run the first time Lando initializes our app. In case we want the build steps to run again, we can invoke lando rebuild.
For example, build allows us to install dependencies using yarn which is needed before our application can run. If we ever need to install a low-level server package that needs admin access, we can use build_as_root here.
Let’s give it a try:
// lando.yml

name: lando-node-12
services:
  defaults:
    type: node:12
    build: yarn

// Result we get in terminal
Your app has started up correctly.
Here are some vitals:

 NAME           lando-node-12
 LOCATION       /Users/USERNAME/Projects/node12
 SERVICES       defaults
So at this point, if we run lando start in the terminal, Lando will set up Docker containers with the specified patch version we defined for Node, run our build step, and install all of the dependencies in the package.json.
Serve/run the container
So, we have our dependencies sorted out, but what about running the app itself. We do not want to type another command to run the application after its service container is booted up.
Turns out what we had in the previous step is a CLI container for our service, which we can run commands against to run it. That is exactly what we are going to do in the lando.yml config to automate this step as well:
// lando.yml

name: lando-node-12
services:
  defaults:
    ...
    command: /app/node_modules/.bin/nodemon src/app-http.js --watch src

// Now we get a URL where our application is served
Your app has started up correctly.
Here are some vitals:
DEFAULTS URLS  http://localhost:32847
To check where the dependencies got installed in our container, we can ssh into our service like this:
// listing all the files in the root directory
lando ssh --service defaults --command "ls -ls /"

// we get several folders listed in our container
0 drwxr-xr-x  10 node dialout  320 Apr 12 19:48 app
4 drwxr-xr-x   1 root root    4096 Mar 31 02:07 bin
4 drwxr-xr-x   2 root root    4096 Feb  1 17:09 boot
...

// We then try to cd to places we assume hold the no_modules intallation
lando ssh -t --service defaults --command 'cd /app && exec bash -l'

// and we see our node_modules directory here under app/
README.md  node_modules  package.json  src  yarn.lock
Using SSL
Let’s spin up another service container to see how more than one service can be handled by Lando. The extra service we are going to build is going to establish a secure HTTPS server for our development environment.
The way we can do this is through a self-signed certificate which is usually built using OpenSSL, but this is something Lando will handle for us. The certificate and key files will be located under /certs directory, which we can use in a new Node server to secure a certain port (which by default is 443 in Lando). Let’s see this in action:
//app-https.js

'use strict';

// global dependencies
const fs = require('fs');
const http = require('http');
const https = require('https');
const express = require('express');

// initialization
const app = express();
const key = fs.readFileSync('/certs/cert.key');
const cert = fs.readFileSync('/certs/cert.crt');

// request handlers
const homepageHandler = function (req, res) {
  res.header('Content-type', 'text/html');
  return res.end('I am on homepage');
};

const aboutpageHandler = function (req, res) {
  res.header('Content-type', 'text/html');
  return res.end('I am on about page');
};

// Create our servers
https.createServer({key, cert}, app).listen(443);
http.createServer(app).listen(3000);

// Basic HTTP response
app.get('/', homepageHandler);
app.get('/about', aboutpageHandler);
// lando.yml
// setting a new service for a node server with SSL support

name: lando-node-12
services:
  ...
  custom:
    type: node:12
    ssl: true
    port: 3000
    build:
      - yarn
    command: /app/node_modules/.bin/nodemon src/app-https.js --watch src --ignore *.test.js
Now after running lando rebuild, we can see that we have two services up and running:
NAME           lando-node-12
 LOCATION       /Users/USERNAME/Projects/node12
 SERVICES       defaults, custom
 DEFAULTS URLS  http://localhost:32898
 CUSTOM URLS    http://localhost:32899
                https://localhost:32900
Also after invoking ssh into custom service, we can see which certificate files are generated:
lando ssh -t --service defaults --command 'cd /certs && ls'

// generated certificates
cert.crt  cert.csr  cert.ext  cert.key  cert.pem  server.crt  server.key
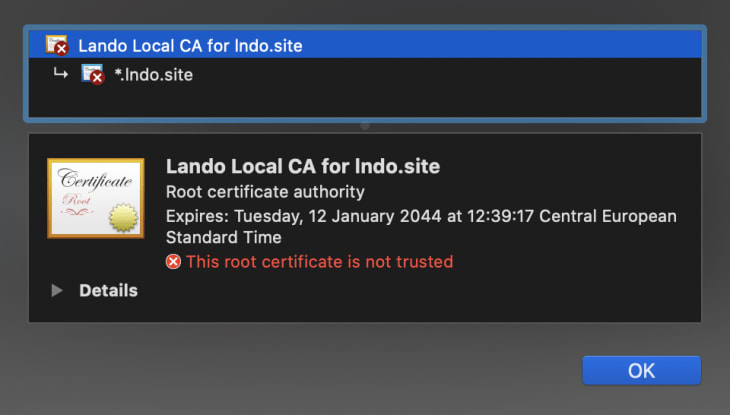
At this point, if we head to the provided URL https://localhost:32900, we see that the browser is complaining about the certificate being invalid. This is fine because we self-signed it.

After proceeding on this page, we can see that the HTTPS connection has been established successfully:
To learn more about handling SSL in Lando, make sure to read this guide thoroughly.
Testing the setup
Now, it is time to test our setup. Imagine you are a new developer on a team and you want to work on this Node server repository. All you have to do is to pull this Github repo, install Lando on your machine, and run lando start and you are good to go.
Conclusion
Together, we have examined and built a simple process for building and running our development environment for a Node web server.
Next steps?
There are many more things we can explore with Lando:
- Make sure to read more thoroughly about Lando recipes and services. Add additional ones for different parts of your stack such as database, frontend, api, monitoring, and analytics tools
- If you need a complex tooling process, you can consider using Lando tooling. With this, you can build complicated build steps across all your containers with just one command. Also, you can set up your CI test in tooling and run it locally
- Consider optimizing the process of running and building Docker containers with Lando
- And most importantly, solve problems that are worth solving. Do not engage in over-engineering and only focus on building configs that happen more than once in your application lifecycle
Resources
https://www.edureka.co/blog/what-is-docker-container
https://nodejs.org/en/knowledge/HTTP/servers/how-to-create-a-HTTP-server/
https://developer.mozilla.org/en-US/docs/Learn/Server-side/Express_Nodejs/Introduction
https://flaviocopes.com/express-https-self-signed-certificate/
https://docs.lando.dev/guides/lando-info.html
Plug: LogRocket, a DVR for web apps

LogRocket is a frontend logging tool that lets you replay problems as if they happened in your own browser. Instead of guessing why errors happen, or asking users for screenshots and log dumps, LogRocket lets you replay the session to quickly understand what went wrong. It works perfectly with any app, regardless of framework, and has plugins to log additional context from Redux, Vuex, and @ngrx/store.
In addition to logging Redux actions and state, LogRocket records console logs, JavaScript errors, stacktraces, network requests/responses with headers + bodies, browser metadata, and custom logs. It also instruments the DOM to record the HTML and CSS on the page, recreating pixel-perfect videos of even the most complex single-page apps.
Try it for free.
The post Introduction to Lando appeared first on LogRocket Blog.

Top comments (0)