
Written by Alexander Solovyov✏️
It’s no secret that Enzyme has become the de facto standard for React components testing, but there are other good options around.
For example: React Test Renderer.
I personally like Test Renderer because of the way it works–it renders React components into pure JavaScript objects that are easy to use and understand.
Another advantage of React Test Renderer is that it is maintained by a core team at Facebook and is always up-to-date.
React Test Renderer has a great documentation, so I won’t duplicate it. Instead, I’d like to illustrate a few of the most common use cases in an example with a Test Driven Development (TDD) approach.

Setup
Test Renderer has a really easy setup process–just install the lib and you’re ready to go:
npm install --save-dev react-test-renderer
Testing with TDD
Ordinarily we’d need a component in order to start writing a test, but React Test Renderer enables us to write a test before the component is implemented.
Side Note: The reason for this is that TDD works like a charm when you test functions, so taking into account that most of the React components are pure functional components, TDD is applied really well here, especially with React Test Renderer. Sometimes it’s even faster to write your component starting with tests in case of complex logic because you need fewer iterations and debugging.
Let’s consider the requirements for a simple component:
- It needs to have a class
btn-group - It should be able to render its children
Testing className
First, we need to test the class of an empty component (as we follow TDD):
import React from "react";
  // [ 1 ] import the React Test Renderer
  import { create } from "react-test-renderer";

  const BtnGroup = () => null;

  test("the className of the component includes btn-group", () => {
    // [ 2 ] boilerplate code
    const root = create(<BtnGroup />).root;

    // [ 3 ] query for element
    const element = root.findByType("div");

    // [ 4 ] assert that className to include btn-group
    expect(element.props.className.includes("btn-group")).toBe(true);
  });
The test has 3 steps: test instance creation, element querying, and assertion.
Let’s skip over the more in-depth explanation of that for now and focus on fixing the test.
At first, it will break (as expected):
No instances found with node type: "undefined"
That means we need to add some node with some type. In our case, the type should be <div>:
const BtnGroup = () => <div />;
Once we change the code, the file watcher runs the test again and we receive an updated message:
expect(received).toEqual(expected) // deep equality

Expected: "btn-group"
Received: undefined
We’re already asserting. To pass the first test, all we need to do now is add a className prop.
const BtnGroup = () => <div className="btn-group" />;
After this change, we’ll see that rewarding green message:
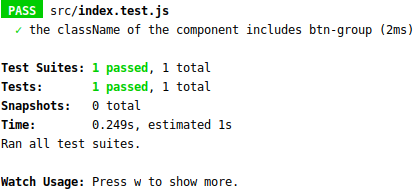
As soon as the test is green we can slow down a bit and revisit the code of the test line by line. Here’s that code again:
import React from "react";
  // [ 1 ] import the React Test Renderer
  import { create } from "react-test-renderer";

  const BtnGroup = () => null;

  test("the className of the component includes btn-group", () => {
    // [ 2 ] boilerplate code
    const root = create(<BtnGroup />).root;

    // [ 3 ] query for element
    const element = root.findByType("div");

    // [ 4 ] assert that className to include btn-group
    expect(element.props.className.includes("btn-group")).toBe(true);
  });
[1] Test Renderer has only one way of creating component — the create method, so just import and use it.
[2] When creating a component, getting a test instance is a standard boilerplate code for React Test Renderer.
[3] There are 2 main ways to query for an element in Test Renderer: by type and by props. I prefer querying by type when there are no other containers around like in the current example. We’ll get to other methods a bit later.
[4] This assertion is pretty self-explanatory: just check that the ‘className’ prop value includes btn-group and you’re good to go.
Testing children
Let’s continue adding functionality to the BtnGroup component we already have since we know we need to meet the following requirement:
It should be able to render its children.
Testing the children prop is very straightforward. We just need to make sure that the passed value matches the result rendered:
import React from "react";
import { create } from "react-test-renderer";

const BtnGroup = () => <div className="btn-group" />;

test("renders BtnGroup component with children", () => {
  // [ 6 ] child text
  const text = "child";

  // boilerplate code, already mentioned in [ 2 - 3 ] above
  const instance = create(<BtnGroup>{text}</BtnGroup>).root;

  // query for element
  const element = instance.findByType("div");

  // assert child to match text passed
  expect(element.props.children).toEqual(text);
  });
[6] The value we pass to the component and the value we use to assert against it should be the same.
Since we’re using TDD, you might expect the test to break here. However, React supports passing children to components out of the box, so our test will be green.
If you’re wondering if the test is running successfully, you can print the element value with console.log.
The output is as follows:

Testing any props
Let’s continue adding requirements for our component:
should render any props passed.
Here’s a test:
import React from "react";
  import { create } from "react-test-renderer";

  // the component is still not updated as we use TDD
  const BtnGroup = () => <div className="btn-group" />;

  test("renders BtnGroup component with custom props", () => {
    // generate some custom props
    const props = { id: "awesome-button-id", className: "mb-3", children: "child" };

    // boilerplate code
    const instance = create(<BtnGroup {...props} />).root;

    // get element by component name
    const element = instance.findByType("div");

    // assert if an additional className was added to existing one
    expect(element.props.className).toEqual("btn-group mb-3");
    // assert "id" prop to match passed one
    expect(element.props.id).toEqual(props.id);
    // assert "children" to match passed
    expect(element.props.children).toEqual(children);
  });
The code of the test already looks familiar: we’re just checking that the prop values match passed.
Now, the test will break and issue the following message:
Expected: "btn-group mb-3"
Received: "btn-group"
What happens now is that we need to actually start passing props. Otherwise btn-group className will always be there:
const BtnGroup = props => <div className="btn-group" {...props} />;
Here’s where having tests comes in handy. We have another message telling us that the className case is specific:
Expected: "btn-group mb-3"
Received: "mb-3"
Now, the passed props replace the props that our component already has–in our case, btn-group is replaced with mb-3.
We should change the code of the component to fix this so that it handles className differently:
const BtnGroup = ({className = "", ...rest}) =>
    <div {...rest} className={`btn-group ${className}`} />;
The trick here is to de-structure props so that items needing special treatment have their name and all other props consolidated into a rest object.
Again, there is no special approach needed for the children prop, although they’re passed now as a regular prop instead of in the body of the component.
Now, the test should be green again. All of the previously written tests will also be green:

Note: I left a console.log here to show how you can check the output at any time.
As you can see, all of the assertions we’ve done — for now — are just checks that strings match.
But if there’s a need to check the number of items, we can use this handy method in Test Renderer: testInstance.findAllByType().
Let’s see how it works.
Testing the amount of items
To demonstrate how to count items in React Test Renderer, we should have some component that renders an array, or list. The requirement for it is something like this:
should render a list with correct items count.
To follow TDD, we’ll start with an empty functional component that renders an empty ul tag:
const ProductList = ({ list }) => <ul />;
Here’s a test we could write:
import React from "react";
  import { create } from "react-test-renderer";

  test("renders a list of items with correct items count", () => {
    // prepare the list for testing
    const list = [{ id: 1, text: "first item" }, { id: 2, text: "second item" }];

    // boilerplate code
    const root = create(<ProductList list={list} />).root;

    // [ 7 ] get list items
    const elementList = root.findAllByType("li");

    // assert if the length match with original list passed as a prop
    expect(elementList.length).toEqual(list.length);
  });
The goal of this test is to check if the number of rendered nodes equals the number of passed items.
Initially, the test will break with the following message:

To fix the test, we should render list items with li tags inside the container:
const ProductList = ({ list }) => <ul>
    {list.map(li => <li key={li.id}>{li.text}</li>)}
</ul>;
Now the test is green and we can talk about the code.
[7] To query specifically for nodes with type li, I use the testInstance.findAllByType() method that returns all elements with tag “li”.
There are also some other methods to search for multiple items: testInstance.findAll() and testInstance.findAllByProps().
The first one is useful when you need to check the overall amount, while the second one comes in handy when you want to count a specific prop, e.g., all nodes with a specific className.
Testing text
In most cases having a test for only items count is not sufficient, and you’ll also want to test the actual text a user can read.
There’s no specific functionality in React Test Renderer for that purpose, but that’s pretty easy to write if you consider that text can only be found in children.
import React from "react";
  import { create } from "react-test-renderer";

  test("renders all items with correct text", () => {
    // [ 8 ] prepare the list for testing
    const list = [{ id: 1, text: "first item" }, { id: 2, text: 33 }];

    // boilerplate code
    const root = create(<ProductList list={list} />).root;

    // get list items
    const elementList = root.findAllByType("li");

    // [ 10 ] Iterate over all items and search for text occurence in children
    elementList.forEach((el, index) => {
        // [ 11 ] convert text to string
        expect(el.children.includes(`${list[index].text}`)).toBe(true);
    });
  });
Having a list of all items in [8] we can iterate over the nodes of the component and make sure that every text was found [10].
This test is instantly green as soon as the component doesn’t have any filtering or sorting logic inside and just renders a list as it is, so we don’t have to change any lines of code in the test.
The only nit to add here is that rendered text is always a string regardless of the value type you pass [11].
Testing event handlers and hooks
Some of the functional components rely on more than just props and have their own state management thanks to the Hooks API.
Consider a classic example of a toggler component with the following requirements:
- should render a button
- should toggle children on button click
That means that children visibility should change on click.
Here’s an example of a test you could write:
import React from "react";
import { create } from "react-test-renderer";

// let component to be a fragment for start
const VisibilityToggler = () => <></>;

test("should toggle children nodes on button click", () => {
  const root = create(
    <VisibilityToggler>
      <div>awecome content</div>
    </VisibilityToggler>
  ).root;

  // helper to get nodes other than "button"
  const getChildrenCount = () =>
    root.findAll(node => node.type !== "button").length;

  // assert that button exists
  expect(root.findAllByType("button").length).toEqual(1);

  // query for a button
  const button = root.findAllByType("button")[0];

  // remember initial nodes count (before toggle)
  const initialCount = getChildrenCount();

  // trigger a hook by calling onClick of a button
  act(button.props.onClick);
  const countAfterFirstClick = getChildrenCount();

  // assert that nodes count after a click is greater than before
  expect(countAfterFirstClick > initialCount).toBe(true);

  // trigger another click
  act(button.props.onClick);
  const countAfterSecondClick = getChildrenCount();

  // check that nodes were toggled off and the count of rendered nodes match initial
  expect(countAfterSecondClick === initialCount).toBe(true);
});
The test looks huge, so let’s not try to fix it right away. First, let’s discuss the code a bit.
[12] Here is one new thing happens: act() method is used to wrap event handler calls.
Why should we? And how should we remember to do so? The second answer is easy: no need to remember, because React Test Renderer checks the code and prints a warning with a reason:
When writing UI tests, tasks like rendering, user events, or data fetching can be considered as “units” of interaction with a user interface.
React provides a helper called act() that makes sure all updates related to these “units” have been processed and applied to the DOM before you make any assertions ~ from the docs.
In other words, an act() method “awaits” for React updates and makes otherwise async code to look synchronous very similar to await from ES7.
At this stage, the test can’t find a button and breaks:

To resolve this issue, let’s add a button:
const VisibilityToggler = () => <><button /></>;
The button exists, but the onClick method is not found:

Don’t forget to add a button:
const VisibilityToggler = () => <><button /></>;
This is the next message you’ll receive after adding an onClick handler:

Finally, we’re at the point where we’re ready to add some state management with Hooks:
const VisibilityToggler = ({ children }) => {
  const [isVisible, setVisibility] = useState(false);
  const toggle = () => setVisibility(!isVisible);
  return (
    <>
      <button onClick={toggle}>toggle</button>
      {isVisible && children}
    </>
  );
};
Clicking on a button now toggles a state variable isVisible to the opposite value (true or false) that in return causes a render of “children” in case of “true” and skips rendering “children” in case of “false”.
All tests should be green now. You can find the complete source code for this example here:

Conclusion
Although React Test Renderer is usually associated with Snapshot testing, it can still be used to make specific assertions against your components with sufficient accuracy for most common use cases.
I personally like it because it has a clean API, it’s simple, and it’s easy to use along with TDD. I hope you like it too!
Editor's note: Seeing something wrong with this post? You can find the correct version here.
Plug: LogRocket, a DVR for web apps

LogRocket is a frontend logging tool that lets you replay problems as if they happened in your own browser. Instead of guessing why errors happen, or asking users for screenshots and log dumps, LogRocket lets you replay the session to quickly understand what went wrong. It works perfectly with any app, regardless of framework, and has plugins to log additional context from Redux, Vuex, and @ngrx/store.
In addition to logging Redux actions and state, LogRocket records console logs, JavaScript errors, stacktraces, network requests/responses with headers + bodies, browser metadata, and custom logs. It also instruments the DOM to record the HTML and CSS on the page, recreating pixel-perfect videos of even the most complex single-page apps.
Try it for free.
The post TDD with React Test Renderer appeared first on LogRocket Blog.

Top comments (0)