
Table of Contents
Terraform Introduction
- Terraform is an Infrastructure as Code (IaC) software tool created by HashiCorp.
- Users define and provide data center infrastructure using a declarative configuration language known as HashiCorp Configuration Language (HCL).
- Terraform manages external resources (such as public cloud infrastructure, private cloud infrastructure, network appliances, software as a service, and platform as a service) with "providers"
- HashiCorp maintains an extensive list of official providers, and can also integrate with community-developed providers.
- Terraform supports a number of cloud infrastructure providers such as Amazon Web Services, Microsoft Azure, IBM Cloud, Google Cloud Platform, DigitalOcean, Oracle Cloud Infrastructure, VMware vSphere, and OpenStack
- Terraform is one of the extensively used IaC tool in the Cloud DevOps Infra automation space
Install and Configure AWS CLI
- Install AWS CLI
- Configure AWS CLI
- Please note, Configuring AWS using
aws configureCLI command, will write the AWS secret and access key to~/$USER_HOME/.aws/credentialsfile and it will used to authenticate the terraform infra creation in AWS.
Install and Configure Terraform
- Refer here for installing terraform
- Extract and Add
terraformexecutable path to ENV variables
Terraform setup in Linux based systems
wget https://releases.hashicorp.com/terraform/0.12.24/terraform_0.12.24_linux_amd64.zip
unzip terraform_0.12.24_linux_amd64.zip -d terraform /usr/local/bin/
If terraform executable stored in another path, make sure the path is added in $PATH variable permanently.
AWS Infrastructure Automation
- We will see How to automate the AWS infrastructure creation using Terraform
- As part of the demo code, we will create a Apache webserver and run a sample website
- Architecture of this server follows the single tier method, wherein we will create only a simple Webserver for demo purpose
Basic Terminologies in Terraform
- Providers
- It should be cloud provider or on-premise provider on which we will create our infrastructure and resources
- Resources
- This indicates the resources like virtual machines, network components, containers we spin-up on the providers
- Tfstate file
- This is the state of terraform infrastructure created when we run the commands
terraform planandterraform apply - This state file can be stored locally or in a network storage for multi developer environments
- This is the state of terraform infrastructure created when we run the commands
Source Code Details
- Full source code of this tutorial available in GitHub
-
main.tfcontains the beginning section of terraform code - So we have to define
terraformwithrequired_providersand we have mentionedawssince we are going to create infra in AWS
terraform {
  required_providers {
    aws = {
      source  = "hashicorp/aws"
      version = "~> 3.0"
    }
  }
}
- We have already installed and configured
aws cliauthentication details pointing to the destination AWS account on which the infrastructure will be created - The configured credentials stored in the file
~/.aws.credentials - We need to provide the reference for the above path in
shared_credentials_filevalue using thecredsvariable ```hcl
Configure the AWS Provider
provider "aws" {
region = var.region
shared_credentials_file = var.creds
profile = "default"
}
- Rest of the `main.tf` should have the resource definition required for creating a `AWS EC2` instance
- We need to have below resources for creating an EC2 instance
  1. VPC
  2. Internet Gateway
  3. Subnet
  4. Route table
  5. Security Group
and then,
  5. EC2 instance definition

```hcl


# Create a VPC
resource "aws_vpc" "app_vpc" {
  cidr_block = var.vpc_cidr

  tags = {
    Name = "app-vpc"
  }
}

resource "aws_internet_gateway" "igw" {
  vpc_id = aws_vpc.app_vpc.id

  tags = {
    Name = "vpc_igw"
  }
}

resource "aws_subnet" "public_subnet" {
  vpc_id            = aws_vpc.app_vpc.id
  cidr_block        = var.public_subnet_cidr
  map_public_ip_on_launch = true
  availability_zone = "us-west-2a"

  tags = {
    Name = "public-subnet"
  }
}

resource "aws_route_table" "public_rt" {
  vpc_id = aws_vpc.app_vpc.id

  route {
    cidr_block = "0.0.0.0/0"
    gateway_id = aws_internet_gateway.igw.id
  }

  tags = {
    Name = "public_rt"
  }
}

resource "aws_route_table_association" "public_rt_asso" {
  subnet_id      = aws_subnet.public_subnet.id
  route_table_id = aws_route_table.public_rt.id
}
Cloud Init and User Data
- Objective of the EC2 instance is to have the Apache Web Server installed on it, when the instance is created
- So we are providing a shell script in
user_datasection to install the apache server - The script added in
user_datasection will be invoked viaCloud Initfunctionality when the AWS server gets created - So what ever the commands added in
user_datasection gets executed whenever the instance getting initialized - We can provide any kind scripts in user_data like the example below,
- Shell script in Unix based systems
- Powershell script in Windows based system
-
Terraform AWS Provider has a syntax to pass the
user_dataas part ofaws_instanceresource declaration ```hcl
resource "aws_instance" "web" {
ami = "ami-005e54dee72cc1d00"
instance_type = var.instance_type
key_name = var.instance_key
subnet_id = aws_subnet.public_subnet.id
security_groups = [aws_security_group.sg.id]
user_data = <<-EOF
#!/bin/bash
echo "*** Installing apache2"
sudo apt update -y
sudo apt install apache2 -y
echo "*** Completed Installing apache2"
EOF
tags = {
Name = "web_instance"
}
volume_tags = {
Name = "web_instance"
}
}
- `variables.tf` file should have the customised variables, a user wanted to provide before running the infra creation
- User can also define default value for each variable in the file

```hcl


variable "region" {
default = "us-west-2"
}
variable "instance_type" {}
variable "creds" {}
variable "instance_key" {}
variable "vpc_cidr" {}
variable "public_subnet_cidr" {}
- It is recommended to create separate tf files for separating various resources
- So we have crreated
sg.tffile for adding resource for AWS VPC security group - sg.tf ```hcl
resource "aws_security_group" "sg" {
name = "allow_ssh_http"
description = "Allow ssh http inbound traffic"
vpc_id = aws_vpc.app_vpc.id
ingress {
description = "SSH from VPC"
from_port = 22
to_port = 22
protocol = "tcp"
cidr_blocks = ["0.0.0.0/0"]
ipv6_cidr_blocks = ["::/0"]
}
ingress {
description = "HTTP from VPC"
from_port = 80
to_port = 80
protocol = "tcp"
cidr_blocks = ["0.0.0.0/0"]
ipv6_cidr_blocks = ["::/0"]
}
egress {
from_port = 0
to_port = 0
protocol = "-1"
cidr_blocks = ["0.0.0.0/0"]
ipv6_cidr_blocks = ["::/0"]
}
tags = {
Name = "allow_ssh_http"
}
}
- We can define `output.tf` file to see expected output values like `ipaddress` of instances and `hostname` etc.

- output.tf
```hcl


output "web_instance_ip" {
    value = aws_instance.web.public_ip
}
- Since we have the custom variables defined in our terraform file, we have provide the values for those custom variables
- So we have to create a
tfvarsfiles and provide the custom variable values - User has to provide the EC2 instance
pem filekey name ininstance_keyvalue - aws.tfvars ```hcl
region = "us-west-2"
instance_type = "t2.micro"
instance_key = "aws_ec2_pem_filename"
creds = "~/.aws/credentials"
vpc_cidr = "178.0.0.0/16"
public_subnet_cidr = "178.0.10.0/24"
## *Steps to run Terraform*
- Now we will see how to run the above created terraform infrastructure automation
terraform init
terraform plan -var-file=aws.tfvars
terraform apply -var-file=aws.tfvars -auto-approve
- Once the `terrform apply` completed successfully it will show the `public ipaddress` of the apache server as `output`
aws_instance.web: Creation complete after 33s [id=i-07f19000878a6ec11]
Apply complete! Resources: 7 added, 0 changed, 0 destroyed.
Outputs:
web_instance_ip = "34.220.248.140"
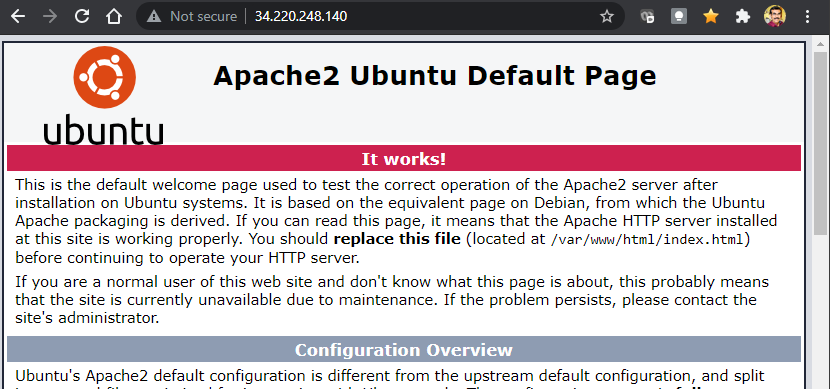
## *Access the Webserver*
- We can access the webserver using the public IP
- Screenshot Below,
## *Cleanup*
- As part of learning we will also cleanup the server using the command,
terraform destroy -var-file=aws.tfvars -auto-approve
- It shows the destruction completed console log
Changes to Outputs:
- web_instance_ip = "34.220.248.140" -> null aws_route_table_association.public_rt_asso: Destroying... [id=rtbassoc-085573ee447b7d0d1] aws_instance.web: Destroying... [id=i-07f19000878a6ec11] aws_route_table_association.public_rt_asso: Destruction complete after 0s aws_route_table.public_rt: Destroying... [id=rtb-04025de8f9149983a] aws_route_table.public_rt: Destruction complete after 0s aws_internet_gateway.igw: Destroying... [id=igw-06269b7b96264af8f] aws_instance.web: Still destroying... [id=i-07f19000878a6ec11, 10s elapsed] aws_internet_gateway.igw: Still destroying... [id=igw-06269b7b96264af8f, 10s elapsed] aws_internet_gateway.igw: Destruction complete after 19s aws_instance.web: Still destroying... [id=i-07f19000878a6ec11, 20s elapsed] aws_instance.web: Still destroying... [id=i-07f19000878a6ec11, 30s elapsed] aws_instance.web: Destruction complete after 30s aws_subnet.public_subnet: Destroying... [id=subnet-06304b3b7eb727669] aws_security_group.sg: Destroying... [id=sg-098709b525d3553b7] aws_security_group.sg: Destruction complete after 0s aws_subnet.public_subnet: Destruction complete after 0s aws_vpc.app_vpc: Destroying... [id=vpc-05f7555059de86cf6] aws_vpc.app_vpc: Destruction complete after 0s
Destroy complete! Resources: 7 destroyed.
.
## *Bibliography*
- [AWS Terraform Workshop](https://hashicorp.github.io/field-workshops-terraform/slides/aws/terraform-oss/index.html#1)

Top comments (0)