So after some interweb perusing for blog post topics, I finally settled on an interesting topic that I thought would be fun and challenging for me to do. That being, find some art piece made solely with code and reproduce something similar. Espen Kluge has an amazing portrait series called "Alternatives" using javascript, found here. After seeing it for the first time, I had to try something similar.
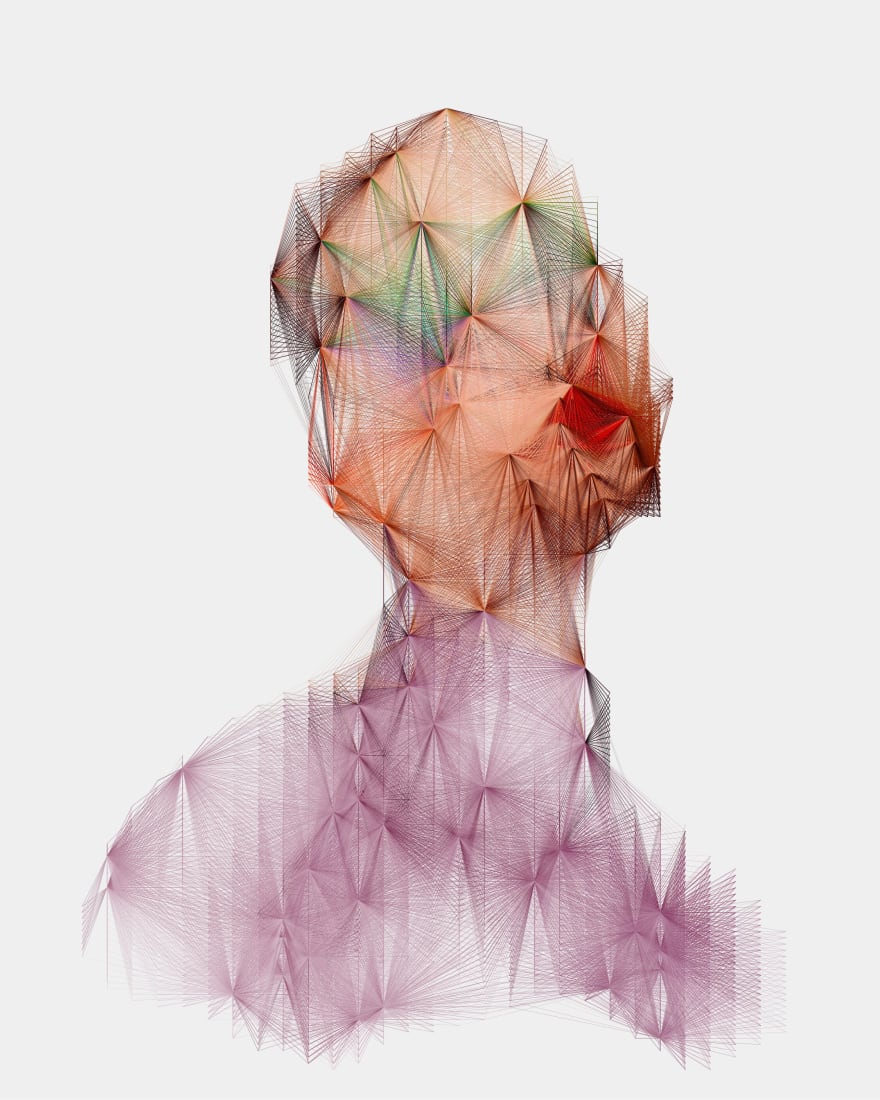
How abstraction is achieved through the colored lines intersecting across the figure is so cool. It's amazing how the eye can pull out the form of a person but there is no tangible features like the eyes, nose, or mouth that can really be seen. And the face is blurred in the most elegant way.
The Preliminary Outline
So it seems like the actual image is initially processed and points on the person are chosen for lines to emerge out of.

I've circled a few of these "points" on the above, as it seems like the portrait is divided up into these nexus points and each line is drawn from one point to a nearby point. Also, some lines are drawn from these points and end at the edges or the contour of the figure. Seen here:
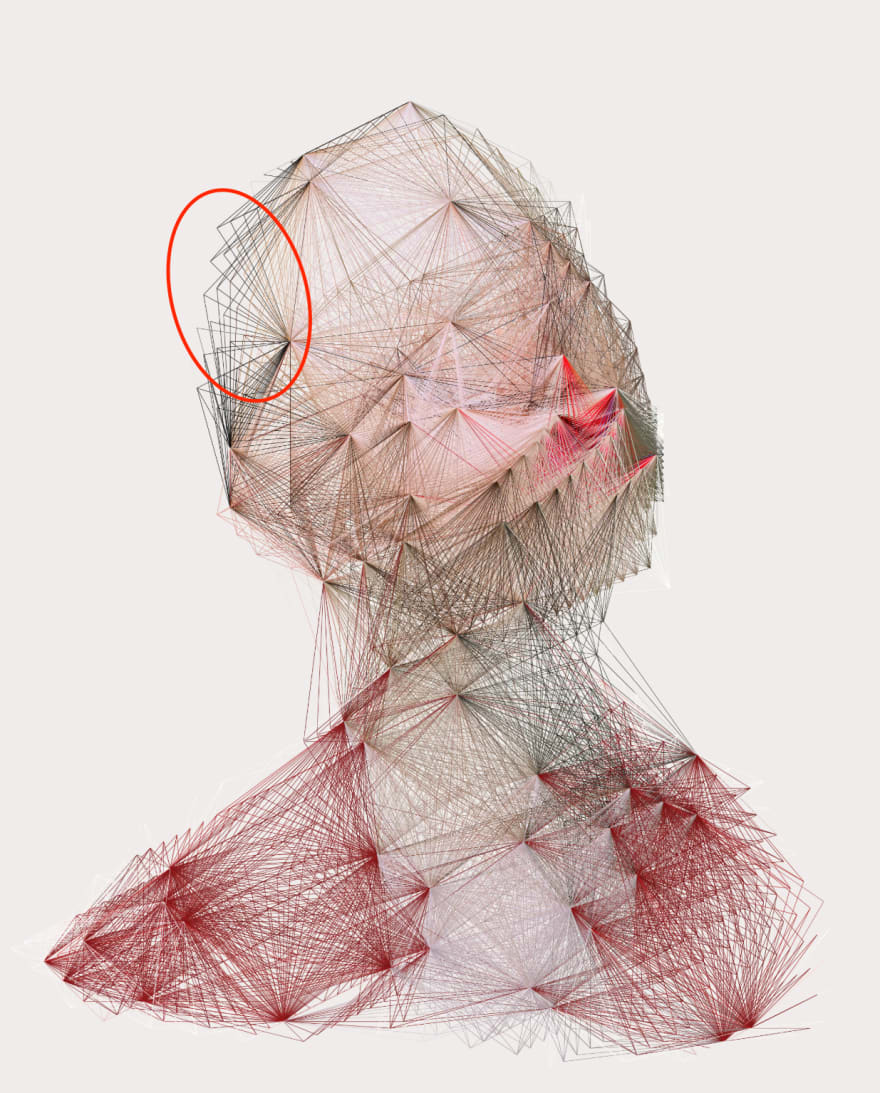
So the steps seem like:
- Divide the portrait into points
- Draw lines from each point to all closest adjacent points and also the contours of the figure
- Each line is one single color (possibly an average rgb value from one point to another, not sure)
To the Code
For this, I'll use processing with Java as it handles images really well and has built in pixel loading methods. P5 is nice and I'm better at javascript, but P5 is not as fast because of the browser. Disclaimer: I am at best a Java newbie so I apologize if I don't stack up to Java conventions. Also, I assume some level knowledge of processing sketches. If you're totally green with processing, check out (coding train)[https://www.youtube.com/watch?v=j-ZLDEnhT3Q]
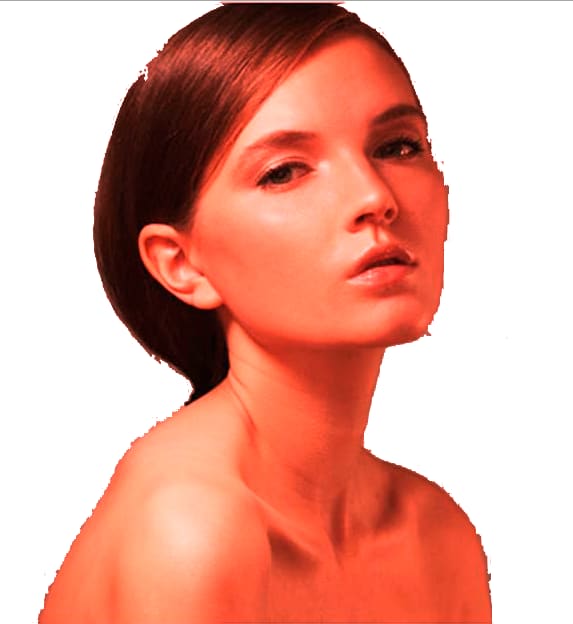
I'm going to choose an image that has a relatively monochromatic background such that the contours of the figure are easily detectable. I've edited this portrait to have no background such that we can easily detect the contours of the figure:

I've lifted a nice portrait from google and edited out the background (a little crudely). In processing, we'll load the image like so:
PImage portrait;

void setup() {
  size(580,625);
  portrait = loadImage("portrait_technique_0014.png");
  image(portrait, 0, 0);
}

void draw() {

}
Where the file is saved in the same directory as my sketch. If you don't know how to do that, select Sketch in the app header and click "show sketch folder." Then just plop that badboy in there. "portrait_technique_0014.png" is just the name of my file.
Anyways, we wanna deconstruct our image pixel by pixel to get the rgb color values at each pixel.
PImage portrait;

void setup() {
  size(580,625);
  portrait = loadImage("portrait_technique_0014.png");
}

void draw() {
  loadPixels();
  portrait.loadPixels();
  for (int i = 0; i < width; i++) {
    for (int j = 0; j < height; j++) {
      int loc = i + j*width;
      float r = red(portrait.pixels[loc]);
      float g = green(portrait.pixels[loc]);
      float b = blue(portrait.pixels[loc]);
      pixels[loc] = color(r,g,b);
    }
  }
  updatePixels();
}
Instead of loading the image in the setup function, the draw function will load the pixels of the canvas and the pixels of my uploaded portrait. Then loop through all the pixels of the image, take their red, green, and blue values in the picture, and then map that value onto the corresponding pixel value. So rather than just uploading the image itself, I'm passing the image through a looping block to intercept data before it's displayed on the canvas.
Note that this line "pixels[loc] = color(r,g,b);" is where we can change the color values of the image like doing:
pixels[loc] = color(2*r,g,b);
Which makes our image have much more red than the original image
Processing the Image
I want to test whether we can find the contours of the image which is where the colored values of the image meet the pure white values of the background (where rgb would be (255, 255, 255)) as our first step. I'm gonna run some logic where values over 250 (due to equality in float values) will be unchanged, but otherwise set to rbg(0,0,0) (pure black).
PImage portrait;

void setup() {
  size(580,625);
  portrait = loadImage("portrait_technique_0014.png");
}

void draw() {
  loadPixels();
  portrait.loadPixels();
  for (int i = 0; i < width; i++) {
    for (int j = 0; j < height; j++) {
      int loc = i + j*width;
      float r = red(portrait.pixels[loc]);
      float g = green(portrait.pixels[loc]);
      float b = blue(portrait.pixels[loc]);
      if (r > 250 & g > 250 & b > 250) {
        pixels[loc] = color(r,g,b);
      } else {
        pixels[loc] = color(0,0,0);
      }
    }
  }
  updatePixels();
}

As you can see, the figure is like a silhouette where we've isolated the white background against the colored portions of the figure. Now lets randomly seed some points on the figure that'll be used to connect with lines.
Now there's probably many ways to go about seeding random points across the figure, how I did it was use the random function. Once we hit a pixel with a non-white rgb value, I'll use the random function to generate a float between 0 and 100. Using some threshold value and checking if the random value is less than the established threshold, create a point on the figure. Which comes out looking like this:
PImage portrait;

ArrayList<Point> points = new ArrayList();
float threshold = .1;

void setup() {
  size(580, 625);
  portrait = loadImage("portrait_technique_0014.png");
  loadPixels();
  portrait.loadPixels();
  for (int i = 0; i < width; i++) {
    for (int j = 0; j < height; j++) {
      Integer loc = i + j*width;
      float r = red(portrait.pixels[loc]);
      float g = green(portrait.pixels[loc]);
      float b = blue(portrait.pixels[loc]);
      if (r > 250 & g > 250 & b > 250) {
      } else {
        float val = random(0, 100);
        if (val < threshold) {
          points.add(new Point(i,j,r,g,b));
        }
      }
      pixels[loc] = color(250, 250, 250);
    }
  }
  updatePixels();
}

void draw() {
  for (int i = 0; i < points.size(); i++) {
    points.get(i).show();
  }
}
Once the threshold value has been met, I'll add it to an arraylist of point instances. I've written a Point class to contain the relevant data I want, like the x and y position on the canvas and the rgb value at that specific point. It'll definitely come in handy as we progress. It looks like this:
class Point {

  float x;
  float y;
  float red;
  float green;
  float blue;

  Point(float i, float j, float r, float g, float b) {
    x = i;
    y = j;
    red = r;
    blue = b;
    green = g;
  }

  public float getX() {
    return x;
  }

  public float getY() {
    return y;
  }

  public color getColor() {
    return color(red,green,blue);
  }

  void show() {
    fill(color(red,green,blue));
    noStroke();
    circle(x,y,5);
  }
}
Which comes out looking like this:

This is all I'm gonna do in this post as to avoid being too long. Please check back in the future as I plan on developing this more in a later post.

Top comments (2)
Just found Espens art today and was inspired and curious. Thank you for sharing this
Great to know about your blog, very helpful