
I was looking for a faster way to create static sites. I've looked into Nuxt and the other js frameworks - they all pack lots of javascript in the export and they don't look at all SEO friendly nor they are simple to use. Hugo looks too complicated and I didn't tried Jekyll.
Eleventy is such an intuitive package to use for creating static sites.
Installation
Make a folder or create a repo then git clone it locally. Initialize a node project with:
npm init -y
Install elevently:
npm install @11ty/eleventy
Create 2 folders next to package.json: site and public.
In the package.json update type to module ("type": "module") and add this command in the scripts field:
"scripts": {
    "dev": "npx @11ty/eleventy --input=./site --output=./public --serve --port=3000 --incremental"
}
With npm run dev 11tly will look into site directory and export the static site in the public directory.
First page
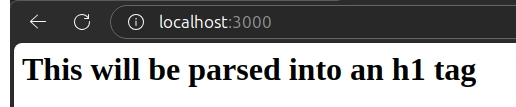
In the site directory create an index.md file in which you can add this markdown:
# This will be parsed into an h1 tag
Now go to localhost:3000 and you'll see the rendered html page.
What's crazy is that you can have html in the .md file with css style and script tags:
# This will be parsed into an h1 tag

<h1 id="header">You could have html as well</h1>

<!-- add css styles like this -->

<style>
    h1 {
        color: red;
    }
</style>

<script>

    let header = document.getElementById('header');

    header.addEventListener('click', function () {
        alert("You clicked the header!");
    });

    document.addEventListener('DOMContentLoaded', function () {
        alert("Hello, World!");
    });
</script>
vscode intelisense will not be great you'll need to change extension name to .html then back to .md. You are not forced to use only .md files you can mix .md with .html files.
Multiple pages and routes
A static site will have multiple pages. To add a new page, next to index.md file create another .md file let's say about.md. Add some header in it like # this is the about page. Now go to browser at localhost:3000/about and see the changes (11tly has hot reload as well).
Yeah, but we don't want to go manually between pages - we need to create a link. Super easy and intuitive:
In index.md file:
# the home page
[go to about](/about)
In about.md file:
# this is the about page
[go home](/)
Creating more nested routes is super simple. You just need to create directories and files. The index.* file will act as a root path for the url.
site
├── about.md            : /about
├── index.md            : /
└── posts
    ├── authors
    │   ├── author1.md   : /posts/authors/author1
    │   ├── author2.md   : /posts/authors/author2
    │   ├── author3.md   : /posts/authors/author3
    │   └── index.md     : /posts/authors
    ├── index.md         : /posts
    ├── post1.md         : /posts/post1
    └── post2.md         : /posts/post2
One thing I noticed is that the public folder (the folder which contains the exported html files) does not delete the exported files which you delete in the source directory (the site dir with .md files). So when you do the final export make sure to cleanup the public dir.
Base layouts
Let's say you have a blog - the layout (html+css+js) of that page will be the same for all blogs. The only thing what will change will be the content (images, text, links etc.).
To create a layout in site dir create a folder named _includes and a file named base.njk we'll use nunjucks as our templating language (it will help us with placing variables, making for loops, if else, adding some basic template logic more specifically).
VScode doesn't know .njk and I didn't found a proper extension which keeps the intelisense of the .html file - so as a "hack" you can go in the right lower corner and configure file association language to html.
![]()

In the site/_includes/base.njk create the layout to want for your pages. You can have multiple layouts and you can also use "inheritance" to build layouts.
Paste this in the base.njk file created:
---
title: this is the default title unless is overwritten in another file
---

<!DOCTYPE html>
<html lang="en">

<head>
    <meta charset="UTF-8">
    <meta name="viewport" content="width=device-width, initial-scale=1.0">
    <link rel="stylesheet" href="https://cdn.jsdelivr.net/npm/@picocss/pico@2/css/pico.min.css">
    <title>{{ title }}</title>
</head>

<body>

    {{ content | safe }}

</body>

</html>
What you see there different from the usual html is nunjucks template syntax and some Frontmatter syntax which helps us deal with handling data. You can see that we added an external css library so you could add Bootstrap, Bulma or other classic css library without any fancy setup.
Data here will go in the head of the html file and some data will be used by 11tly to figure out which layout to use and other stuff.
---
title: this is the default title unless is overwritten in another file
---
Here 11lty using nunjucks will insert in the curly braces the content of index.md for example.
{{ content | safe }}
Here for layout: base.njk 11tly knows which template to use for this file. The title: overwritten title will overwrite existing title in the head for base.njk.
---
layout: base.njk
title: overwritten title
---

# the home page

[go to about](/about)
[go to posts](/posts)
[go to authors](/posts/authors)
If you need to reuse a layout in another layout you can use the frontmatter meta tags to specify from which template to inherit.
Create another layout named dashboard.njk in site/_includes folder and add the following content:
---
layout: base.njk
---

<aside>
    <ul>
        <li><a href="/">home</a> </li>
        <li><a href="/posts">posts</a> </li>
        <li><a href="/posts/authors">authors</a> </li>
    </ul>
</aside>

<main>
    {{ content | safe }}
</main>
As you can see we inherited from base.njk so we removed some duplicated code this way. Now to see it in action go to site/index.md and switch existing layout to layout: dashboard.njk.
Note that we could create that aside element taking use of 11tly collections. The special field tags will be gathered under a special variable called collections so we can iterate over collections.all links collected or by tag (ex: iterate over all posts)
---
tags:
  - post
---
This is useful for generating sitemaps, navigation etc.
<ul>
   {%- for post in collections.all -%}
        <li><a href="{{ post.url }}">{{ post.url }}</a></li>
   {%- endfor -%}
</ul>
Checkout pagination is kinda similar to collections.
Adding static assets like css, js, images, videos tailwind, daisy ui
First create a folder which will hold these static files. Next to package.json create a folder named assets and add there your .css, .js, .png, .jpg etc. static files. Now next to the same package.json file (in the root folder) create a file named eleventy.config.js and add the following code:
export default function (eleventyConfig) {
    eleventyConfig.addPassthroughCopy("./assets");
};
This will tell 11tly to copy the assets folder in the public folder on build.
Now to use those files in the head tag of the layout add them like this:
<head>
    <meta charset="UTF-8">
    <meta name="viewport" content="width=device-width, initial-scale=1.0">
    <link rel="stylesheet" href="https://cdn.jsdelivr.net/npm/@picocss/pico@2/css/pico.min.css">

    <link rel="stylesheet" href="/assets/styles.css">
    <link rel="stylesheet" href="/assets/some_other_styles.css">
    <script src="/assets/scripts.js"></script>
    <script src="/assets/some_other_scripts.js"></script>

    <title>{{ title }}</title>
</head>
If you have images or other videos you can add them like this in the html files like this:

or this:
<img src="/assets/elevently.jpg" alt="">

To add Tailwind v4 and Daisy UI 5 to elevently you need to do the following:
Install tailwind, daisy ui, and eleventy-plugin-vite
npm install @11ty/eleventy-plugin-vite@^6.0.0 @tailwindcss/vite@^4.0.15 daisyui@^5.0.9 tailwindcss@^4.0.15
Now in eleventy.config.js we need to configure tailwindcss with vite:
import EleventyVitePlugin from "@11ty/eleventy-plugin-vite";
import tailwindcss from '@tailwindcss/vite';


export default function (eleventyConfig) {
    eleventyConfig.addPassthroughCopy({
        "./assets/tailwind.css": "/assets/styles.css",
        // other static files you may have
        "./assets/custom.css": "/assets/custom.css",
        "./assets/custom.js": "/assets/custom.js",
    });

    eleventyConfig.addPlugin(EleventyVitePlugin, {
        viteOptions: { plugins: [tailwindcss()] }
    });
};
How to deploy one or more static sites on a VPS?
You can deploy multiple 11tly sites on a VPS using docker and Caddy.
Create a folder named websites and inside it make another folder with the domain name of the static site you want to serve. Copy the contents generated by 11tly into websites/my-static-site
Now create a file named Caddyfile and add the following contents:
mystaticsite.localhost {
    tls your-email-used-to-buy-domain@gmail.com
    root * /srv/websites/my-static-site
    push
    file_server browse
}
The .localhost will allow you to view the website on localhost. On the VPS change it to the domain you bought (ex: mystaticsite.com).
Create a docker-compose.yml file:
services:

  proxy:
    container_name: multisite-apps-caddy-proxy
    image: caddy:2-alpine
    restart: unless-stopped
    ports:
      - "80:80"
      - "443:443"
    volumes:
      - ./websites:/srv/websites # here we mount the static sites
      - $PWD/Caddyfile:/etc/caddy/Caddyfile
      - caddy_data:/data
      - caddy_config:/config
    networks:
      - web

volumes:
  caddy_data:
  caddy_config:

networks:
  web:
    driver: bridge
Cool now do a docker compose up -d wait for it to build and you can see your site(s) at mystaticsite.localhost
You can do even more with 11tly: create pages from json data, support multiple languages, handle dates based on timezone, add plugins to optimize images and many more.
Check more docs at 11ty.dev

Top comments (0)