Engaging customers through various communication channels is important in today's dynamic business landscape. From emails and SMS to push notifications and voice messages, staying connected with your audience is the key to thriving.
This guide focuses on the push notification channel and the logistics of sending these notifications to mobile applications. Although we will focus on IOS applications built with React Native, the concept is essentially the same for Android apps.
We will create a mini React native app and use the AWS Amplify push notification feature and its easy-to-use APIs to set up and receive push notifications in our app. Under the hood, Amplify push notifications uses AWS Pinpoint, an AWS service that would serve as our our method for segmenting and targeting users.
We will first set up and get push tokens. We will then use these tokens to send push notifications from our AWS pinpoint dashboard. Then, we will show how to do the same from a mini Node.js app using the AWS library.
Prerequisites
You need to know the following to proceed with this guide:
- Familiarity with React and TypeScript
- Understanding of basic mobile app development with React Native
- Familiarity with Restful APIs and HTTP
To be able to replicate this guide locally, you need the following:
- A MacBook with Xcode 13.4+ and/or iPhone for development.
- An Apple developer account, enrolled in the membershipprogram.
- An AWS account.
How Push Notification Work
Below is a diagram illustrating the main steps in sending push notifications to mobile devices. Understanding this diagram makes it easier to get started and tweak things in your app. This diagram will form the basis of all the decisions made in this guide. We will briefly explain how it works on a basic level then, based on this explanation, we will see what we need to do to build our mobile app to make this flow possible.

Let's break down how sending push notifications works in simple terms, step by step:
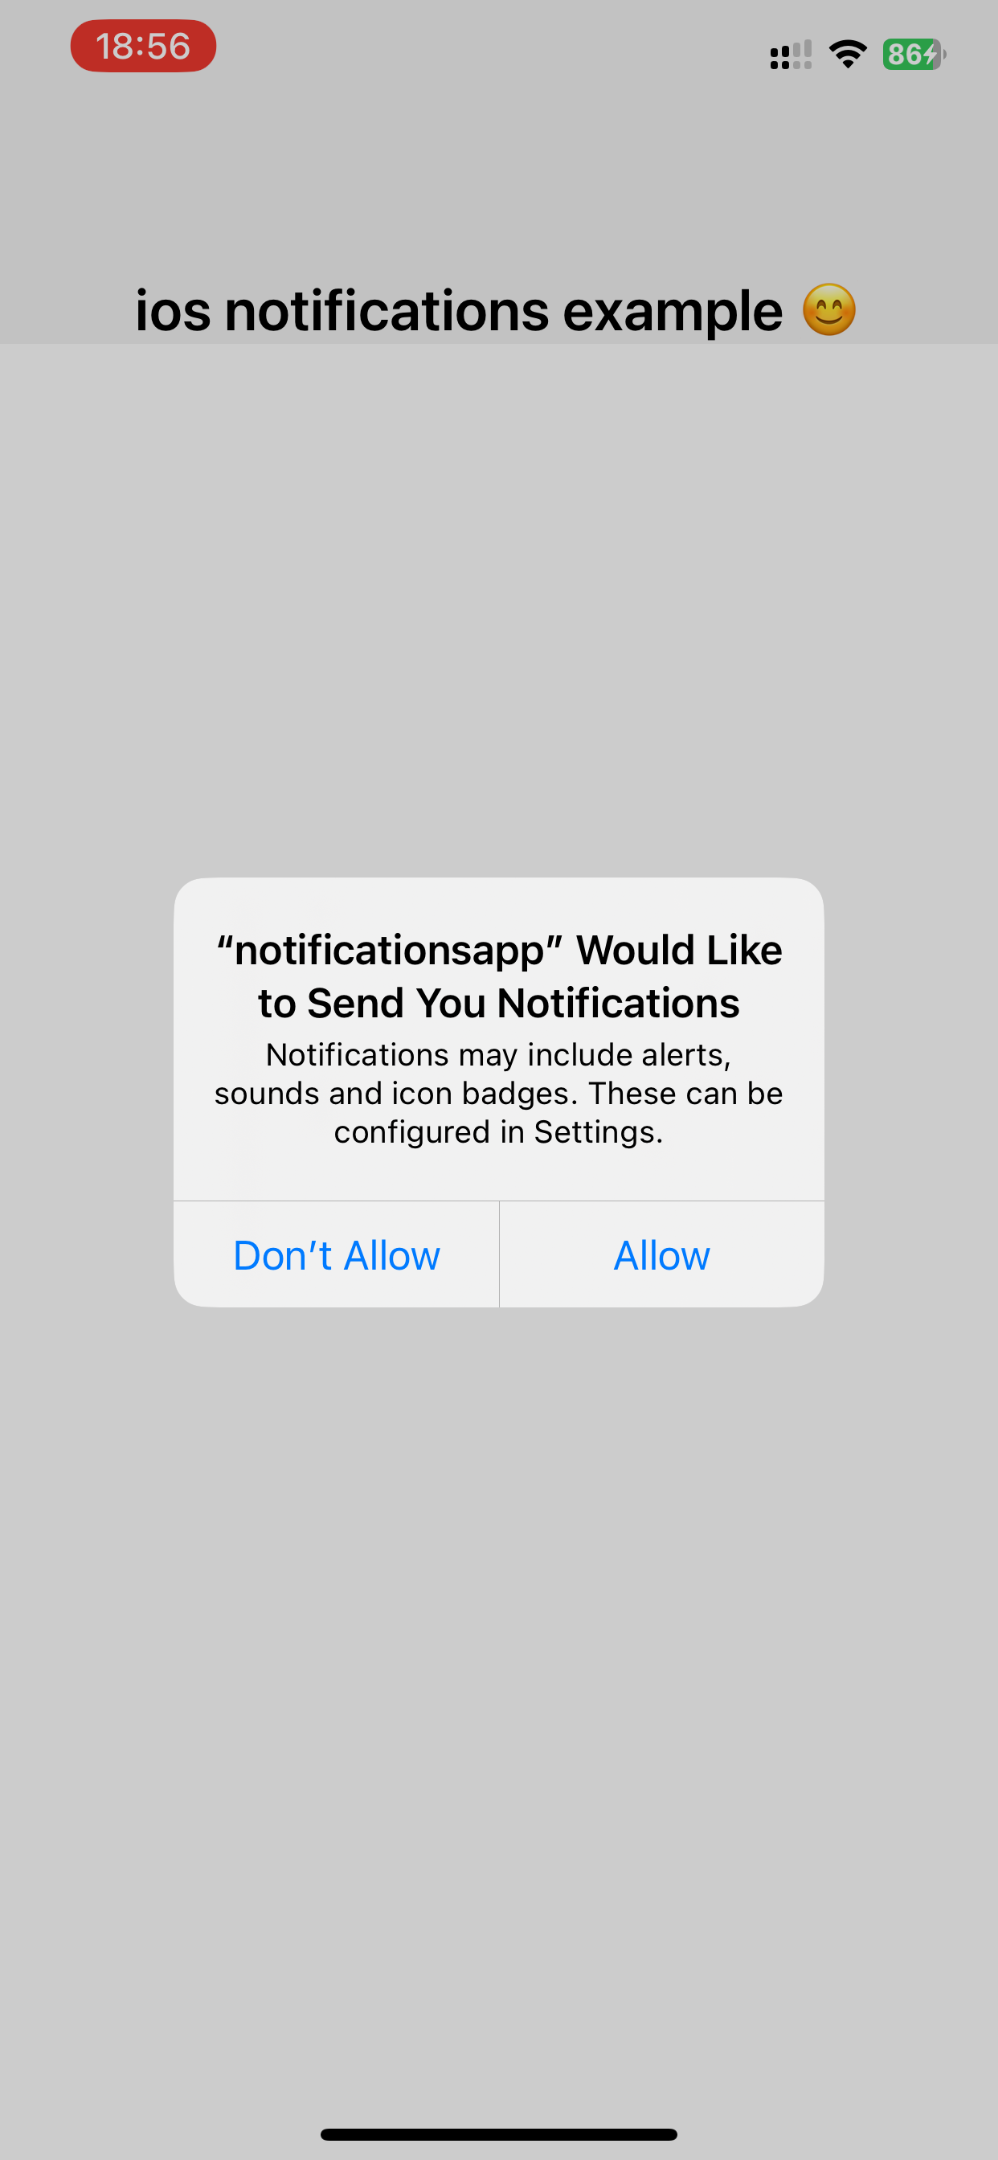
- First, the operating system (iOS in our case) asks the user if they want to receive notifications.
- If the user accepts, the app interfaces with the device operating system.
- Next, the operating system, via HTTP, requests for a "push token," — which is just a string that will be used to send notifications to the device for the mobile app. This token is gotten from the push service and is then sent back to the mobile app
- The app sends this token over the internet (using, for example, HTTP) to a backend web server.
- When the token arrives at the server, based on its configuration and preferences, it may store the token and associate it with the user's data on some database server. Whenever the server wishes to send the user a push notification, it retrieves the push token, composes the message it wants to send to the device, and passes it to the push provider (in our case, AWS pinpoint).
- It then modifies the configuration of the messages, includes any other credentials required to send the message, and then sends it to the push service.
- The push service then delivers it to the device, which is displayed on the user's device. This behavior when the notification gets to the device, depending on whether the mobile app it is intended for is open (app in foreground ) or not(the app is closed or in the background ), is handled accordingly. Later in this guide, we will see how to handle all these situations.
You may wonder why the backend, — our custom API, does not directly send the message request straight to the Push service. Why does it have to go through the push provider first?
Well, technically, the backend could send notification requests directly to the push service. However, by doing so, the backend would miss the benefits provided by the notifications provider. These advantages include analytics, tracking metrics when users receive notifications, conducting campaigns (sending messages to users at specific times), managing user journeys, and more. These features are common requirements for businesses when sending out notifications.
Development Environment
As of the time of writing, this project was tested on an Intel MacBook with macOS 13.3, Xcode 14.7, and an iPhone running IOS 16.5.
Project Setup
We will revisit our push notifications diagram later, but for now, let's create a React native project.
Run the following command in your terminal:
npx react-native@latest init notificationsapp
The above command creates a bare react native mobile app in a folder called notificationsapp. Feel free to give yours any name that suits you.
Next, let us preview this app. Remember, we will only focus on the IOS part of things. We can get push tokens from simulators on MacBooks with an M1 or M2 chip. You can directly run the app on your simulator.
Run the following command in your terminal:
npx react-native run-ios
If you are running on a MacBook with an Intel processor, we will need to preview on an actual device to get push tokens. Open the ios folder in your newly created project and open the .xcworkspace folder in Xcode, then follow this guide to have it up and running on your device.
You should see the app running on your device, as shown below.

Now that we have our App up and running let's update the App.tsx file with the following:
import React, { useEffect } from "react";
import {
  SafeAreaView,
  ScrollView,
  StatusBar,
  StyleSheet,
  Text,
  useColorScheme,
} from "react-native";
import { Colors } from "react-native/Libraries/NewAppScreen";
import { handleBadgeUpdate } from ".";

function App(): JSX.Element {
  const isDarkMode = useColorScheme() === "dark";
  const backgroundStyle = {
    backgroundColor: isDarkMode ? Colors.darker : Colors.lighter,
  };

  return (
    <SafeAreaView style={backgroundStyle}>
      <StatusBar
        barStyle={isDarkMode ? "light-content" : "dark-content"}
        backgroundColor={backgroundStyle.backgroundColor}
      />
      <ScrollView
        contentInsetAdjustmentBehavior="automatic"
        style={backgroundStyle}
      >
        <Text
          style={[
            styles.sectionTitle,
            {
              color: isDarkMode ? "white" : "black",
            },
          ]}
        >
          ios notifications example 😊
        </Text>
      </ScrollView>
    </SafeAreaView>
  );
}

const styles = StyleSheet.create({
  sectionTitle: {
    fontSize: 24,
    fontWeight: "600",
    marginTop: 70,
    textAlign: "center",
  },
});

export default App;
Once our app refreshes, it should look like the one in the image below.

Setting up Amplify
You need to configure the Amplify CLI locally, and connect it to your AWS account. Run the following command in your terminal:
npm install -g @aws-amplify/cli
Next, run the amplify configure command to configure your AWS Amplify environment. Follow the prompts to create a new IAM user that AWS Amplify will use to manage resources for your app. Here’s a link with step-by-step details on how to configure the Amplify CLI.
Now that the CLI is ready lets now head over to the root of our react native project and run this command:
amplify init
This command will ask you to select a name for your application here, and I called mine notificationsapp. The CLI will also detect that we are developing a React native app and presents us with some default options to accept.

Once this is done, it will create amplify and src folders at the root of our project. The amplify folder holds all the configurations for all the services we will use in our project, with all the cloud formation templates required to create these resources on our AWS console.
We are only interested in the contents of the src/aws-exports.js file, which will be used later to configure the Amplify library.
You should also see a newly created amplify project on your AWS account, as shown below.

Adding Amplify Push Notifications
Next, we need to integrate the push notifications feature to our app. There are several things we need to put in place to add this functionality but first, let us take a closer look at our push notification diagram once more.
The diagram doesn't specify how our app will get installed on the user's device, so our app needs to have a provisioning profile. Xcode already created one for us to use during development; that is why we could build and run our app on an iOS device.
When you are ready to push your application to the app store, you need to create one from your developer account, but since we are only testing, we are fine with the default one created during development.
When the operating system requests a push token from the push service, the push service won’t just respond to that request and generate tokens randomly because the OS requests it. It needs to know the app and ensure it supports receiving push notifications. It needs an app or bundle id to do that.
Let's create an app id that supports push notifications and add this capability to our app from Xcode.
Create an App Id That Supports Push Notifications
Head over you your Apple Developer account and select identifiers from the page.

Click the plus icon to create a new App id of type App.

Add a description and name for your app id. Here we called ours com.notiapp.noti12345. Scroll to the bottom of the page and check push notifications in the Capabilities section.

Review all the changes, then click the Register button to register your new app id, as seen below.

You should now see a newly created app id in the identifiers section.

Now head over to your <YOUR-PROJECT-NAME>.xcworkspace file on Xcode, and in the Signings & Capabilities tap, update the bundle identifier with your newly created app id. Next, click on the + Capability button.

Next, add push notifications capability by searching for and selecting it.

Push notification capability means we also want our app to receive notifications when the app is in the background. Let's add background capabilities to our app and turn on remote notifications by searching for and selecting background mode capabilities, then checking remote notifications.

This should be all for now.
Generate an SSL Certificate That Is Bound to Our App Id
In the push notifications diagram, when the push notifications provider sends a request to the push service to send a notification to a device with the push token, the push service will not just randomly respond to message-sending requests from any random server because it could be a malicious attempt to spam or mislead users. We need to generate an SSL certificate that is bound to our app id and is known only to the push provider and the push service so that each time the push provider wants to send a message, it presents this certificate to validate the request and send the message to the targeted device.
Let's create and download a certificate signing request. Head over to your keychain from your device utilities. Create one and download the file as shown below.

Head to the Identifiers section on your Apple Developer account, and select your newly created app. In the capacities tab, scroll to push notifications and click configure, as seen below.

Under Production SSL Certificate, click the Create Certificate button.

Upload your Certificate Signing request file to create the new certificate, then download and save the resulting certificate to your local machine.

Double click on the downloaded file to install it on your keychain.

Open your keychain app and search for the installed certificate. The certificate's name will be the same as your app id's. Click on Export items from the File menu bar and export in .p12 format. Take note of the path pointing of this file, as we will use it later.

This step only applies to users developing with Intel-based MacBooks. Since these users need to test their app on an actual device to be able to get push tokens, they need to register their device on their Apple developer account to receive push notifications and get an error while developing as shown below.

Register Your Device
Head over to the Certificate, Identifiers & Profile section of your Developer Account and click on Devices from the menu. Click on the plus icon to add a device, specify the device platform, a random name of your choice, and the device UDID, then click register as shown below.

Now we can go ahead and add push notifications to our app. At the root of your project, run this command in your terminal:
amplify add notifications
In the prompt, choose to enable the Apple Push Notifications channel and then choose a certificate and specify a relative path to the certificate with a .p12 extension as shown below.

Once this is successful, the amplify folder will be updated accordingly, and our new AWS pinpoint app will be created on our dashboard as shown below
Next, let’s install the necessary libraries we will need to complete our setup. Run the following command in your terminal:
npm install aws-amplify @aws-amplify/rtn-push-notification amazon-cognito-identity-js @react-native-community/netinfo @react-native-async-storage/async-storage react-native-get-random-values react-native-url-polyfill{% raw %}`
```
Let's update our `index.js` file to use the `react-native-get-random-values` and `react-native-url-polyfill` modules.
```
import 'react-native-get-random-values';
import 'react-native-url-polyfill/auto';
```
Next, let's link all the installed modules to our ios directory. Run the following command at the root of your project:
```
npx pod install
```
If you get an error like this:

Remember, Amplify push notifications is geared to only work on iOS apps with a deployment target of at least iOS 13.0. To resolve this issue, open the `ios` folder in your app and update your podfile as shown below:
```
require_relative '../node_modules/react-native/scripts/react_native_pods'
require_relative '../node_modules/@react-native-community/cli-platform-ios/native_modules'
platform :ios, "13.0"
prepare_react_native_project!
```
Then in your `ios` folder clear existing pods by running the following command:
```
pod deintegrate
```
Finally, run this:
```
pod install
```
This should fix the issue.
Now open the `<YOUR PROJECT NAME>.xcworkspace` file in XCode and make the following updates.
Update the `Appdeligate.m` file to match the following:
```
#import "AppDelegate.h"
#import <React/RCTBundleURLProvider.h>
#import "AmplifyPushNotification.h"
@implementation AppDelegate
- (BOOL)application:(UIApplication *)application didFinishLaunchingWithOptions:(NSDictionary *)launchOptions
{
self.moduleName = @"notificationsapp";
// You can add your custom initial props in the dictionary below.
// They will be passed down to the ViewController used by React Native.
self.initialProps = @{};
return [super application:application didFinishLaunchingWithOptions:launchOptions];
}
- (NSURL *)sourceURLForBridge:(RCTBridge *)bridge
{
#if DEBUG
return [[RCTBundleURLProvider sharedSettings] jsBundleURLForBundleRoot:@"index"];
#else
return [[NSBundle mainBundle] URLForResource:@"main" withExtension:@"jsbundle"];
#endif
}
/// This method controls whether the `concurrentRoot`feature of React18 is turned on or off.
///
/// @see: https://reactjs.org/blog/2022/03/29/react-v18.html
/// @note: This requires to be rendering on Fabric (i.e. on the New Architecture).
/// @return: `true` if the `concurrentRoot` feature is enabled. Otherwise, it returns `false`.
- (BOOL)concurrentRootEnabled
{
return true;
}
- (void)application:(UIApplication *)application didRegisterForRemoteNotificationsWithDeviceToken:(NSData *)deviceToken {
[AmplifyPushNotification didRegisterForRemoteNotificationsWithDeviceToken:deviceToken];
}
- (void)application:(UIApplication *)application didReceiveRemoteNotification:(NSDictionary *)userInfo fetchCompletionHandler:(void (^)(UIBackgroundFetchResult result))completionHandler {
[AmplifyPushNotification didReceiveRemoteNotification:userInfo withCompletionHandler:completionHandler];
}
@end
```
This file is the root file of any iOS project. It holds the code and configurations our app uses during startup and the interactions between our app and the operating system, irrespective of whether our application is running.
We updated it with some imports from the Amplify notification model. We added two methods to handle registration for push tokens and handling incoming notifications.
## Building the Frontend
So far, we focused more on the configuration part of things. We already know how push notifications work, so we will make changes to our `index.js` and `App.tsx` files and then map these changes to the steps in our push notifications diagram.
Update your `index.js` file to match the following:
```
import 'react-native-get-random-values';
import 'react-native-url-polyfill/auto';
import {Alert, AppRegistry} from 'react-native';
import App from './App';
import {name as appName} from './app.json';
import {Amplify, Notifications} from 'aws-amplify';
import awsconfig from './src/aws-exports';
Amplify.configure(awsconfig);
Notifications.Push.enable();
AppRegistry.registerComponent(appName, () => App);
```
Next, update your `App.tsx` file to match the following:
```
import { Notifications } from "aws-amplify";
import React, { useEffect } from "react";
import {
Alert,
SafeAreaView,
ScrollView,
StatusBar,
StyleSheet,
Text,
useColorScheme,
} from "react-native";
import { handleBadgeUpdate } from ".";
function App(): JSX.Element {
const isDarkMode = useColorScheme() === "dark";
const backgroundStyle = {
backgroundColor: isDarkMode ? "white" : "black",
};
async function handlePermissions() {
const status = await Notifications.Push.getPermissionStatus();
if (status === "SHOULD_REQUEST") {
await Notifications.Push.requestPermissions({
sound: true,
badge: true,
});
}
if (status === "SHOULD_EXPLAIN_THEN_REQUEST") {
await Notifications.Push.requestPermissions({
sound: true,
badge: true,
});
}
}
const tokenReceivedHandler = (token: string) => {
console.log({ token });
};
useEffect(() => {
handlePermissions();
const listener = Notifications.Push.onTokenReceived(tokenReceivedHandler);
return () => listener && listener.remove();
}, []);
return (
<SafeAreaView style={backgroundStyle}>
{
{
/* rest UI*/
}
}
</SafeAreaView>
);
}
const styles = StyleSheet.create({
// styles
});
export default App;
```
The `index.js` file starts by using the amplify configuration in the `src/aws-exports.js` file to configure the amplify library. Next, we enable push notifications by calling the `enable()` method next in our `App.tsx` file. When this component mounts, we run an effect that requests permission from the user to receive push notifications via the `handlePermission()` method, where it requests the user's permission to receive notifications based on what the existing permission status allows.
If the user accepts, we also register a listener when our app receives a push notification after the operating system resolves it. We do this by calling the `Notifications.Push.onTokenReceived()` method, which gets fed a callback called `tokenReceivedHandler`, which receives the push token as a parameter and prints it to the console as shown below.

You could configure an API endpoint to send the token to your backend somewhere, but we are fine with just printing it to our console for now.
Now that we have the push token, the next thing is to use this token to send users notifications. Let's copy the push token and head over to our AWS pinpoint dashboard.
## Sending Test Push Notifications from AWS Pinpoint Dashboard
On your AWS pinpoint dashboard, select your newly created pinpoint project.
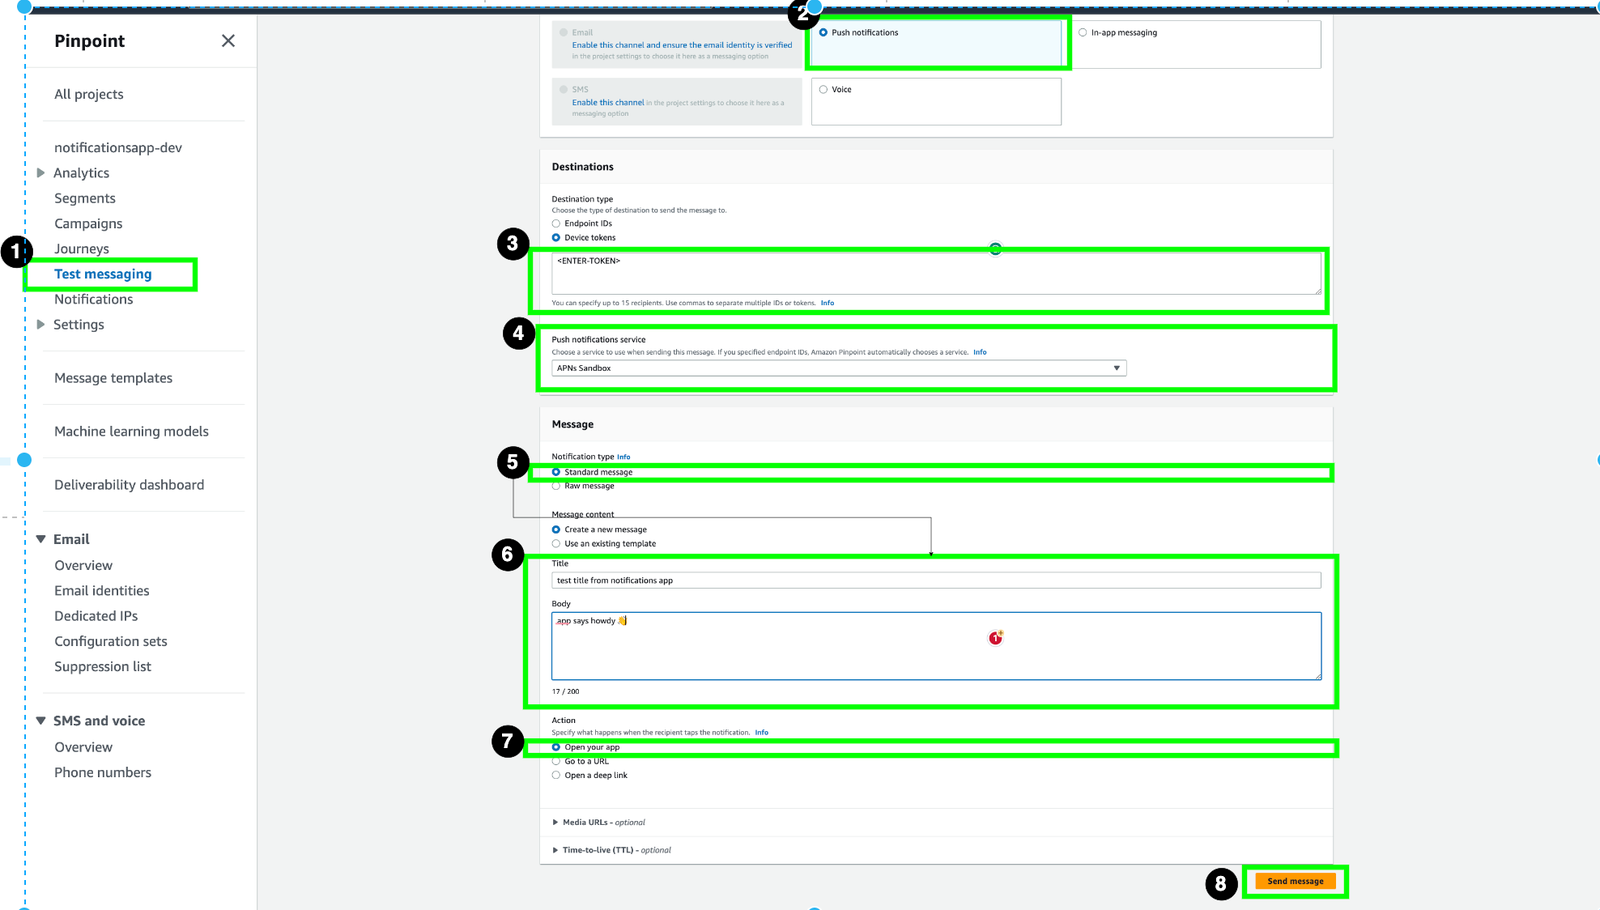
Let's now send a simple push notification to our device from our pinpoint dashboard. We will do so via the following steps, ensure that the mobile app is closed or in the background before you go through this step so that the notification will pop up and appear in the notification drawer.
1. Select test messaging from the sidebar.
2. In the form, select the push notification channel.
3. Input the target device token; you can specify multiple tokens separated by a comma.
4. Select the push notification service. Since we are developing, we selected APN sandbox, which is the service used to send notifications during testing.
5. Usually, you can send standard or raw notifications when sending push notifications. We will explore raw notifications when we write code using the AWS SDK later.
6. Specify the title and body of the message.
7. Select an action when the user clicks on the notification. We just want to open the users' app.
8. Click send to send the message.
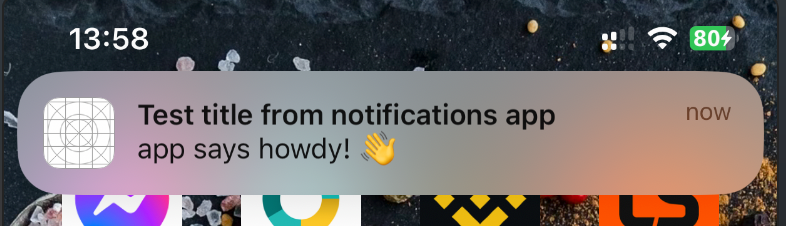
You should now see the message displayed on your device or emulator, as shown below, and clicking on the message automatically opens your App.
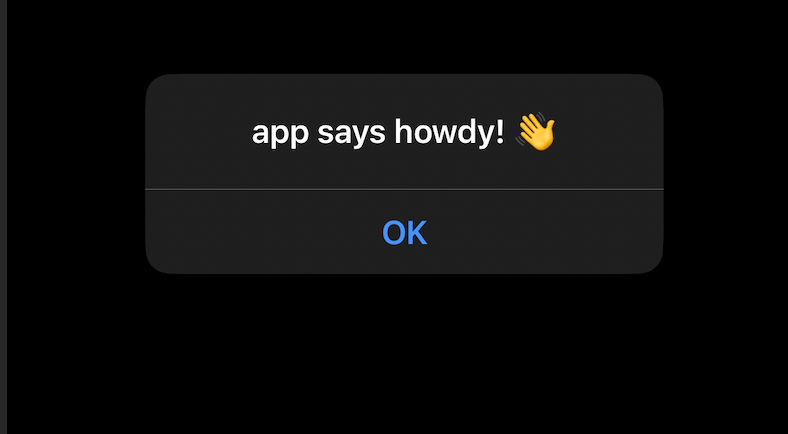
While this works, remember that the OS only displays a notification like this when the App is in background mode or closed. So what happens if the App is active or in the foreground? Well, we can also add a listener to handle this situation. Update your `App.tsx` file to match the following:
```
import {Alert, SafeAreaView,
ScrollView,
StatusBar,
StyleSheet,
Text,
useColorScheme,} from 'react-native'
function App(): JSX.Element {
//...
useEffect(() => {
handlePermissions();
const listener = Notifications.Push.onTokenReceived(myTokenReceivedHandler);
Notifications.Push.onNotificationReceivedInForeground(async message => {
if (message.body) {
Alert.alert(message.body);
}
});
return () => listener && listener.remove();
}, []);
return
( <SafeAreaView style={backgroundStyle}>
//...
</SafeAreaView>)
}
```
Now, when we get a notification while the App is in the foreground, we get an alert on our screen with the body of the message as shown below.
You can also use this function to inform your notification provider that a user has received a notification to record metrics. Amplify push also provides a `Notifications.Push.onNotificationReceivedInBackground` method you can register in your `index.js` file, not **** in an app component. Since it is assumed that the app is not in the foreground when running, you can also use this to log metrics or do other work.
## Sending Push Notifications from Code
Typically, in real-world apps, you will want to send push notifications from your code, not from some custom UI. Also, unlike the example above, in most cases, you want to attach some `json` data to your notifications and customize them to meet your needs, add notification badges, etc.
Let's write a mini Node.js script to do that.
```
mkdir sample
cd sample
npm init --y
touch push.js
npm install aws-sdk
```
Update the `push.js` file to match the following:
```
"use strict";
const AWS = require("aws-sdk");
const region = "us-east-1";
var applicationId = "e5e878550b874d4b8148511c16873af4";
function CreateMessageRequest() {
var recipientPushToken = "b6a6cafb435111685b948fad5891b57560868104a47165c4fe21e0119387dfe4"
var messageRequest = {
Addresses: {
[recipientPushToken]: {
ChannelType: "APNS_SANDBOX",
},
},
MessageConfiguration: {
APNSMessage: {
Action:"OPEN_APP",
RawContent: JSON.stringify({
name: "benzo",
some_property:"yupeee!"
aps: {
alert: {
title: "test title from notifications app",
body: "app says howdy! 👋",
},
sound: "default",
badge: 2,
},
}),
},
},
};
return messageRequest;
}
function SendMessage() {
var messageRequest = CreateMessageRequest();
AWS.config.update({ region: region });
var pinpoint = new AWS.Pinpoint();
var params = {
ApplicationId: applicationId,
MessageRequest: messageRequest,
};
pinpoint.sendMessages(params, function (err, data) {
if (err) console.log(err);
else console.dir(data);
});
}
SendMessage();
```
This snippet just makes a request to the `push` service to send a notification to some user's device. It calls the `sendMessage` custom function, which creates a request by invoking the `createMessageRequest()` function, which returns an object with two properties.
The first property, `Addresses` holds the list of recipients we want to send the message to, and each key in this object is the recipient's push token, and the value is an object for the push notification service.
The second property, `MessageConfiguration` holds information about the message to be sent. We specified an action to open the app when the notification is clicked. Next is the `rawMessage` property. Remember earlier, when we sent a notification from our pinpoint dashboard, we said we could send standard or raw notifications. Typically, in most cases, you will send raw notifications since they allow you to add any JSON data, and that's why we used the `rawMessage` property.
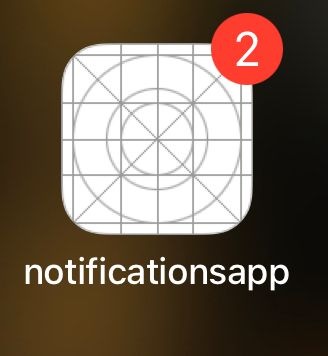
First, we specified some hardcoded random properties we wanted to be part of the message. We trivially chose `name` and `some_property`. Finally, we specify a mandatory `aps` property. We also instruct the system to play the default notification sound when the message arrives and a hardcoded app badge of 2 so that the operating system sets a badge like the one shown below.
The maximum size of a push notification’s payload is 4KB, so try to keep things minimal.
Once this object is created and returned from the `createMessageRequest` function, we update the AWS SDK with our preferred origin, after which we create an AWS pinpoint instance and invoke its `sendmessages` method, which gets fed an object with our message request and our AWS pinpoint app id. The response is logged to the console if the call succeeds or fails.
Open your terminal and run the following:
```
node push.js
```
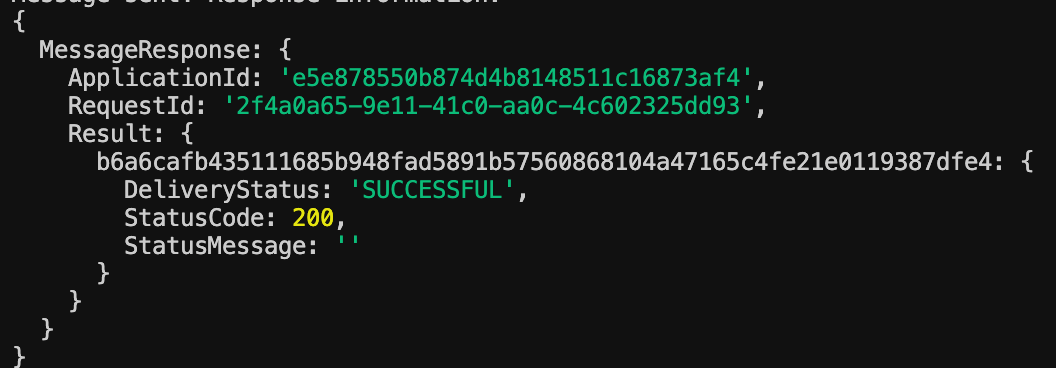
If the message was sent successfully, a response is printed to the console, like the one below.
## Clean Up
To ensure that you don’t have any unused resources in you AWS account, run the following command to delete all the resources that were created in this project if you don’t intend to keep them.
```
amplify delete
```
## Conclusion
Push notifications continue to remain a popular channel to engage users on mobile and web applications. This guide explains how push notifications work and explores an easy way to integrate this feature in an IOS app.

Top comments (1)
Hi, thanks for the article! Did you create an AWS Lambda from the push.js Node function, and call that when an user wants to send a notification to another user? Thanks!