
UTM makes it easy to set up and manage macOS and Windows virtual machines. This can be especially useful for developers such as Tauri contributors who need to test their applications across multiple platforms, or for those looking to experiment with different operating systems without affecting their primary system.
In this tutorial, we set up macOS and Windows virtual machines on UTM, a macOS application that provides a GUI wrapper for QEMU, a powerful open-source emulator and virtualizer. UTM allows you to easily manage and run virtual machines without memorizing complex commands. It also has special handling for macOS, making it simpler to install compared to other virtual machine software.
Before you get started, download and install UTM.
Setting up a macOS Virtual Machine
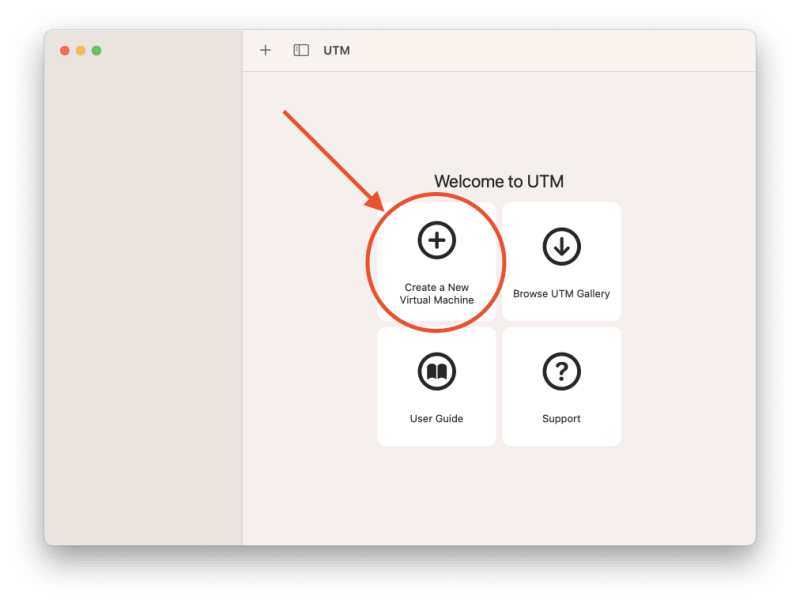
To create a macOS virtual machine:
- Click on “Create Virtual Machine”
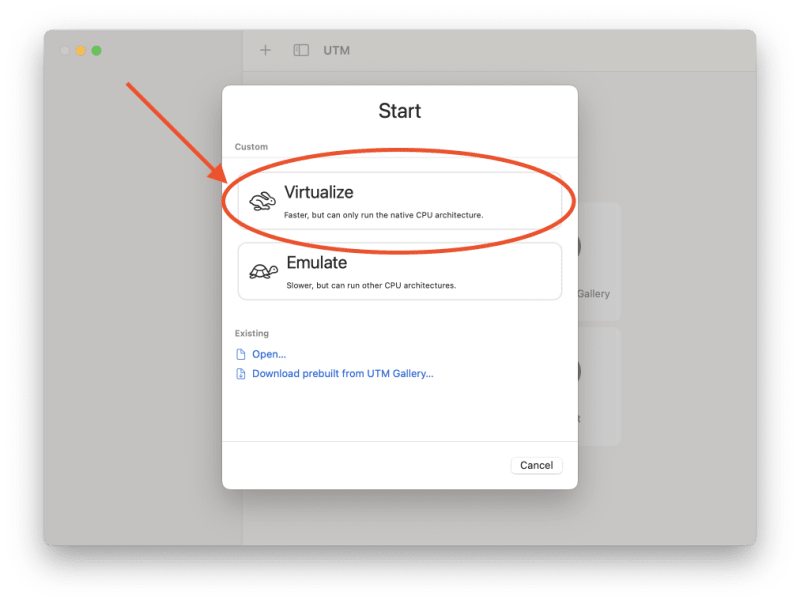
- Choose “Virtualize”
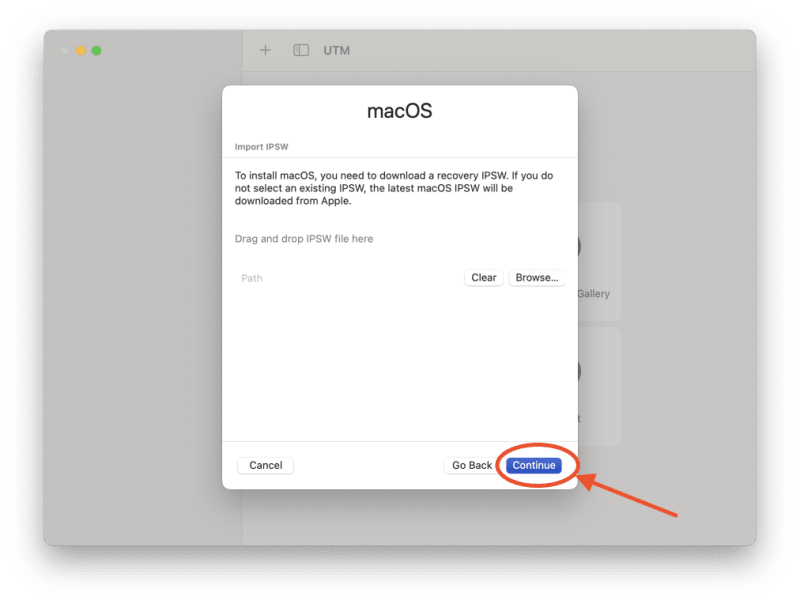
- Select “macOS 12+”

- Select an IPSW (iPhone Software, although this name is used for all Apple operating systems) or let UTM download it automatically
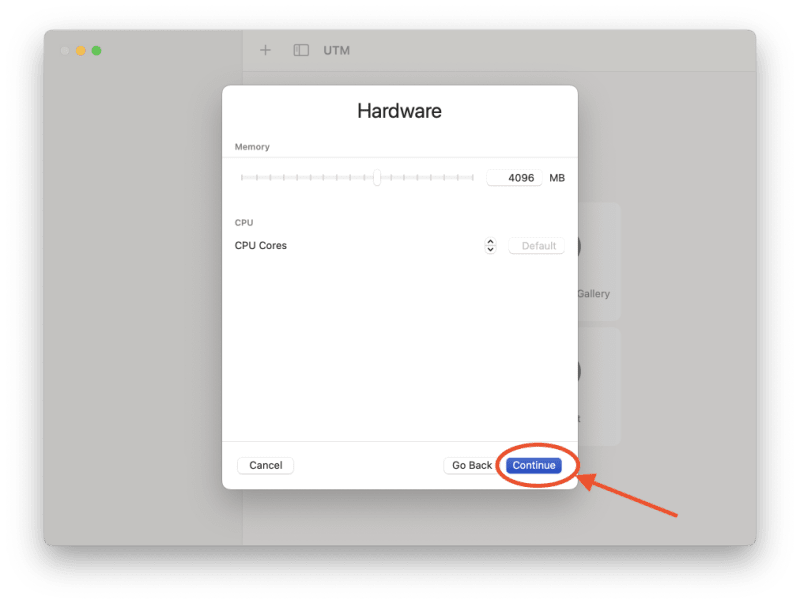
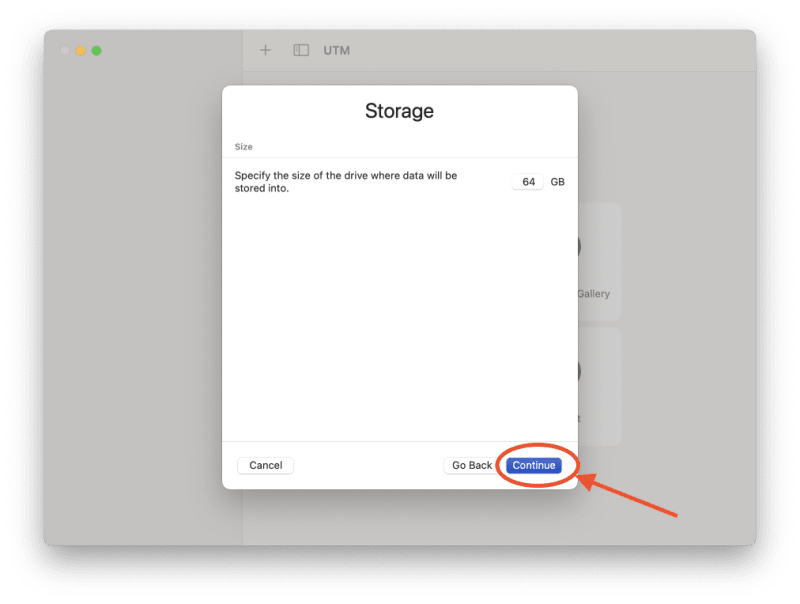
- Configure system settings like CPU cores and storage
- Save the configuration and UTM will automatically download the macOS installer and install the OS on the virtual hard drive
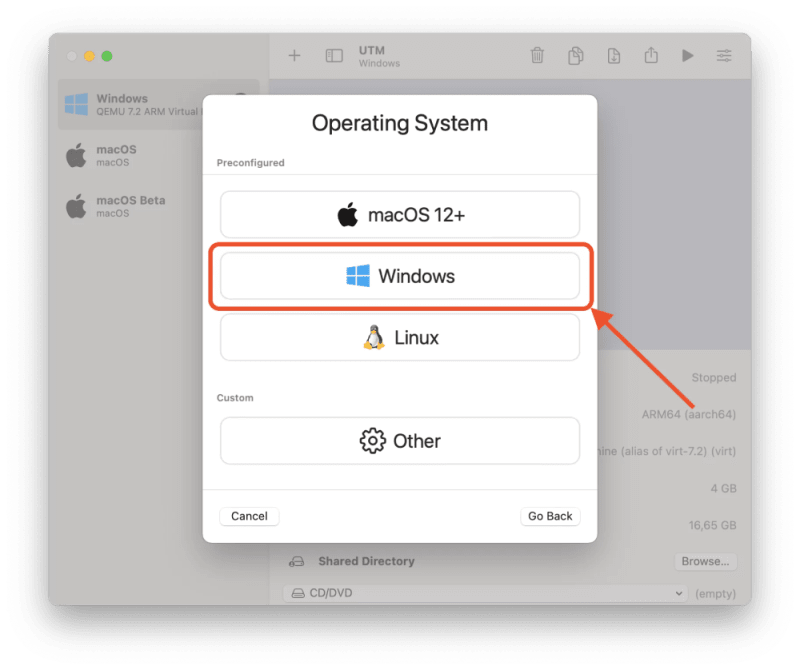
Setting up Windows Virtual Machine
For a Windows virtual machine:
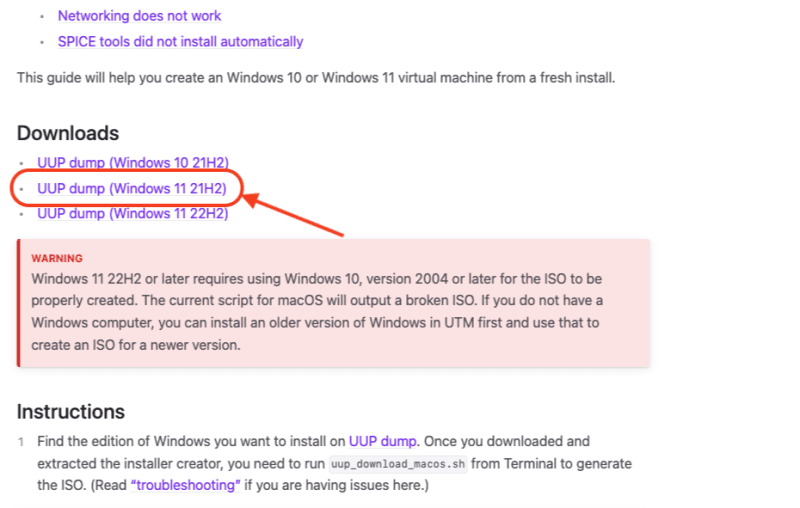
- Make sure you have the necessary prerequisites installed (such as Homebrew). See the instructions provided in the Windows install guide on the UTM website for detailed information. Here’s the guide for Windows 11 from UTM’s website
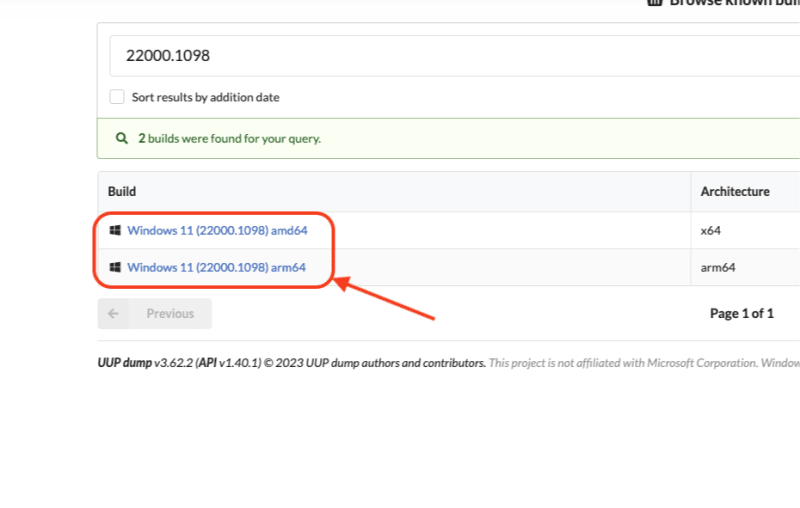
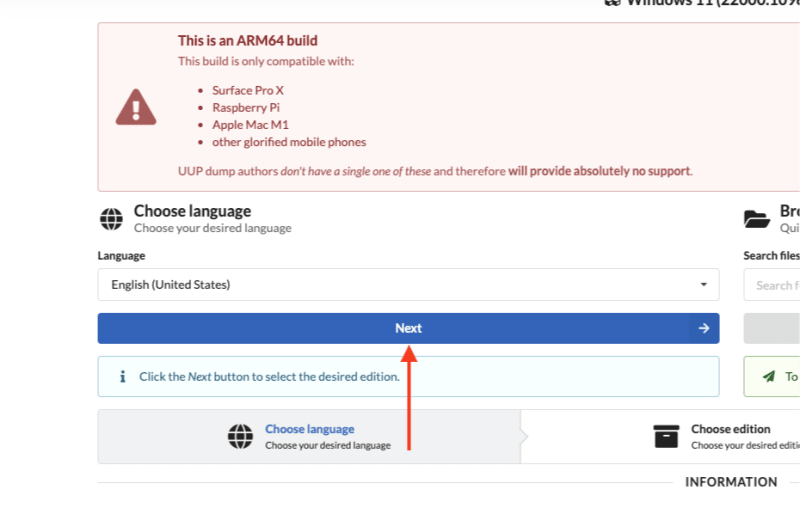
- Build the Windows ISO file

- Create a new virtual machine in UTM and choose “Windows”
- Uncheck the “Directly boot ISO/CD image” option and ensure “Install drivers and SPICE tools” is checked
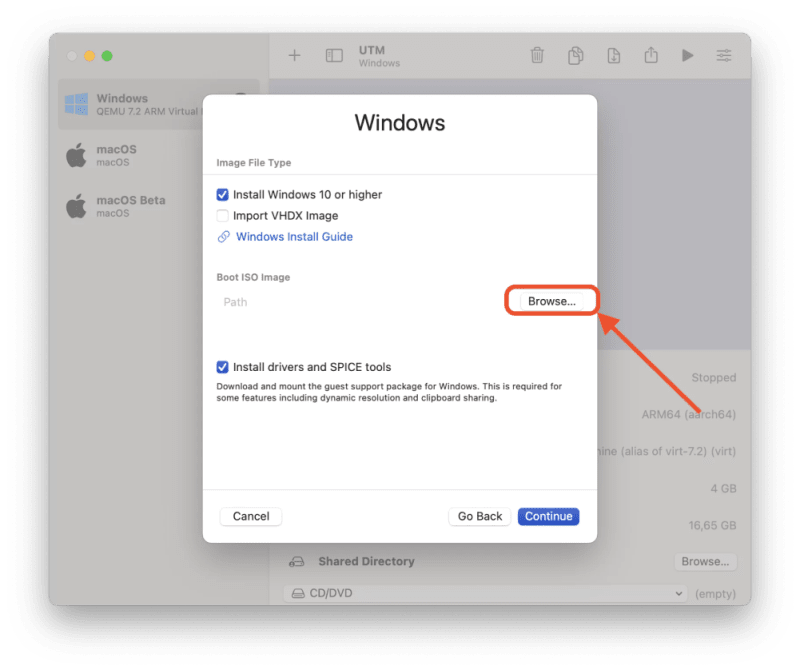
- Upload the ISO file you created earlier
- Configure other settings like memory, CPU cores, and storage as needed

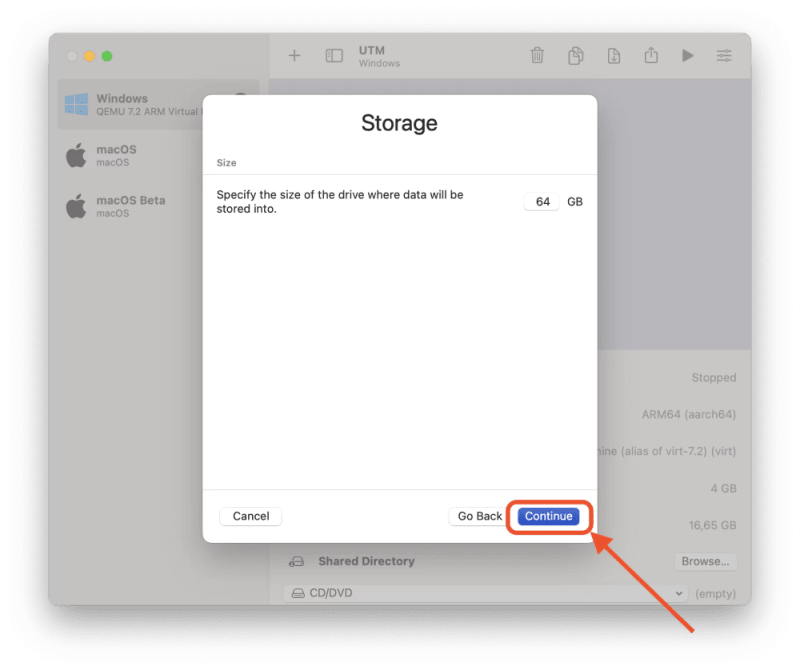
- After saving the configuration, UTM will boot the Windows installer, and you can follow the usual Windows installation process


Managing Virtual Machines
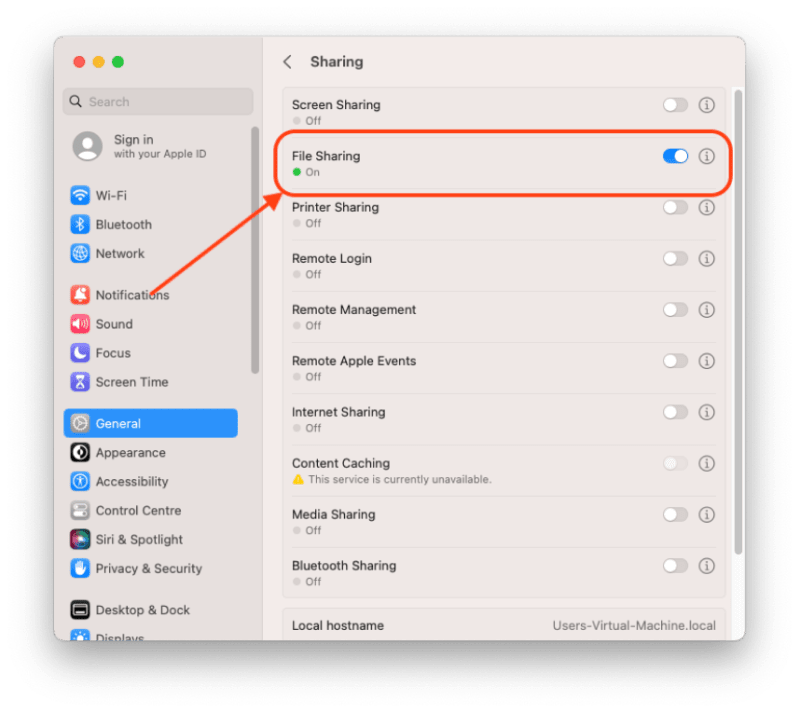
Both macOS and Windows virtual machines can be customized and managed through UTM’s user interface. You can adjust settings, add devices, and even set up shared folders to share files between the host and guest operating systems. Shared folders serve as a great method for passing files between the host OS and the VM guest. In order to make this possible:
- Enable the shared folder in the macOS settings under “General” > “Sharing” > “File Sharing”

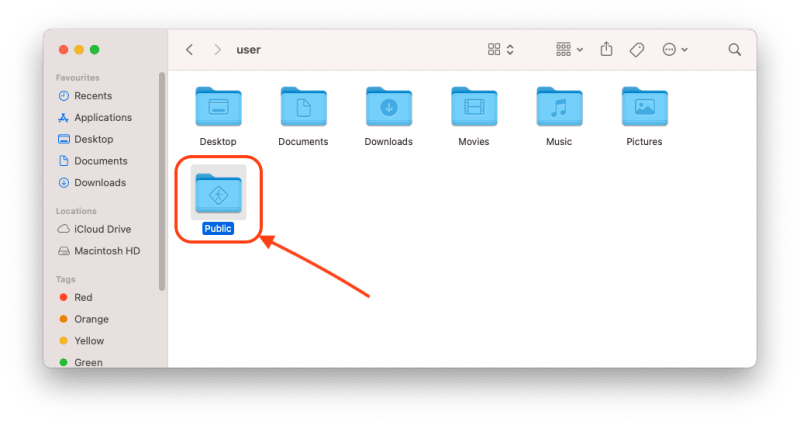
- Locate the shared folder in “/users//Public” (Note: you can drag the folder into the sidebar for easier access)
- The VM guest will now show up in your host machines Finder under “Network”

For more detailed guidance on setting up and managing virtual machines with UTM, you can watch the livestream replay on YouTube.
Author: Jonas Kruckenberg, DevRel

Top comments (0)