Welcome back to our series on working with GraphQL, Node.js, and Apollo Server. In our previous posts, we set up our serverless environment and configured our Apollo Server with TypeGraphQL. We even created our first basic resolver. It's been quite a journey, but we're only just getting started.
Today, we're going to delve deeper into the exciting world of data resolvers. As we know, resolvers play a crucial role in a GraphQL server, acting as the bridge between our schema and the data we need to fetch from various sources. They're what make GraphQL such a dynamic and efficient tool for developers.
In this post, we will enhance our understanding of data resolvers. We'll start by exploring how to query data from a database using resolvers. We'll then venture into the integration of external APIs into our GraphQL server — a powerful way to leverage additional data sources and functionality. From there, we'll turn our attention to mutations, allowing us to not only fetch data but also modify it. To wrap it all up, we'll discuss some best practices for working with resolvers.
By the end of this blog post, you'll have a robust understanding of data resolvers and how to utilize them effectively within your Node.js and Apollo Server setup. Let's jump right in!
Querying Data from a Database
Up until now, we've been focusing on building the structure of our GraphQL server, without working with any persisted data. All our operations so far have dealt with data held temporarily in memory. But to develop a fully functional, real-world application, we need a persistent storage system - a database.
That's where we're heading in this section. We'll take a crucial step forward in our project and set up a database. To achieve this, we'll use Amazon DynamoDB.
Amazon DynamoDB is a fast, fully managed NoSQL database service from AWS, offering seamless scalability and reliable performance. Ideal for applications requiring single-digit millisecond latency, it provides a key-value and document data model that enables flexible, dynamic schemas. Its compatibility with GraphQL makes it a robust choice for modern web applications.
Not only is it a powerful, flexible, and high-performance NoSQL database service, but it also happens to be part of the AWS Free Tier. This means we can experiment and build our knowledge without incurring extra costs, making it an ideal choice for our exploration of GraphQL. You can check out all the details of the AWS Free Tier, including DynamoDB, at this link. So, let's get started with setting up our DynamoDB!
Setting Up The Database
We need to put this snippet into our serverless.stack.ts file. This creates a database with the table name data_table and afterwards we grant read and write access to our lambda.
const dataTable = new Table(this, 'data-table', {
   tableName: `data_table`,
   timeToLiveAttribute: 'ttl',
   billingMode: BillingMode.PAY_PER_REQUEST,
   removalPolicy: RemovalPolicy.DESTROY,
   partitionKey: { name: 'id', type: AttributeType.STRING },
});
dataTable.grantReadWriteData(lambda);
Updating the Resolver and Accessing the Data
Now that we have created the database we need to create a repository for adding, accessing, updating and deleting data in the database. We will use dynamo-easy for this, a wrapper around the AWS dynamodb client, written by shiftcode which does the data mapping to typescript object by using decorators. We will use a fork of it because we want to use the aws sdk v3 version with some additional fixes added. Let's install it via npm i @cubesoft/dynamo-easy typedi @types/uuid. Now that we have it installed, let's create the repository and our data model. Let's pretend we want to create a database with plants. There are several different classes we need to create.
The interface/plant.interface.ts, which will be used as an interface for our plant model to make sure all inheriting classes have all required fields.
export interface PlantInterface {
  id: string;

  name: string;
  description?: string;

  createdAt: number;
  updatedAt: number;
}
The model/plant.model.ts file, which represents our plant object for storing it in dynamodb:
import { v4 } from 'uuid';

import { Model, PartitionKey } from '@cubesoft/dynamo-easy';
import { PlantInterface } from '../interface/plant.interface';

@Model({ tableName: 'data_table' })
export class PlantModel implements PlantInterface {
  @PartitionKey()
  id: string;

  name: string;
  description?: string;

  createdAt: number;
  updatedAt: number;

  constructor() {
    this.id = v4();
    this.createdAt = Date.now();
    this.updatedAt = this.createdAt;
  }
}
The repository/plant.repository.ts file, for storing and retrieving the data from dynamodb:
import { Service } from 'typedi';

import { DynamoDB } from '@aws-sdk/client-dynamodb';
import { DynamoStore } from '@cubesoft/dynamo-easy';

import { PlantModel } from '../model/plant.model';

@Service()
export class PlantRepository {
  private dynamoDb = new DynamoDB({ region: 'eu-central-1' });

  async createOrUpdatePlant(plant: PlantModel): Promise<void> {
    const store = new DynamoStore(PlantModel, this.dynamoDb);
    await store.put(plant).execFullResponse();
  }

  async deletePlant(id: string): Promise<void> {
    const store = new DynamoStore(PlantModel, this.dynamoDb);
    return store.delete({ PartitionKey: id }).exec();
  }

  async getPlant(id: string): Promise<PlantModel> {
    const store = new DynamoStore(PlantModel, this.dynamoDb);
    return store.get(id).exec();
  }
}
The model/plant.type.ts file which represents our plant model annotated with the necessary decorators so that they will appear in our GraphQL Schema. It is good to provide an ID field type for every model, because this helps Apollo when identifying unique objects for it's caching mechanism.
import { PlantInterface } from '../interface/plant.interface';
import { Field, Float, ID, ObjectType } from 'type-graphql';

@ObjectType('PlantType', { description: 'Object representing a plant' })
export class PlantType implements PlantInterface {
  @Field(() => ID)
  id: string;

  @Field(() => String)
  name: string;

  @Field(() => String, { nullable: true })
  description?: string;

  @Field(() => Float)
  createdAt: number;

  @Field(() => Float)
  updatedAt: number;
}
Last but not least we need to update our resolver so that it will actually use the new models and is able to read from the database. I renamed the resolver and put it in in a file resolver/plant.resolver.ts. Instead of returning a string now, our new query getPlant will return a list of plants from dynamodb.
If you like me did also update the name of the resolver from last time, make sure to update the name also in our handler/serverless-api.ts file:
const schema = buildSchemaSync({
  resolvers: [PlantLibraryResolver],
  container: Container,
  validate: { forbidUnknownValues: false },
  dateScalarMode: 'timestamp',
});
Now we can build and deploy our api again using nx build serverless-api && nx deploy serverless-cdk --profile serverless-hero.
When we open our Apollo Playground this time we will see the updated query:
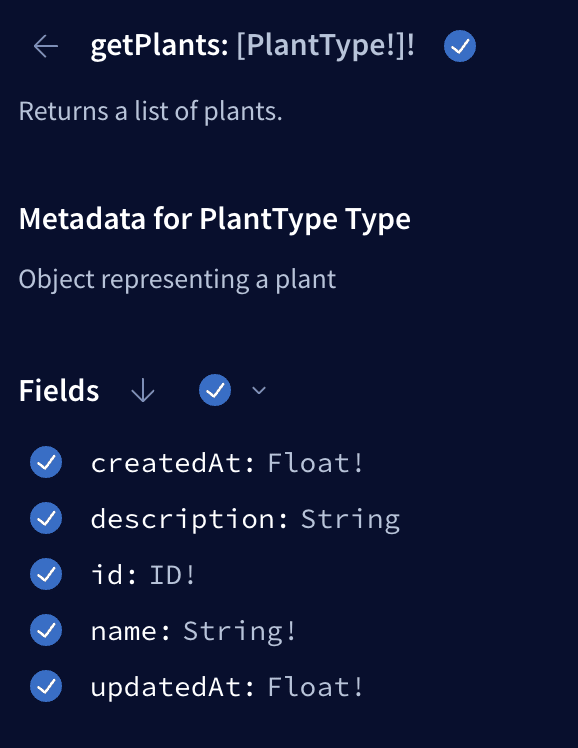
And if you execute the query you will get an empty array, because we did not yet add any plants to our database, which can be returned. For this we will have a look at mutations in the next section.
Handling Mutations
In the realm of GraphQL, while queries allow us to fetch and read data, mutations empower us to modify data. Essentially, mutations are operations that can create, update, or delete data in our backend - be it a database or another data source.
Understanding and implementing mutations is crucial for any application that requires dynamic user interactions. From adding a product to a shopping cart, updating user details, to deleting an old post, all these operations rely on mutations. It's through mutations we shape and reshape our data, creating a more interactive and responsive user experience.
So let's create a mutation for adding a plant to our database:
import 'reflect-metadata';
import { Arg, Mutation, Query, Resolver } from 'type-graphql';
import { PlantType } from '../model/plant.type';
import { PlantRepository } from '../repository/plant.repository';
import { Service } from 'typedi';
import { PlantModel } from '../model/plant.model';

@Service()
@Resolver()
export class PlantLibraryResolver {
  constructor(private readonly plantRepository: PlantRepository) {}
  @Query(() => [PlantType], {
    description: 'Returns a list of plants.',
  })
  async getPlants(): Promise<PlantType[]> {

    return this.plantRepository.listPlants();
  }

  @Mutation(() => PlantType, {
    description: 'Add a new plant to the library.',
  })
  async addPlant(
    @Arg('name', () => String) name: string,
    @Arg('description', () => String, {nullable:true}) description?: string
  ): Promise<PlantType> {
    const plant = new PlantModel();
    plant.name = name;
    plant.description = description;

    return this.plantRepository.createOrUpdatePlant(plant);
  }
}
We add a new function addPlant to the resolver and annotate it with the @Mutation decorator. The function will take two inputs a variable name of type string and an optional variable description of type string, in TypeGrapQL we need to add the {nullable:true} in the decorator to tell TypeGrapQL that the variable is optional.
After deploying your last change with nx build serverless-api && nx deploy serverless-cdk --profile serverless-hero you will now be able to use the mutation and add your first plant in the Apollo Playground:

Now you can run your Query again and you will get an array with your new plant item. You did it, you have written your first mutation in a lambda function.
Conclusion
In this post, we delved into the essentials of interacting with a database using Apollo Server and DynamoDB, from setting up the database to querying data. We also introduced mutations, crucial operations for changing data, and explained their various use cases.
We encourage you to apply what you've learned here to your own projects. Experiment with different types of queries, API integrations, and mutations. Dive deeper into error handling mechanisms and resolver optimization techniques. Remember, the best way to learn is by doing, so don't be afraid to get your hands dirty.
Looking forward, get ready for our next deep-dive - into GraphQL subscriptions and the WebSocket gateway. This exciting topic will take our real-time data handling capabilities to the next level, further expanding the possibilities of what we can achieve with GraphQL and Apollo Server. Stay tuned!
Hey there, dear readers! Just a quick heads-up: we're code whisperers, not Shakespearean poets, so we've enlisted the help of a snazzy AI buddy to jazz up our written word a bit. Don't fret, the information is top-notch, but if any phrases seem to twinkle with literary brilliance, credit our bot. Remember, behind every great blog post is a sleep-deprived developer and their trusty AI sidekick.

Top comments (0)