- DB Setup
- Gitea Install
- Gitea Configuration
- Repo Population
- Gitea Runner Setup
- Python Package Deployment
- Conclusion
Gitea is an open source project which provides an interface similar to GitHub that can be self hosted. It includes features such as traditional PR workflows, git+SSH authentication, Action Runners, Gitea Actions for CI/CD, and Gitea Packages for pypi hosting. This article will discuss:
- Setting up DB for Gitea
- Setting up Gitea
- Preparing a Python repository
- Setup Action Runner
- Implementing a CI/CD pipeline to deploy python package to Gitea
DB Setup
Gitea is backed by a database for handling data storage. The three major providers are SQLite, MySQL, and Postgres. While SQLite is probably the simplest solution that doesn't feel hacker enough so I'll show how to do the Postgres setup. This mostly follows these instructions. Also I'll be using Ubuntu Linux for most of the instructions.
$ sudo apt-get install postgresql postgresql-contrib
I'll first edit the config to make some adjustments. Changing the password encryption to something more secure:
$ sudo vim /etc/postgresql/14/main/postgresql.conf
Note the directory may be different depending on your Postgres installation. Then changing the file to uncomment this out:
password_encryption = scram-sha-256
Note that if you plan to use this database remotely, you'll need to change the bind address:
listen_addresses = '192.168.8.5'
To whatever the IP you want to listen on is. If you're using a manged DB service then this step can be ignored and you'll simply need to ask them for the endpoint. An appropriate locale will also need to be set for database setup. Looking at locales in depth is quite out of the scope of this article but for my example I use en_US.UTF-8:
$ sudo locale-gen en_US.UTF-8
Generating locales (this might take a while)...
  en_US.UTF-8... done
Generation complete.
As locales are a mixture of regional differences and languages you can also setup your own. A rather comprehensive list can be found here. For more complex language/regional requirements I recommend looking over how language tags work. Now restart the service to pickup the new change:
$ sudo systemctl restart postgresql.service
Now when doing administrative tasks with Postgres it utilizes a system "postgres" user to allow a more isolated setup security wise. We'll go ahead and use su to change to the postgres user and immediately run the psql command to access the database:
$ sudo su -c "psql" - postgres
psql (14.8 (Ubuntu 14.8-0ubuntu0.22.04.1))
Type "help" for help.

postgres=#
Successful execution gives us an interactive prompt which can be utilized to administer the server through various commands. The only two things we need to do here are create a user and a database for that user:
postgres=# CREATE ROLE gitea WITH LOGIN PASSWORD 'a_more_secure_password_than_this';
CREATE ROLE
postgres=# CREATE DATABASE giteadb WITH OWNER gitea TEMPLATE template0 ENCODING UTF8 LC_COLLATE 'en_US.UTF-8' LC_CTYPE 'en_US.UTF-8';
CREATE DATABASE
postgres=# \q
$
You'll want to replace the fake password string with an actual secure password. Also be sure to replace en_US.UTF-8 with whatever your locale selected ended up being. Now we need to modify /etc/postgresql/14/main/pg_hba.conf to authorize our user:
local   giteadb         gitea                                   scram-sha-256
# DO NOT DISABLE!
# If you change this first entry you will need to make sure that the
# database superuser can access the database using some other method.
# Noninteractive access to all databases is required during automatic
# maintenance (custom daily cronjobs, replication, and similar tasks).
#
# Database administrative login by Unix domain socket
local   all             postgres                                peer
This is different from the traditional username/password authentication in that you can also force things such as password encryption and method of connection (UNIX domain sockets in this case). While this method works for a local setup, something remote like connecting to an RDS Postgres database would require this instead:
host giteadb gitea [cidr info here] scram-sha-256
It's important to note that the location of the line relative to the other hosts is very important. This is due to postgres parsing rules and stopping at the first match. Given that we're connecting to a UNIX socket we need to have it above the admin login otherwise the connection will be rejected due to the wrong user (git instead of postgres).
Gitea Install
Security Notice: This setup is meant for a local deployment. Having the DB, runners, and Gitea and the same instance with Gitea using HTTP traffic is not sound for an actual production deployment. When doing a production deployment ensure that https is used and databases/runners are on separate hardware from gitea.
While there is a snap version available for Ubuntu, I prefer to do a binary install for more control:
$ wget https://dl.gitea.com/gitea/1.19.4/gitea-1.19.4-linux-amd64
Note I'm running off a current stable branch. Check the installation page for instructions on which exact file to download should you use a different OS. Now I'll do a verification of the file:
$ wget https://dl.gitea.com/gitea/1.19.4/gitea-1.19.4-linux-amd64.asc
$ gpg --keyserver keys.openpgp.org --recv 7C9E68152594688862D62AF62D9AE806EC1592E2
gpg: key 2D9AE806EC1592E2: public key "Teabot <teabot@gitea.io>" imported
gpg: Total number processed: 1
gpg:               imported: 1
$ gpg --verify gitea-1.19.4-linux-amd64.asc gitea-1.19.4-linux-amd64
gpg: Signature made Tue Jul  4 14:04:23 2023 CDT
gpg:                using RSA key CC64B1DB67ABBEECAB24B6455FC346329753F4B0
gpg: Good signature from "Teabot <teabot@gitea.io>" [unknown]
gpg: WARNING: This key is not certified with a trusted signature!
gpg:          There is no indication that the signature belongs to the owner.
Primary key fingerprint: 7C9E 6815 2594 6888 62D6  2AF6 2D9A E806 EC15 92E2
     Subkey fingerprint: CC64 B1DB 67AB BEEC AB24  B645 5FC3 4632 9753 F4B0
It's fine to ignore the trusted signature content as we already know the signature does indeed belong to the owner since it comes from the official website docs. Next we'll setup a git user which will allow an isolated user for gitea to run as:
$ sudo adduser \
--system \
--shell /bin/bash \
--gecos 'Git Version Control' \
--group \
--disabled-password \
--home /home/git \
git
[sudo] password for cwprogram:
Adding system user {% raw %}`git' (UID 109) ...
Adding new group `git' (GID 119) ...
Adding new user `git' (UID 109) with group `git' ...
Creating home directory `/home/git' ...
```
Now to create the necessary directory structure for gitea:
```
$ sudo mkdir -p /var/lib/gitea/{custom,data,log}
$ sudo chown -R git:git /var/lib/gitea/
$ sudo chmod -R 750 /var/lib/gitea/
$ sudo mkdir /etc/gitea
$ sudo chown root:git /etc/gitea
$ sudo chmod 770 /etc/gitea
```
Note that these permissions are for the web installer and we'll be changing some of them back to a more secure read only later. Now to copy over and verify the gitea binary:
```
$ sudo cp gitea-1.19.4-linux-amd64 /usr/local/bin/gitea
$ sudo chmod a+x /usr/local/bin/gitea
$ gitea --version
Gitea version 1.19.4 built with GNU Make 4.1, go1.20.5 : bindata, sqlite, sqlite_unlock_notify
```
I'll be using a systemd service to manage gitea itself so I'll download the file to edit:
```
$ wget https://raw.githubusercontent.com/go-gitea/gitea/release/v1.19/contrib/systemd/gitea.service
$ vim gitea.service
```
After modification of the contents and trimming down the file:
```
[Unit]
Description=Gitea (Git with a cup of tea)
After=syslog.target
After=network.target
Wants=postgresql.service
After=postgresql.service
[Service]
# Uncomment the next line if you have repos with lots of files and get a HTTP 500 error because of that
# LimitNOFILE=524288:524288
RestartSec=2s
Type=simple
User=git
Group=git
WorkingDirectory=/var/lib/gitea/
# If using Unix socket: tells systemd to create the /run/gitea folder, which will contain the gitea.sock file
# (manually creating /run/gitea doesn't work, because it would not persist across reboots)
#RuntimeDirectory=gitea
ExecStart=/usr/local/bin/gitea web --config /etc/gitea/app.ini
Restart=always
Environment=USER=git HOME=/home/git GITEA_WORK_DIR=/var/lib/gitea
[Install]
WantedBy=multi-user.target
```
Be sure to look over the file and understand the options. For example, if you decide to use mysql you'll need to uncomment that section instead. Now for the final steps in setting up the service and verifying that it's running:
```
$ sudo cp gitea.service /etc/systemd/system/gitea.service
$ sudo systemctl start gitea.service
$ sudo systemctl status gitea.service
● gitea.service - Gitea (Git with a cup of tea)
Loaded: loaded (/etc/systemd/system/gitea.service; disabled; vendor preset: enabled)
Active: active (running) since Fri 2023-07-14 06:00:51 CDT; 6s ago
Main PID: 5457 (gitea)
Tasks: 21 (limit: 18997)
Memory: 116.6M
CGroup: /system.slice/gitea.service
└─5457 /usr/local/bin/gitea web --config /etc/gitea/app.ini
```
## Gitea Configuration
Before starting we'll need to get information on the IP address that gitea will bind to. To get the IP you need for this purpose:
```
$ sudo apt-get install net-tools
$ ifconfig eth0
```
Where `eth0` is your primary adapter (this will be potentially different for wifi). Then simply look for the `inet` value. Now the server name is how it will end up for things like git checkouts. I tend to label my services with specific hosts since I run a lot of things locally (also makes SSH key verification more manageable). You'll simply need to add to the respective hosts file:
```
[eth0 inet value here] gitea
```
as an example for me:
```
172.18.139.193 gitea
```
I'll refer to this address as the network IP throughout the guide. Host file is either `/etc/hosts` on most *NIX systems or `c:\Windows\system32\drivers\etc\hosts` for Windows systems on whatever systems you plan on using to connect. Then directing your browser to http://gitea:3000 should bring up the Gitea web installer and overall web configuration. The most important thing to fill out is the database credentials:
- Database Type: PostgreSQL
- Host: /var/run/postgresql/
- Username: gitea
- Password: Whatever password you setup for that user
- Database Name: giteadb
- SSL: Disable (it's a local instance so not much of a concern, but a production deployment you definitely would want this enabled)
- Schema: Leave blank
- Server Name: gitea
- Gitea Base URL: http://172.18.139.193:3000
The Base URL is this way as it's needed for python packaging interaction to work properly with Gitea Actions. You can still access through the http://gitea:3000/ address, it's just the system might throw ignorable red banners at you. Note that if you use Jenkins as a CI/CD instead you can get away with http://gitea:3000/ as the Gitea Base URL. I also enable the update checker. Security wise it does connect to gitea.io, so if you're doing this in a production/secure environment you'll probably want to leave this disabled. Next expand the "Administrator Account Settings" and fill in the details for username and password. If you don't do this it will default to the first user sign-in. After filling everything out you should be presented with a screen similar to:
We'll also need to return permission to read-only for the config files now that the setup is done:
```
$ sudo chmod 750 /etc/gitea
$ sudo chmod 640 /etc/gitea/app.ini
```
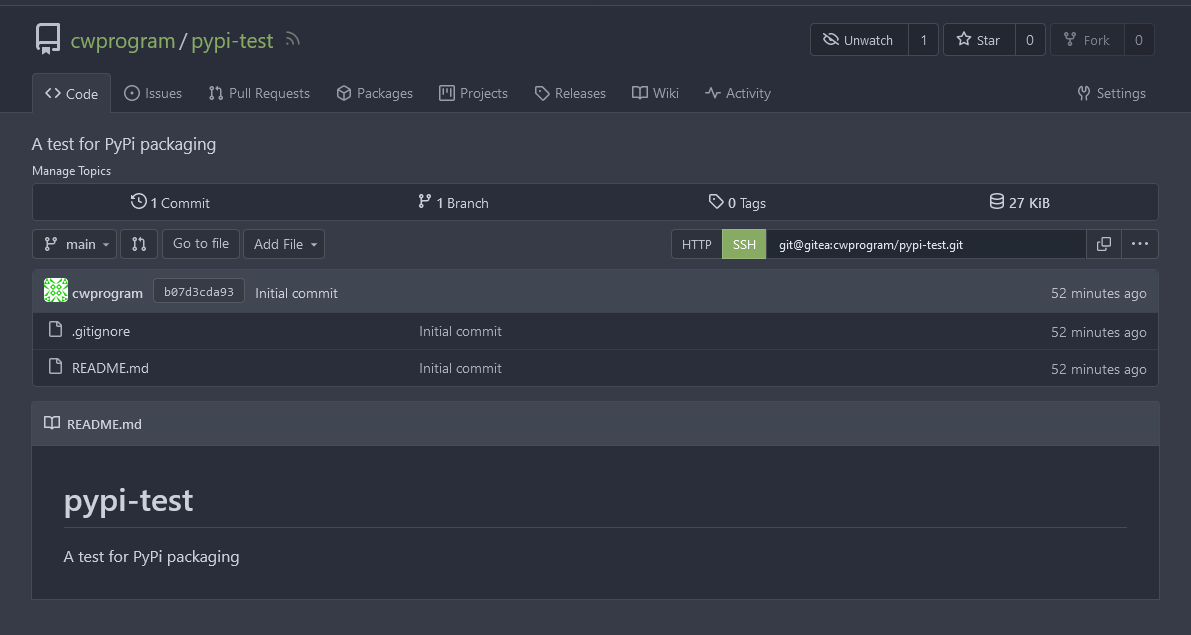
Now click on the + sign next to repositories to create a new one. The owner organization will end up being the administrative user you created:

The repository name I have as `pypi-test` with a suitable description. `Python` is set to the `.gitignore` as we're working with Python. Everything else is left default, which means we can finish with "Create Repository". Once this is done you should see a repository screen similar to:
Next thing to do is add SSH keys similar to how it would work on GitHub so SSH authentication works. Simply navigate to http://gitea:3000/user/settings/keys to begin the setup. If you already have an SSH key on GitHub or any other service, you can skip the key generation step. Best practice wise having separate keys for services is ideal. So I'll generate the SSH key:
```
$ ssh-keygen -t ed25519 -C "your@email.com"
Generating public/private ed25519 key pair.
Enter file in which to save the key (/home/cwprogram/.ssh/id_ed25519): /home/cwprogram/.ssh/id_gitea
Created directory '/home/cwprogram/.ssh'.
Enter passphrase (empty for no passphrase):
Enter same passphrase again:
Your identification has been saved in /home/cwprogram/.ssh/id_gitea
```
You'll want to tailor the path to the key and your email accordingly. Once that's done simply click "Add Key" towards the right in the Gitea interface, enter a key name, and then paste in your public key (the location of the key file with `.pub` appended to it). Then click "Add Key". An entry will need to be added to `~/.ssh/config` so we don't need to add the identity file option every time:
```
Host gitea
User git
IdentityFile ~/.ssh/id_gitea
IdentitiesOnly yes
```
Now I'll do a checkout:
```
$ git clone git@gitea:cwprogram/pypi-test.git
Cloning into 'pypi-test'...
remote: Enumerating objects: 4, done.
remote: Counting objects: 100% (4/4), done.
remote: Compressing objects: 100% (3/3), done.
remote: Total 4 (delta 0), reused 0 (delta 0), pack-reused 0
Receiving objects: 100% (4/4), done.
```
On the repo view you can get your specific git URL by clicking on the SSH tab in this area and copying the value:

## Repo Population
The current repo doesn't have much in it, so I'll ago ahead and use an [example repo](https://github.com/tomchen/example_pypi_package) I've used before:
```
$ git clone https://github.com/tomchen/example_pypi_package.git
$ cd example_pypi_package/
$ git archive main | tar -x -C ../pypi-test/
$ cd ../pypi-test/
```
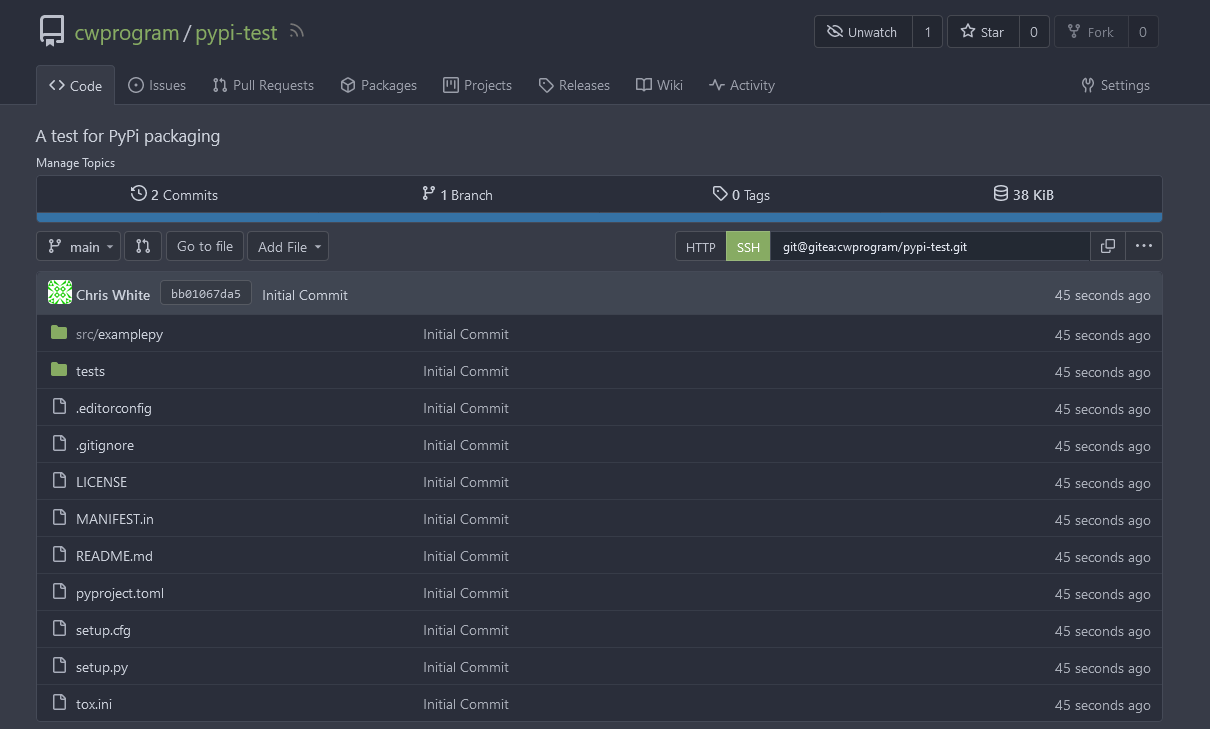
`git archive` essentially gives me all of the files without the `.git` information. I'll go ahead and remove things I don't need and then add the rest of the files:
```
$ rm -rf .github .vscode vscode.env
$ git add .
$ git status
On branch main
Your branch is up to date with 'origin/main'.
Changes to be committed:
(use "git restore --staged <file>..." to unstage)
new file: .editorconfig
modified: .gitignore
new file: LICENSE
new file: MANIFEST.in
modified: README.md
new file: pyproject.toml
new file: setup.cfg
new file: setup.py
new file: src/examplepy/__init__.py
new file: src/examplepy/module1.py
new file: tests/__init__.py
new file: tests/test_module1.py
new file: tox.ini
```
Note that I only do `git add .` for initial setups like this and recommend doing explicit filename listing for other commits. This prevents accidentally committing things you weren't expecting. Now for the commit and push:
```
$ git commit -m "Initial Commit"
$ git push origin main
Enumerating objects: 21, done.
Counting objects: 100% (21/21), done.
Delta compression using up to 32 threads
Compressing objects: 100% (15/15), done.
Writing objects: 100% (18/18), 8.53 KiB | 8.53 MiB/s, done.
Total 18 (delta 1), reused 0 (delta 0), pack-reused 0
remote: . Processing 1 references
remote: Processed 1 references in total
To gitea:cwprogram/pypi-test.git
b07d3cd..bb01067 main -> main
```
Verifying on the gitea web interface we can see the push has made it to the backend:
## Gitea Runner Setup
Before going further I'd like to note that Gitea actions are very much in development. They're meant to be compatible with GitHub actions and related 3rd party actions but it's not a 100% guarantee at the moment. If this is a concern to you you might look into a self hosted Jenkins solution instead.
In order to use the CI/CD with Gitea we'll need to active Gitea Actions and have a runner available to process requests. This will need to be enabled in the gitea config and restart to make the changes active:
```
$ sudo su git -
$ vim /etc/gitea/app.ini
<at bottom of file>
[actions]
ENABLED=true
$ exit
$ sudo systemctl restart gitea.service
```
The next requirement is to have an agent running. Visit http://gitea:3000/admin/runners if you're in the default install or apply named domain. Click "Create New Runner" which will bring a dropdown that looks like this:
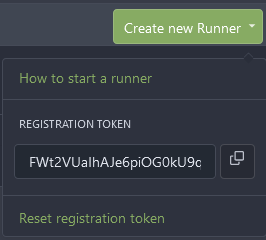
This will provide a registration code for the runner to validate connectivity. You can use the clipboard icon to the right of the code and save it someplace temporary. I'll chose docker containers to handle the agents themselves so they're fairly isolated. The docker install guide has the instructions on [setting up Docker for Ubuntu](https://docs.docker.com/engine/install/ubuntu/#install-using-the-repository) so I won't delve too much into it. One change I will make is to run docker as a TCP service to make networking slightly easier:
```
$ sudo cp /lib/systemd/system/docker.service /etc/systemd/system/
$ sudo sed -i 's/\ -H\ fd:\/\//\ -H\ fd:\/\/\ -H\ tcp:\/\/127.0.0.1:2375/g' /etc/systemd/system/docker.service
$ sudo systemctl daemon-reload
$ sudo systemctl restart docker.service
```
Before starting you'll also want to add your regular user to the docker group or it will throw permission errors:
```
$ sudo usermod -a -G docker cwprogram
```
Replace `cwprogram` with whatever your intended sudo capable user is. Then you'll want to re-login as the user to apply the group changes. Now it's a matter of running the container with the runner client:
```
$ docker run -d --add-host gitea:host-gateway -e GITEA_INSTANCE_URL=http://172.18.139.193:3000 -e GITEA_RUNNER_REGISTRATION_TOKEN=FWt2VUaIhAJe6piOG0kU9qsi5cKIem1n6g0l40aD -v /var/run/docker.sock:/var/run/docker.sock --name gitea_runner gitea/act_runner
```
GITEA_INSTANCE_URL is the same as the URL we had in the web setup. Doing so makes networking operations with the runners a lot easier. `--add-host gitea:host-gateway` is done because `gitea` is the domain for git checkouts that will be done on the runner. This tells it direct to the container host where the SSH server is so the container can properly do an SSH checkout. Note that while `gitea/act_runner:nightly` is suggested by the docs I found `:latest` to be more stable. The Runners listing where you created the registration token should now show the runner in idle:

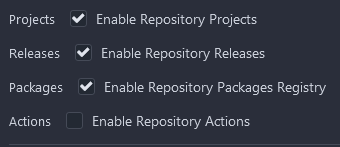
We'll also need to enable actions in the repository. If you go to the settings page of your repository, there will be an option to enable actions for it:
Now to go ahead and put the following file in `.gitea/workflows/deploy.yaml` in the repository root:
```yaml
name: Gitea Actions Demo
run-name: ${{ gitea.actor }} is testing out Gitea Actions 🚀
on: [push]
jobs:
Explore-Gitea-Actions:
runs-on: ubuntu-latest
steps:
- run: echo "🎉 The job was automatically triggered by a ${{ gitea.event_name }} event."
- run: echo "🐧 This job is now running on a ${{ runner.os }} server hosted by Gitea!"
- run: echo "🔎 The name of your branch is ${{ gitea.ref }} and your repository is ${{ gitea.repository }}."
- name: Check out repository code
uses: actions/checkout@v3
- run: echo "💡 The ${{ gitea.repository }} repository has been cloned to the runner."
- run: echo "🖥️ The workflow is now ready to test your code on the runner."
- name: List files in the repository
run: |
ls ${{ gitea.workspace }}
- run: echo "🍏 This job's status is ${{ job.status }}."
```
Then push it to gitea:
```
$ git add .gitea/workflows/deploy.yaml
$ git commit -m "Adding example actions file"
$ git push origin main
```
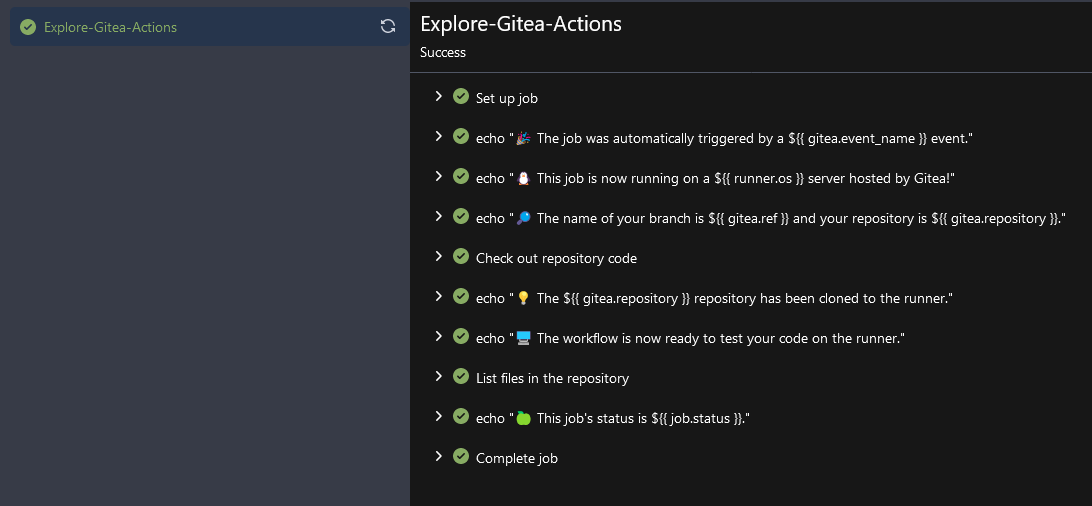
If you look at the Actions tab in the repository view we can see the deployment was successful:
A final note on runners is that if you do a docker stop on a container to free resources you can do a docker start and it will be available as an agent again. If you destroy it though or create a new agent from scratch you'll need to obtain a new registration code for the runner.
## Python Package Deployment
As this package is a sample PyPi package we're going to create a pipeline that deploys it to Gitea's built in [package hosting](https://docs.gitea.com/packages/usage/packages/pypi) feature. First we need authentication to deploy. Now for a standard production deployment you'd want to create a service account to manage CI/CD access. However since this is just a personal instance I'll go ahead and use a personal token on my account for this. Navigate to the "Applications" ( http://gitea:3000/user/settings/applications ) tab of user settings and expand "Select Scopes" under "Manage Access Tokens":
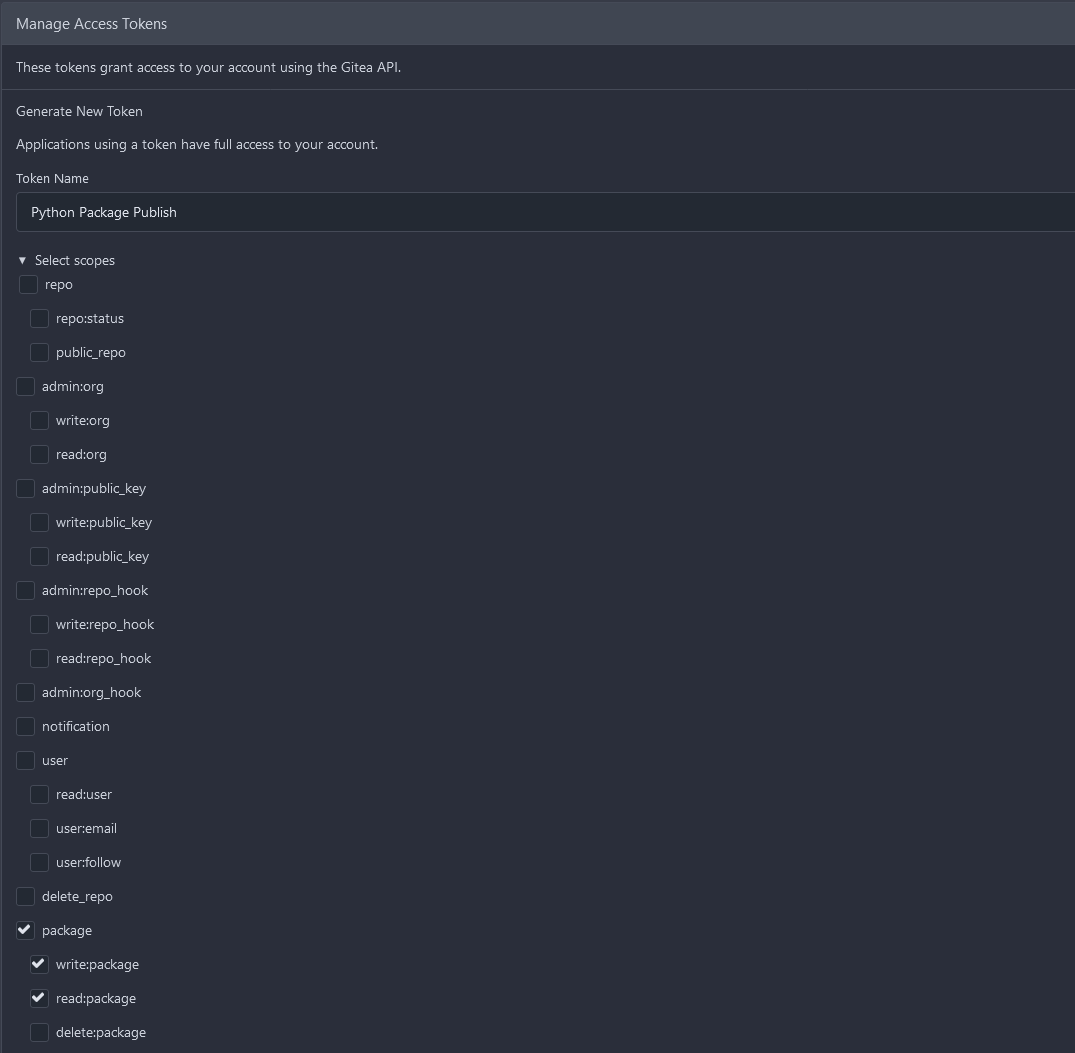
For scopes we only really need package read and package write as publishing is all we plan to do at the moment. Once you select "Generate Token" it will be displayed in a blue banner. Be sure to keep this somewhere secure as once you navigate away you'll have no way to recover the token and will have to create a new one from scratch. Now it's time to set this key up as a secret. To simplify future needs of python package deployment I'll go ahead and do this at the user level. You can also scope this to the repository level or create an organization and scope it to that. So navigate to the secrets page of the user ( http://gitea:3000/user/settings/secrets ). Clicking "Add Secret" will display:

Enter the token name, and then paste in the token that was generated earlier as the value. It's important to note that being a secret means it's decrypted in the process into a plain text form. This is why scoping access is so important. While certainly not easy decrypting is still possible so it's something to take into consideration for security practice. Now that this is done, it's time to modify the `.gitea/workflows/deploy.yaml` file to deploy to Gitea Packages:
```yaml
name: PyPi Gitea Actions Deploy
run-name: PyPi deploy
on: [push]
jobs:
Deploy-PyPi:
runs-on: ubuntu-latest
steps:
- name: Check out repository code
uses: actions/checkout@v3
- name: Apt update
run: apt-get update
- name: Setup Python
run: apt-get install -y python3 python3-pip python3-venv
- name: Build Python Package
run: |
pip3 install twine build
python3 -m build --sdist --wheel .
- name: Publish package to Gitea Packages
env:
TWINE_USERNAME: ${{ gitea.repository_owner }}
TWINE_PASSWORD: ${{ secrets.PYPI_DEPLOY_TOKEN }}
run: python3 -m twine upload --repository-url "${{ env.GITHUB_SERVER_URL }}/api/packages/${{ gitea.repository_owner }}/pypi" dist/*
```
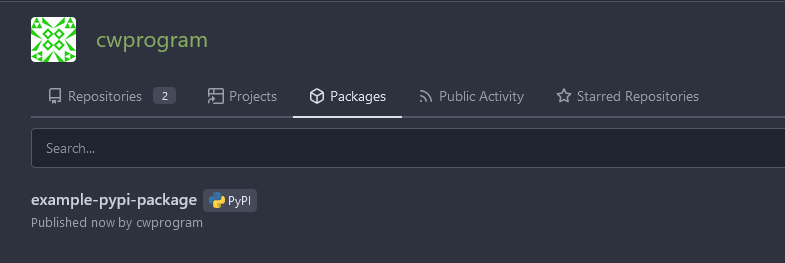
python and pip are installed, along with venv for the build module to work. Then twine (package upload) and build (distribution build) are installed. `build` will generate a binary distribution and a wheel for the package. The environment is setup for username and password so the twine upload command is shorter. The owner of the repository is the user required for uploading to the private repository. Despite the `env.GITHUB_SERVER_URL` naming it points to the `GITEA_INSTANCE_URL` passed in to the runner. It's done in this way to improve compatibility with github actions. Taking a look at the packages page of my user:
Now for installing form the private repo, pip with the `PIP_INDEX_URL` environment variable can be utilized for installs of private packages:
```
name: PyPi Gitea Actions Deploy
run-name: PyPi deploy
on: [push]
jobs:
Deploy-PyPi:
runs-on: ubuntu-latest
steps:
- name: Check out repository code
uses: actions/checkout@v3
- name: Apt update
run: apt-get update
- name: Setup Python
run: apt-get install -y python3 python3-pip
- name: Private PyPi install package
env:
URL_USER: ${{ gitea.repository_owner }}
URL_PASSWORD: ${{ secrets.PYPI_DEPLOY_TOKEN }}
URL_PATH: "api/packages/${{ gitea.repository_owner }}/pypi/simple"
run: |
export URL_BASE=${{ env.GITHUB_SERVER_URL }}
export DOMAIN=${URL_BASE/http\:\/\//}
export DOMAIN_NO_PORT=$(echo $DOMAIN | sed -e 's|:.*$||')
PIP_INDEX_URL="http://$URL_USER:$URL_PASSWORD@$DOMAIN/$URL_PATH" pip3 install --trusted-host $DOMAIN_NO_PORT --no-deps example-pypi-package
```
`env` setups up variables for us to work with in a way that makes commands and their arguments easier to read. `URL_BASE` is simply the `GITEA_INSTANCE_URL` value. Then `DOMAIN` uses removes the http as we'll be doing basic authentication which looks something like:
http://user:password@domain:port/
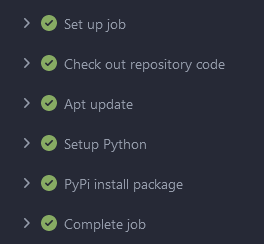
And since we don't have just an IP address given we need to strip out the `http://` to make this work. `DOMAIN_NO_PORT` is due to needed to add the private repo to `--trusted-host` since instance traffic is over http (even if it was https self-signed would still need this). A look at the actions section after commiting and pushing the code shows everything works:
## Conclusion
I will say this was probably one of the most time consuming articles I've worked on. My general consensus is that the git related parts are great for local GitHub like deployment, but using something like a local Jenkins install for CI/CD pipelines would be better. It will also take a fair amount of time for Gitea actions to stabilize out enough to be a transition point for teams working with GitHub actions. The pypi package service is a great addition, though I wish pip installs of custom repositories was easier to work with.

Top comments (0)