Installed Kubuntu 20.04 LTS (KDE version of Ubuntu) on my old laptop.
Had a bit of trouble setting up Korean input so decided to share here.
I will use KDE GUI for the majority of the tasks here.
Table of Contents
- Install Korean
- Install ibus-hangul
- Configure ibus
- Autostart ibus-daemon
- Trying out Korean input
1. Install Korean
- Go to Application Launcher, and search & select "Language"

- Click on "Add languages..." button
- Select Korean (한국어) & click on "Add" button
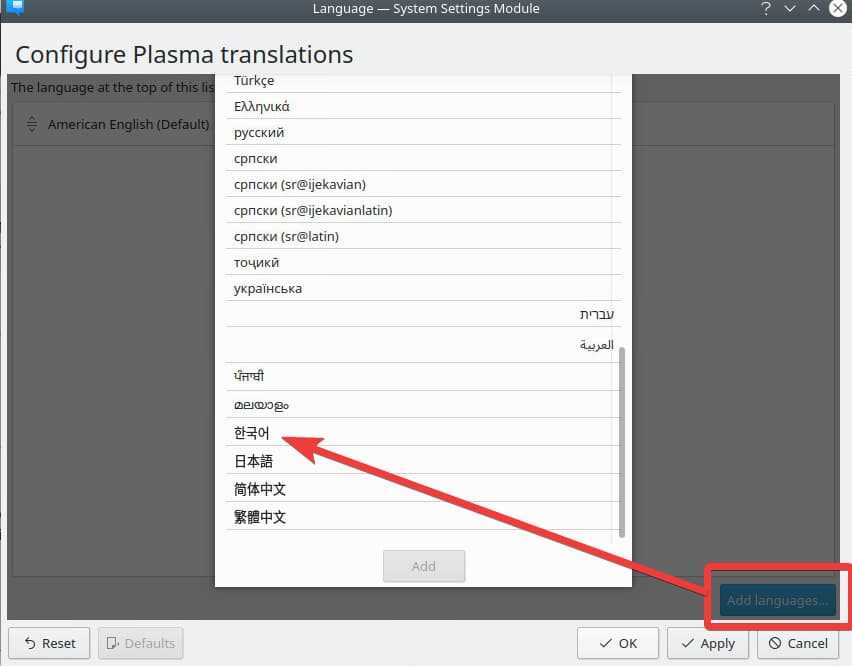
Now Korean is available in your system so let's move on and install ibus-hangul, which supports Korean input.
2. Install ibus-hangul
Quick and easy way is to install ibus-hangul is via apt command,
sudo apt install ibus-hangul
Let's now configure ibus to work with Korean next.
3. Configure ibus
- Go to Application Launcher, and search & select "Ibus Preferences"

- You will see that the default "Next input method" is
<Super>space
-
<Super>is the "Windows" key on your keyboard - So you can press
Windows + spaceto switch between English & Korean
- You will see that the default "Next input method" is
- Go to "Input Method" tab, and click on "Add" button
- Find and select Korean (한국어) and click on "Add" button, and close the preferences dialog

You might get prompted to start ibus-daemon when you opened "Ibus Preferences".
It's a one-off execution, so when you restart your machine, you'd need to start the ibus-daemon manually.
As it's a pain, let's autostart the daemon on log on.
4. Autostart ibus-daemon
- Go to Application Launcher, and search & select "Autostart"

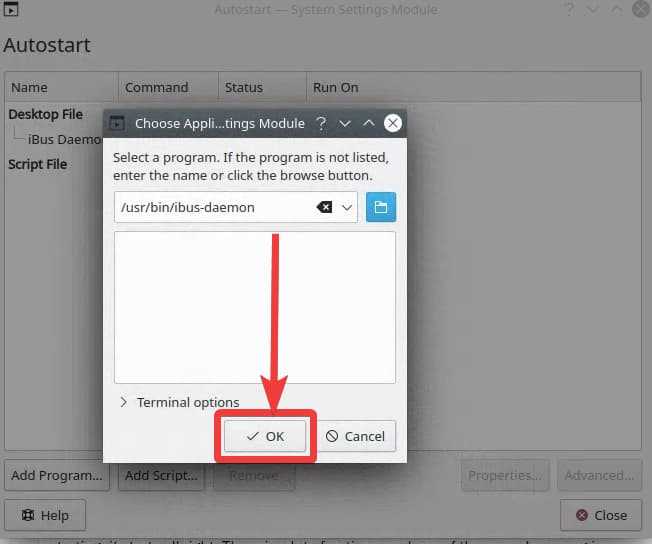
- Click on "Add Program" button and then "Open file dialog" button

- In the "Name" field, add
/usr/bin/ibus-daemon& click "Open" button
- Click "OK" to close "Choose Application" dialog, which then opens "Properties for ibus-daemon-desktop" dialog, automatically
- Go to "Application" tab and add
-din the "Command" to start the daemon in the background.- "Command" field should be
/usr/bin/ibus-daemon -d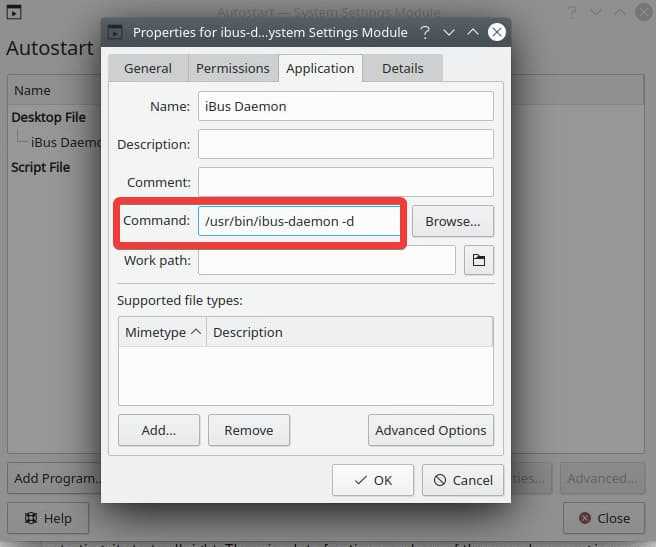
- You will now see the command under "Desktop File"
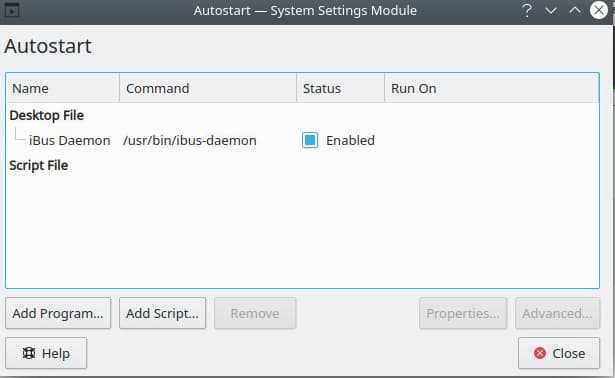
- "Command" field should be
- Save and close with "OK" button
⚠ At this point you need to restart your machine.
5. Trying out Korean input
After you restarting the machine, open up a browser and press <Super>space to change the language to Korean.
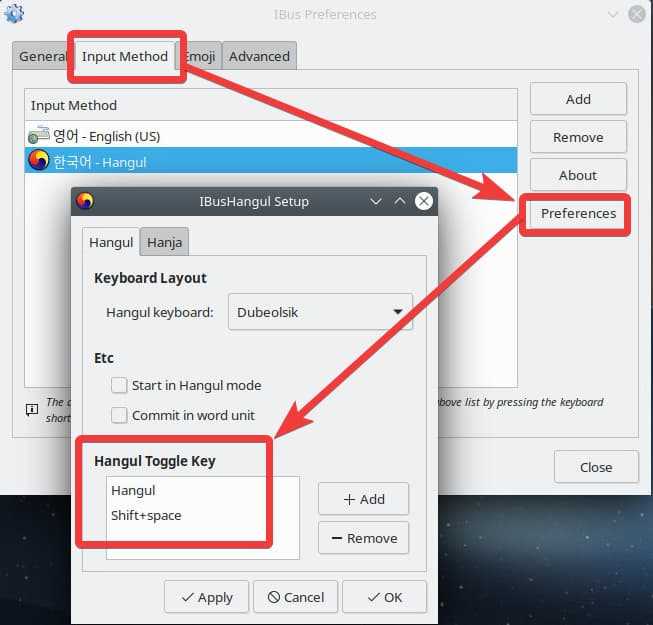
At this point, we haven't set the default language for Korean input to be Korean. You can start using Korean after pressing shift + space.
You can change the default keyboard binding in the preferences screen.
You should now be able to type in Korean (I am using VS Code below)
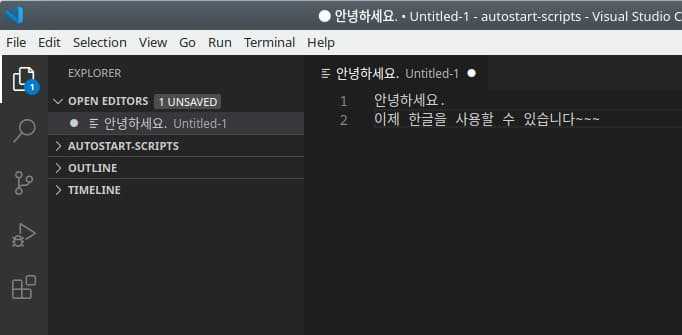
Image by Free-Photos from Pixabay



Top comments (6)
Wow, and I thought the days of painful IME installs were behind us. Thanks for sharing this, I think it's important for people to see the kind of hurdles large swathes of the world have to jump through.
It was pretty tough spending few days as I forgot to blog last time 😅
I believe Ubuntu (not Kubuntu) makes it easy but I prefer KDE so decided to go with the long route 🙂
I find ibus not very flexible for Korean input and prefer nimf. Easier to install too :)
github.com/hamonikr/nimf
curl -sL https://pkg.hamonikr.org/add-hamonikr.apt | sudo -E bash -sudo apt install nimf nimf-libhangul
im-config -n nimf
Oh how I wish this tutorial existed back in the day when I had to take extreme measures to make this work
It was pretty tough still... This was the 3rd time doing this but as I didn't leave a lot, I just wasted half a day trynna get it working again.
Hopefully this helps you and others (as well as me next time 😉).
If you are looking for reliable platforms for online casino games in Korea, Melbet koreamelbet.com/ provides a range of options including slots, table games, and live casino features. The site supports smooth navigation on both desktop and mobile devices, with secure payment methods and a user-friendly interface that makes it easy for players to access games and manage their accounts efficiently.