
If you have read another one of my posts, then you should be familiar with SSH and how you can use it with Amazon Lightsail. You should know how to use SSH to connect to your Lightsail WordPress instance and how to connect to phpMyAdmin to manage your instance’s database.
There is a problem though. That post only shows you how to connect to the MySQL database that comes with your Lightsail WordPress instance. Your instance could be using a remote database. Another one of my posts describes how to create a WordPress instance with Amazon Lightsail. That post references a link that shows how to connect your Lightsail WordPress instance to a remote highly available MySQL database.
So, if you have an Amazon Lightsail WordPress instance that is connected to a highly available MySQL database and you would like to use phpMyAdmin to manage that database, then you are in the right spot. This post is going to show you how to do just that.
Configure config.inc.php
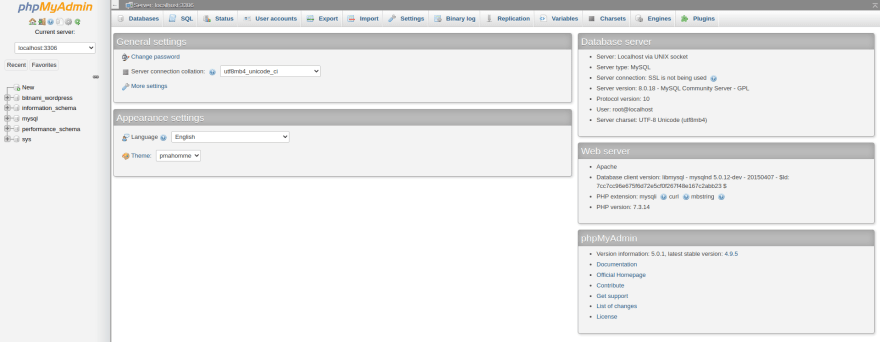
First, make sure that you are able to connect to phpMyAdmin, following the directions given in this post.
Next, use SSH to connect to the terminal of your Lightsail WordPress instance.
Now find the configuration file for phpMyAdmin. The name of the file is ‘ config.inc.php ‘.
Here is the file path for it:
/opt/bitnami/apps/phpmyadmin/htdocs/config.inc.php
I am going to show you how to configure that file to allow phpMyAdmin to access your remote highly available MySQL database. Before we change anything in the file though, be sure to create a backup. That way if you accidentally make a change that causes the file to stop working, then we can always fall back to the file that works.
Use this command to create a copy:
$ sudo cp /opt/bitnami/apps/phpmyadmin/htdocs/config.inc.php /opt/bitnami/apps/phpmyadmin/htdocs/config.inc.php.org
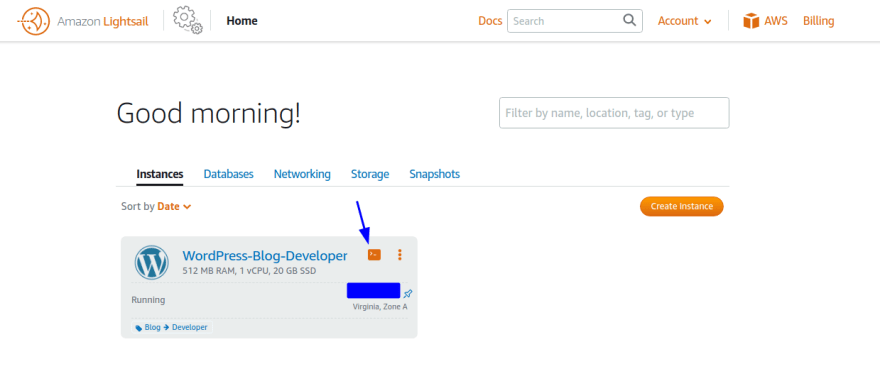
You are almost ready to configure config.inc.php, but first you have to get some information about your highly available MySQL database. Click on the databases tab on your Amazon Lightsail home page. Then select the MySQL database that is connected to WordPress instance.

First, you are going to need the endpoint. You will also need the password and the username in a few steps. You will need all of the text that is given as the endpoint. That means from where it starts to where it ends with ‘amazonaws.com’. I left some of my endpoint outside of the blue box, so that you could see that it is similar to your endpoint.
Ok, so open config.inc.php now. Be sure to be in this directory:
/opt/bitnami/apps/phpmyadmin/htdocs
Use a command like this to open the file:
$ sudo nano config.inc.php
You need to be all the way at the bottom of this file before adding your configurations. This makes sure that your code doesn’t get overwritten by any other lines of code that are in the file. Here is a shortcut you can use to get to the bottom of the file quickly.
Enter these changes into the config.inc.php file:

Be sure to put the endpoint for your database where the blue box is. Once again, be sure that it is the full endpoint. Also be sure to enclose it within single quotes, just like all of the other fields.
The field for $cfg[‘Servers’][$i][‘verbose’] can be filled in with whatever name you want to use to identify your database. I used ‘Remote MySQL DevBlog’ to describe mine.
Save your changes. And let’s see how it affects the phpMyAdmin login screen.
phpMyAdmin Login
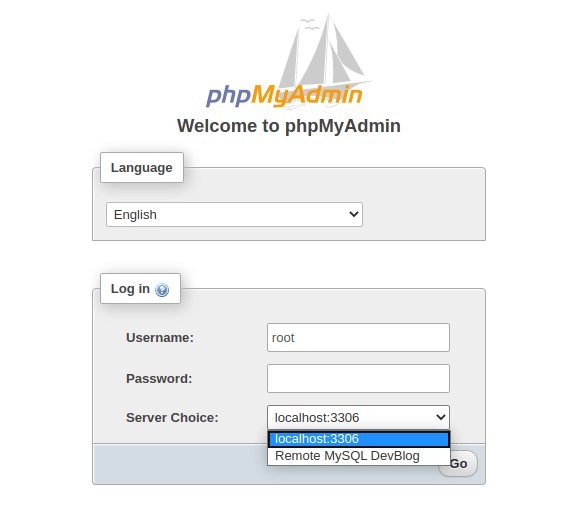
Now, when I go to to the phpMyAdmin login page there is a new meta field. There is a ‘Server Choice’ option. I am now able to choose between two different servers. If I were to choose the ‘localhost:3306’ option, I would use ‘root’ as the username and the password of my WordPress instance to log in. That is how we have been logging into phpMyAdmin up until this point.
That isn’t helping us much though, because that is not where the data is being stored. It is being stored in the remote highly available database that is connected to the WordPress instance.
Remember the page that had all of the info for the database? Now, use the username of ‘dbmasteruser’ and your password to log in while having the second ‘Server Choice’ selected.

All right! Hopefully you were able to successfully connect to your remote highly available MySQL database.
Be sure to learn some MySQL and read up on phpMyAdmin, so that you can have some fun! Here is the link to the MySQL documentation and here is a link to the phpMyAdmin documentation.
Big Thanks!
I had some help figuring this stuff out. Big thanks to BeumSeok from the AWS Support Center for all of the help!

Top comments (0)