
This tutorial demonstrates how to restrict access to an S3 bucket so that your html, css, and images, are only accessible through CloudFront.
This post is part of a wider series documenting my journey in migrating a traditional LAMP website over to a Single Page Application running on the Amazon Web Services platform. Here, I will focus on the static content and setting up CloudFront as my CDN.
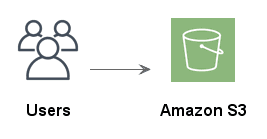
Using Amazon Simple Storage Service (Amazon S3) is a cheap and effective way to host static websites and other web content.
You can do so directly from the S3 console by enabling the Static website hosting feature and you’ll get a website of the form http://my-bucket-name.s3-website-eu-west-1.amazonaws.com. You can also create an A-record in Route 53 to use your own custom domain.
Some solutions may stop here. For some, this is good enough. (but this is not the purpose of our article; it would be incredibly short if it was).
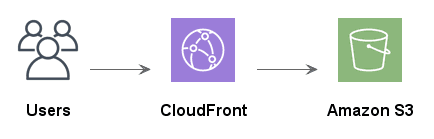
More likely the solution will evolve toward serving content from edge cache locations using CloudFront — Amazon’s low-latency Content Delivery Network (CDN). Using a CDN both speeds up the distribution of content to visitors and will also reduce the overall cost for a busy site.
Even with the CDN our visitors can still access the S3 static website directly, and the Solution Architect will now be asked “how do we restrict access to the S3 bucket so that our html, css, and images, are only accessible through CloudFront?” (this question is the purpose of this tutorial).
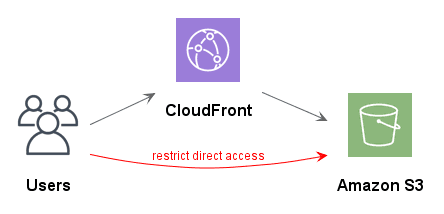
The answer is to use Origin Access Identity (OAI).
We can restrict public access to objects in the S3 bucket — as of today, this is the default setting when creating a new bucket — and we grant permission to the OAI to distribute the content through CloudFront to our visitors from around the world. We no longer need to configure S3 to host a static website.
The steps we follow to achieve this solution are;
- Create the S3 bucket with default settings and upload an index.html file (index.html will not be accessible directly from S3).
- Create a CloudFront distribution with the S3 bucket as its origin (index.html still cannot be accessed).
- Set up the OAI, and configure a policy that permits CloudFront to serve the index.html file (now it all works).
Steps 2 and 3 would normally be applied at the same time, but I’ll demonstrate separately to show the individual steps and how the OAI is the bit of magic sugar in the solution.
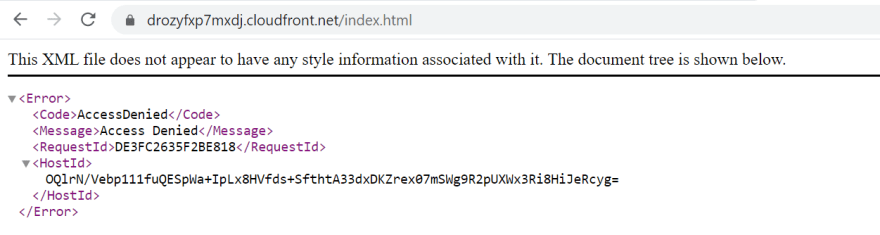
Step 1. Create the bucket in S3 that will hold the static content and use all the default settings. The bucket and its objects are not accessible to the public.

When we attempt to reach the index.html file in a browser, we get an Access Denied error as expected.

Step 2. In CloudFront, create a Web distribution and select the S3 bucket as the origin. At this stage, leave everything else as the default settings, scroll to the bottom and create the distribution. You’ll have to wait until it’s deployed and as this can take 10 minutes, go grab a coffee...

Once its status has changed to “Deployed”, it’s ready. At this stage, the index.html page is not accessible on the CloudFront domain.
Step 3. Create the Origin Access Identity and configure the policy in S3 that grants the OAI permission to access objects.
Since we’re doing this in two stages, we have to edit our existing Origin to access the OAI option; however, usually you would do this at the same time as creating your Web distribution and it’s on the initial list of options.

On the next page, select Restrict Bucket Access, allow Amazon to Create a New Identity, and choose Yes, Update Bucket Policy.

Wait for the status to change to “Deployed” again, and then refresh the page and the index.html page will now be displayed.

All set. Success.
✔️ CloudFront edge locations are serving our static content in S3.
✔️ And no one can hit the content in S3 directly.
Check the direct S3 endpoint again just to be sure that remains blocked, and view the Bucket Policy in S3 that was added automatically to learn more.
What we didn’t cover today. Most solutions are also likely to require;
- a custom domain that is configured in Route 53 and CloudFront;
- an SSL certificate from Amazon Certificate Manager so that content can be served over https;
- and have cache expiry limits set on the objects.

In addition, if you have built a Single Page Application (SPA), like Angular or ReactJS, then you may need to configure CORS.
Finally, we didn’t cover off creating signed URLs, which is useful if you are distributing paid-for content and want to limit access to your edge location caches.
These will be subject of further posts in this series.

Oldest comments (0)