
A few years ago, I visited my grandma who at the time lived by herself in Vajxo, Sweden. Her vision was slowly deteriorating and she would always ask us to tell her what time it was. There are a lot of talking clocks out there, but they are all mostly in English. Seven days before my trip to Sweden, I decided to create an Arduino clock that would produce audio notifications for each hour. For this, I recorded my mother’s voice (This was the hardest part! 😛) for each hour and minute along with a greeting message in Bosnian that would play every morning at 8am. Needless to say, grandma was thrilled and happy that she no longer had to rely on her family and visitors to tell her what time it was. This gave her some much-needed independence.
The clock produces audio notifications for every hour, or on demand using the remote control.
Down below is the tutorial - hope you find it useful.
I bought all the parts from a local shop. You’ll need the following:
- Arduino UNO
- DS3231 real time clock module
- Wtv020sd16p sound module
- IR Reciver module
- Speakers
- Button
- SD Card 2GB

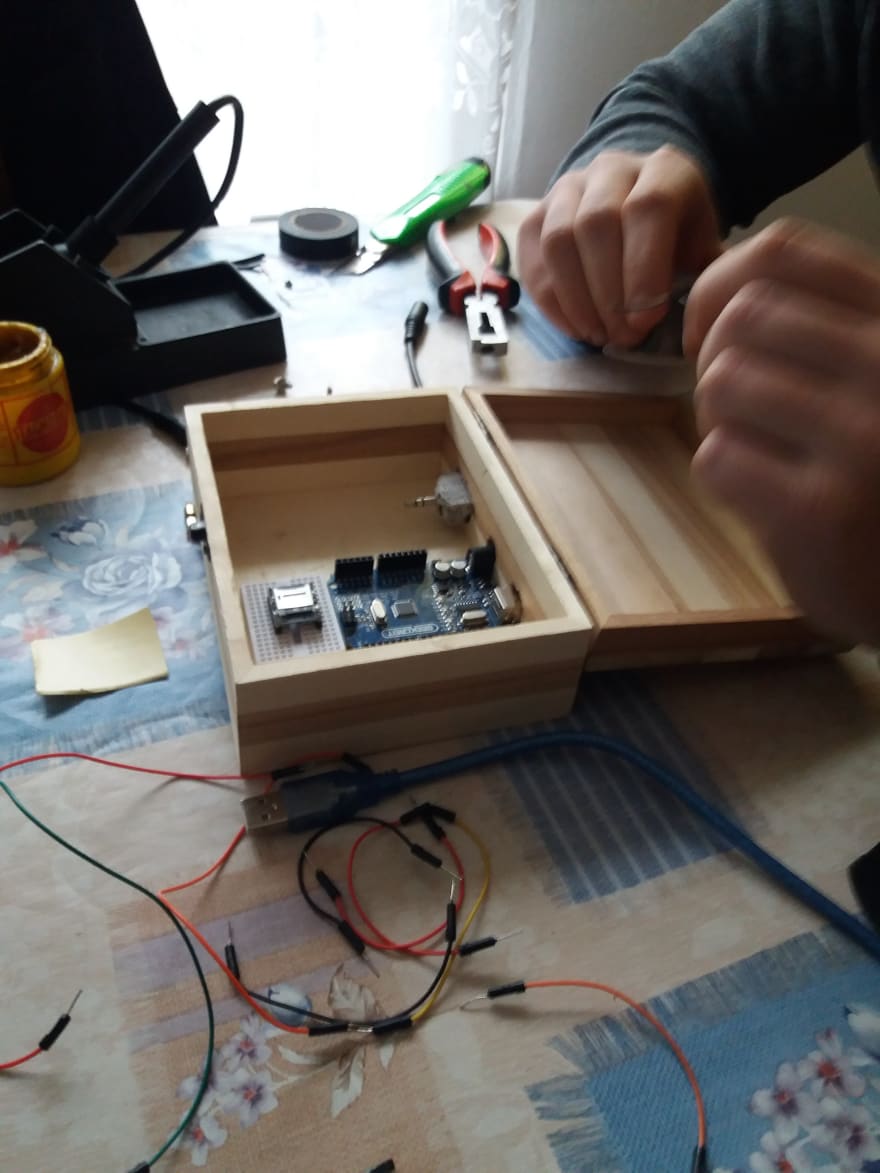
The first step is to make a prototype, we don't want to test it after we solder everything.

After we finished prototyping and testing everything we are ready to put it all together.
I called my good friend (Armin Mušić) to help me with soldering. He is really good with it - I can't risk to leave joints loose.
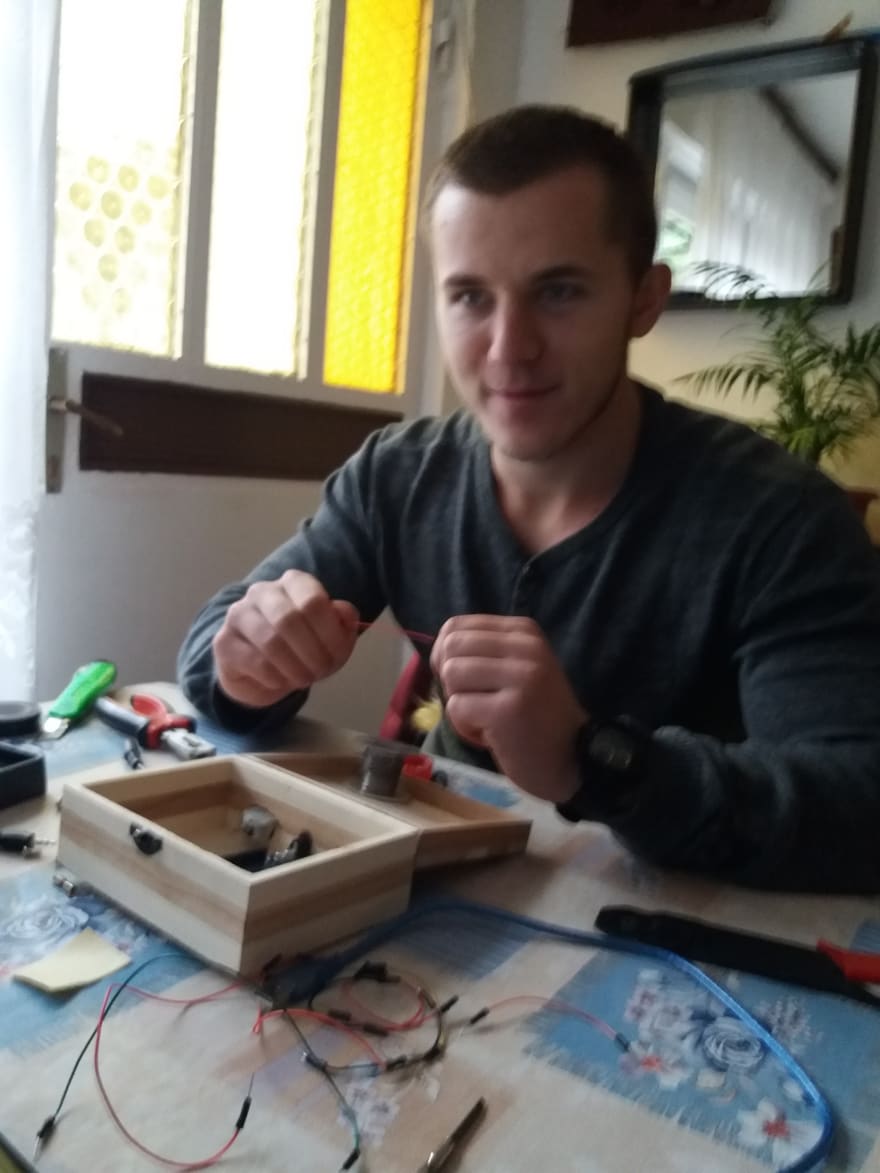
Now, we make our box look a bit fancier.


Next we will record audio for our clock
This part was very annoying for my mom - I made her repeat all those numbers 🤣
I used an android app to record and edit the audio.

Record audio for hours and minutes and name the files in this format '0000.wav' '0001.wav'. This will be important later when we use the sound module to play the audio files.

Adding audio files to sd card
Before continuing, remember to format the SD card.

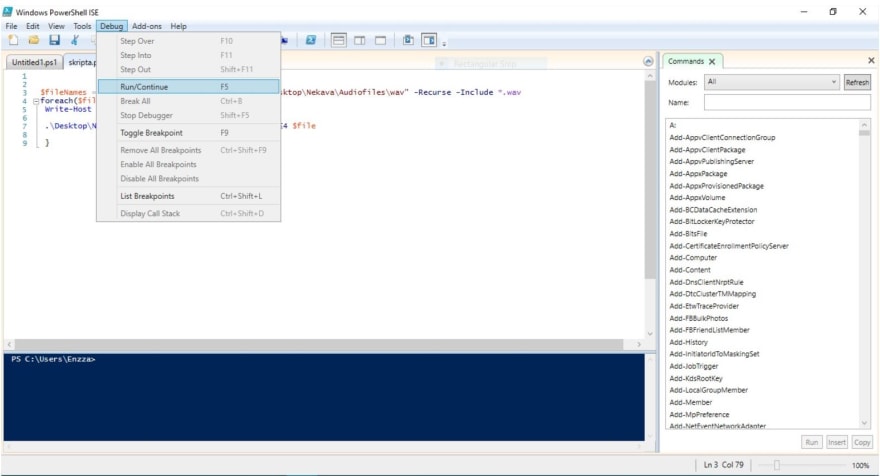
We will now add all the files to the SD card. Our sound module accepts ad4 file format so we need to convert our files to that format using AD4CONVERTER.
To make it easier, I made powershell script that will automatically convert all the files in the folder to AD4 format.
$fileNames = Get-ChildItem -Path "your_audio_files location" -Recurse -Include *.wav
foreach($file in $fileNames ){
 Write-Host  $file.FullName
 .\your_ad4_location\AD4CONVERTER.EXE -E4 $file

}
Run this script inside your folder with audio files - make sure to put AD4CONVERTER.exe in same folder.

Add AD4 files to the SD card.
Time for coding 😍
Add all the libs in rar format to our ArduinoIDE then include those libs.
#include <EEPROM.h>
#include <RTClib.h>
#include <Wtv020sd16p.h>
#include "IRremote.h"
Now we define all the PINs we will use in our code.
// RTC setup
RTC_DS3231 rtc;

// Wtv020sd16p Pins
#define RESET_PIN 2  // The pin number of the reset pin.
#define CLOCK_PIN 3  // The pin number of the clock pin.
#define DATA_PIN 4  // The pin number of the data pin.
#define BUSY_PIN 5  // The pin number of the busy pin.

// IR Pin
#define RECEIVER_PIN 11 // Signal Pin of IR receiver to Arduino Digital Pin 11

// DST Pin
#define DST_PIN 9

// DST check
int DST;

/*-----( Declare objects )-----*/
IRrecv irrecv(RECEIVER_PIN);     // create instance of 'irrecv'
decode_results results;      // create instance of 'decode_results'

/*
  Create an instance of the Wtv020sd16p class.
  1st parameter: Reset pin number.
  2nd parameter: Clock pin number.
  3rd parameter: Data pin number.
  4th parameter: Busy pin number.
*/
Wtv020sd16p wtv020sd16p(RESET_PIN, CLOCK_PIN, DATA_PIN, BUSY_PIN);
DST is the variable in which we will keep state of button.
The role of this button is to track daylight savings time. When pressed it will change the time by one hour.
Next, we will explain the setup function which will run when we power on Arduino.
void setup() {
  // put your setup code here, to run once:
  Serial.begin(9600);

  irrecv.enableIRIn(); // Start the receiver

  // this code will get state of DST variable from EEPROM memory
  // if there is nothing ine memory we will put 1 aka summertime
  DST = EEPROM.get(0, DST);

  if (DST != 0 && DST != 1)
  {
    DST = 1;
    EEPROM.put(0, DST);
  }

  // RTC clock
  // we will loop until RTC module start
  if (! rtc.begin()) {
    Serial.println("Couldn't find RTC");
    while (1);
  }

  // this condition will check if our RTC module lost power
  if (rtc.lostPower()) {
    Serial.println("RTC lost power, lets set the time!");

    // Following line sets the RTC to the date & time this sketch was compiled
    rtc.adjust(DateTime(F(__DATE__), F(__TIME__)));
  }
  // Comment out below lines once you set the date & time.
  // Following line sets the RTC with an explicit date & time
  // for example to set January 27 2017 at 12:56 you would call:
  // rtc.adjust(DateTime(2017, 1, 27, 12, 56, 0));

  // Initializes the sound module.
  wtv020sd16p.reset();

  // Setting up our DST button
  pinMode(DST_PIN, INPUT_PULLUP);
}
In this function we’ll setup initial values for our modules. We’ll try to get DST button state from EEPROM memory. If there is nothing in the memory, we will put 1 as default (summer time).
DST = EEPROM.get(0, DST);

  if (DST != 0 && DST != 1)
  {
    DST = 1;
    EEPROM.put(0, DST);
  }
After we finished up initial setup, Arduino will run loop function that is running in some interval.
void loop() {
  // Check if DST button is pressed

  if (digitalRead(DST_PIN) == LOW) {
    DateTime now = rtc.now();
    if (DST == 0) {
      rtc.adjust(DateTime(now.year(), now.month(), now.day(), now.hour() + 1, now.minute(), now.second()));
      DST = 1;
      EEPROM.put(0, DST);
    } else if (DST == 1) {
      rtc.adjust(DateTime(now.year(), now.month(), now.day(), now.hour() - 1, now.minute(), now.second()));
      DST = 0;
      EEPROM.put(0, DST);
    }
  }

  // Initialize time object
  DateTime  myTime = rtc.now();

  // Run hourly clock notifications
  hourly(myTime);

  // Run clock notification when remote controller button is pressed
  if (irrecv.decode(&results)) // have we received an IR signal?
  {
    if (IRvalues()) {
      switchTime(myTime, false);
      delay(1000);
    }

    irrecv.resume(); // receive the next value

  }

}
In the loop function we’re checking if the DST button has been pressed. Then, we check if the DST state is 0 or 1 and we adjust the time accordingly. We add one hour if the DST state is 1.
/*loop function*/
// Check if DST button is pressed

  if (digitalRead(DST_PIN) == LOW) {
    DateTime now = rtc.now();
    if (DST == 0) {
      rtc.adjust(DateTime(now.year(), now.month(), now.day(), now.hour() + 1, now.minute(), now.second()));
      DST = 1;
      EEPROM.put(0, DST);
    } else if (DST == 1) {
      rtc.adjust(DateTime(now.year(), now.month(), now.day(), now.hour() - 1, now.minute(), now.second()));
      DST = 0;
      EEPROM.put(0, DST);
    }
  }
In every loop we will get current time using
DateTime myTime = rtc.now();
Next we call function named hourly which accepts current time
/*loop function*/
// Run hourly clock notifications
hourly(myTime);
This function will play audio for every hour
/*hourly function*/
void hourly(DateTime &myTime) {
  // 7 o'clock
  if (myTime.hour() == 7 && myTime.minute() == 00 && myTime.second() == 00) {
    wtv020sd16p.playVoice(86); delay(16000);
    delay(500);
    switchTime(myTime, true);
    delay(1000);
  }
  // 8 o'clock
  else if (myTime.hour() == 8 && myTime.minute() == 00 && myTime.second() == 00) {
    wtv020sd16p.playVoice(86); delay(16000); // the birds begin to sing
    switchTime(myTime, true); delay(1000); // tells what time it is
    wtv020sd16p.playVoice(84); delay(6500); // message from grandma's daughter
    wtv020sd16p.playVoice(85); delay(5500); // message from granddaughter

    delay(1000);
  }
  //.....
}
In this function we will use multiple if else statements, to play audio we use this function
wtv020sd16p.playVoice(86); delay(16000);
Notice to play the sound we use numbers and these numbers correspond to the audio files on the SD card. Number 86 is 0086.ad4 file on the SD card. In my case ad4 file with number 86 will play the sound of birds singing. This audio will play before every audio for each hour. In this function, we also called function switchTime - this function will accept current time and boolean value. If boolean value is true we will only play the exact hour time without minutes. If this value is false we will play the exact time in hours and minutes.
When this function is called from within hourly function we will send true.
/*switchTime function*/
void switchTime(DateTime &myTime, bool hourly) {
  int Hour = myTime.hour();
  int Minute = myTime.minute();

  switch (Hour) {
    case 0: wtv020sd16p.playVoice(0); delay(4500);    break;
    case 1: wtv020sd16p.playVoice(1); delay(3800);    break;
    case 2: wtv020sd16p.playVoice(2); delay(3800);    break;
    case 3: wtv020sd16p.playVoice(3); delay(3000);    break;
    case 4: wtv020sd16p.playVoice(4); delay(3000);    break;
    //......
    default:
      Serial.println("Erorr check files");

  }

  // Play minutes audio
  if (hourly != true) {
    switch (Minute) {
      case 0: wtv020sd16p.playVoice(24); delay(1000);    break;
      case 1: wtv020sd16p.playVoice(25); delay(1000);    break;
      case 2: wtv020sd16p.playVoice(26); delay(1000);    break;
      case 3: wtv020sd16p.playVoice(27); delay(1000);    break;
      case 4: wtv020sd16p.playVoice(28); delay(1000);    break;
      //....

      default:
        Serial.println("Erorr check files");
    }

  }

  delay(5000);

}
Back to the loop function, now we will react if we recive IR signal from the remote and if we get a signal from the remote, we’ll play current time with hours and minutes using the same function switchTime; now we will send false as the second parameter.
  /*loop function*/
  // Run clock notification when remote controller button is pressed
  if (irrecv.decode(&results)) // have we received an IR signal?
  {
    if (IRvalues()) {
      switchTime(myTime, false);
      delay(1000);
    }

    irrecv.resume(); // receive the next value

  }
In this, if block we’ll check if we receive a signal and to ignore other remote controlers e.g. TV remote controller we’ll check if the signal is in the allowed IRvalues
bool IRvalues() {
  // Accept signals only from custom remote
  switch (results.value) {
    case 0xFFA25D: return true; break;
    case 0xFFE21D: return true; break;
    case 0xFF629D: return true; break;
    case 0xFF22DD: return true; break;
    case 0xFF02FD: return true; break;
    case 0xFFC23D: return true; break;
    case 0xFFE01F: return true; break;
    case 0xFFA857: return true; break;
    case 0xFF906F: return true; break;
    case 0xFF9867: return true; break;
    case 0xFFB04F: return true; break;
    case 0xFF6897: return true; break;
    case 0xFF30CF: return true; break;
    case 0xFF18E7: return true; break;
    case 0xFF7A85: return true; break;
    case 0xFF10EF: return true; break;
    case 0xFF38C7: return true; break;
    case 0xFF5AA5: return true; break;
    case 0xFF42BD: return true; break;
    case 0xFF4AB5: return true; break;
    case 0xFF52AD: return true; break;
    case 0xFFFFFFFF: return true; break;

    default:
      return false;

  } // End Case

}
I hope you’ll find this useful and make your visually impaired friends & family happy. The Arduino clock definitely helped my grandma.

Top comments (0)